Cargo-Planner Docs
애플리케이션에 포함하기
우리의 웹 애플리케이션은 대부분의 사용 사례를 다룰 수 있지만, 때로는 기존 WMS 또는 ERP 시스템에 로드 계획 기능을 추가하거나 자체 구축한 웹 포털에 추가하는 것이 관심사가 될 수 있습니다. 우리의 Rest API와 JavaScript SDK를 사용하여 대부분의 기능을 활용할 수 있습니다.
애플리케이션에 Cargo-Planner를 추가하는 세 가지 방법
애플리케이션에 화물 계획 기능을 추가하는 세 가지 방법이 있습니다. 어느 것이 가장 적합한지는 복잡성과 기능 및 맞춤화 간의 절충입니다.
1. iframe에 포함하기 - 거의 코드 없음
우리의 로드 계획 도구를 통합하는 가장 쉬운 방법은 iframe html 요소에 보기를 포함하는 것입니다.
이 접근 방식의 가장 큰 단점은 인증되지 않은 방식으로 수행된다는 점입니다. 이는 로드 목록 객체를 사전에 생성하고 공용 공유를 위해 읽기 및 쓰기 액세스를 활성화해야 함을 의미합니다. 이를 위해 새 로드 계획을 생성해야 하며(데이터를 입력할 필요는 없습니다) 공유를 활성화해야 합니다.
이 작업이 완료되면 공유 링크를 복사하여 다음과 같이 iframe에 포함합니다:
<iframe
  src="https://app.cargo-planner.com/loadlist/10405cacde654075kjf53bd1f78520/workspace/0?length_dim=IN&weight_dim=LB&primary=1e3a8a"></iframe>
주의: 기본 쿼리 매개변수에 16진수 색상을 추가할 수 있습니다. 테마 색상을 제공하면 환경에 더 잘 어울립니다.
또한 쿼리 매개변수 hide_navigation을 true로 설정하여 탐색 막대를 숨길 수 있습니다. 예를 들어 로드 계획 보기만 표시하려는 경우 유용할 수 있습니다.
2. API를 사용하여 데이터 업로드 - 결과를 iframe에 표시
위의 솔루션은 사이트에 로드 계획 기능을 빠르게 연결할 수 있지만, 주요 단점은 각 목록을 수동으로 생성해야 한다는 것입니다. 여러 사용자가 애플리케이션을 사용하는 경우 동일한 로드 목록이 동시에 업데이트될 수 있어 이상한 동작이 발생할 수 있습니다.
또 다른 단점은 화물 데이터를 수동으로 추가해야 한다는 점입니다(물론 다양한 가져오기 기능을 사용할 수 있습니다). 애플리케이션에는 이미 이 정보가 있을 가능성이 높으므로 이 정보를 자동으로 업로드할 수 있다면 좋을 것입니다.
해결책은 우리의 API를 사용하는 것입니다.
애플리케이션에 다음과 같은 엔드포인트가 있다고 가정해 봅시다:
# /calculate 엔드포인트는 https://example.com에 위치한 서버에 있습니다

import requests
import json

CARGO_PLANNER_TOKEN = 'Token your-token'

def calculate(request):

    # 이 데이터는 아마도 귀하의 프론트 웹사이트나 내부 데이터 소스에서 올 것입니다
    data = {
        "loadlist": {
            "name": "Purchase-order 1234",
            "public_access": "RW"
        },
        "calculation": {
            "length_dim": "CM",
            "weight_dim": "KG"
            "container_types": [
                {
                    "id": 1,
                    "payload": 20000
                }
            ],
            "items": [
                {
                    "label": "product 1",
                    "l": 30,
                    "w": 80,
                    "h": 90,
                    "wt": 70,
                    "qty": 2
                },
                {
                    "label": "product 2",
                    "l": 50,
                    "w": 40,
                    "h": 50,
                    "wt": 40,
                    "qty": 3
                }
            ],
        }
    }

    # 우리의 API 호출
    response = requests.post(
        url="https://api.cargo-planner.com/api/2/create_and_calculate/",
        data=json.dumps(data),
        headers={
            'Content-type': 'application/json',
            'Authorization': CARGO_PLANNER_TOKEN
        })
    if response.status_code == 200:
        # iframe을 위한 페이지 링크 반환
        return "https://app.cargo-planner.com/loadlist/{}/".format(response.data["id"])
    #...
3. API를 사용하여 데이터 업로드 - SDK를 사용하여 결과 표시
외관과 느낌을 완전히 맞춤화하고 iframe을 사용할 필요가 없도록 하려면 우리의 Javascript SDK를 사용할 수 있습니다.
이 방법으로 각 컨테이너의 3D 레이아웃을 표시하고 가장 중요한 메트릭을 제시할 수 있습니다.
아래는 Python의 간단한 서버 측 코드 스니펫과 프론트 애플리케이션을 위한 Javascript 스니펫입니다:
# /calculate 엔드포인트는 https://example.com에 위치한 서버에 있습니다

import requests
import json

CARGO_PLANNER_TOKEN = 'Token your-token'

def calculate(request):
    response = requests.post(
        url="https://api.cargo-planner.com/api/2/calculate/",
        data=json.dumps(request.data),
        headers={
            'Content-type': 'application/json',
            'Authorization': CARGO_PLANNER_TOKEN
        })
    if response.status_code == 200:
        return response.json()
#...<meta charset="utf-8">
<title>My customer portal</title>
<script src="https://usermedia.cargoplanner.net/sdk/cargoPlannerSDK.umd.min.js"></script>
<body>
<h1>Load plan</h1>
</body>
<script>
calculate();
async function calculate() {
// 3D 엔진 초기화
await cargoPlannerSDK.SceneManager.init();
// API 문서에서 더 많은 옵션을 참조하세요
let calculationData = {
length_dim: "M",
weight_dim: "KG",
// 아마도 화물 치수는 대화형 양식에서 입력될 수 있습니다?
"items": [
{
"label": "Cargo 1",
"l": 1.2,
"w": 0.8,
"h": 0.5,
"wt": 300,
"qty": 20,
"layers": 2,
"color":"#48c9b0"
},
{
"label": "Cargo 2",
"l": 1.2,
"w": 1.0,
"h": 0.9,
"wt": 300,
"qty": 20,
"layers": 2,
"color":"#ec7063"
},
],
"container_types": [
{
"name": "40ft DV",
"L": 12,
"W": 2.33,
"H": 2.38,
"payload": 22000,
"door": {
H: 2.33,
W: 2.28
}
}
]
}
fetch('/calculate/', {
method: 'POST',
headers: {
'Content-Type': 'application/json',
},
body: JSON.stringify(calculationData),
})
.then(response => response.json())
.then(data => {
// 솔루션을 받은 경우
if(data.solutions) {
// 현재 각 계산은 하나의 솔루션을 제공합니다 (미래에는 더 많은 솔루션을 제공할 수 있습니다)
data.solutions.forEach((solution) => {
// 각 컨테이너를 순회합니다
solution.containers.forEach((container, index) => {
// 캔버스 렌더링
cargoPlannerSDK.SceneManager.createScene(
[container], // 컨테이너 데이터, 여러 컨테이너를 장면에 보내고 위치를 지정할 수 있습니다
null, // 대화형 모드 (여러 컨테이너를 표시할 때 null로 설정)
400, // 픽셀 단위의 너비
200 // 픽셀 단위의 높이
).then((canvas) => {
const containerDiv = document.createElement("div");
const label = document.createTextNode(`Container ${index+1}: ${container.name} Max used space: ${container.items_bb.max.x}, Weight used: ${container.WT} `)
containerDiv.appendChild(label);
containerDiv.appendChild(canvas);
document.body.appendChild(containerDiv);
});
});
});
}
});
}
</script>
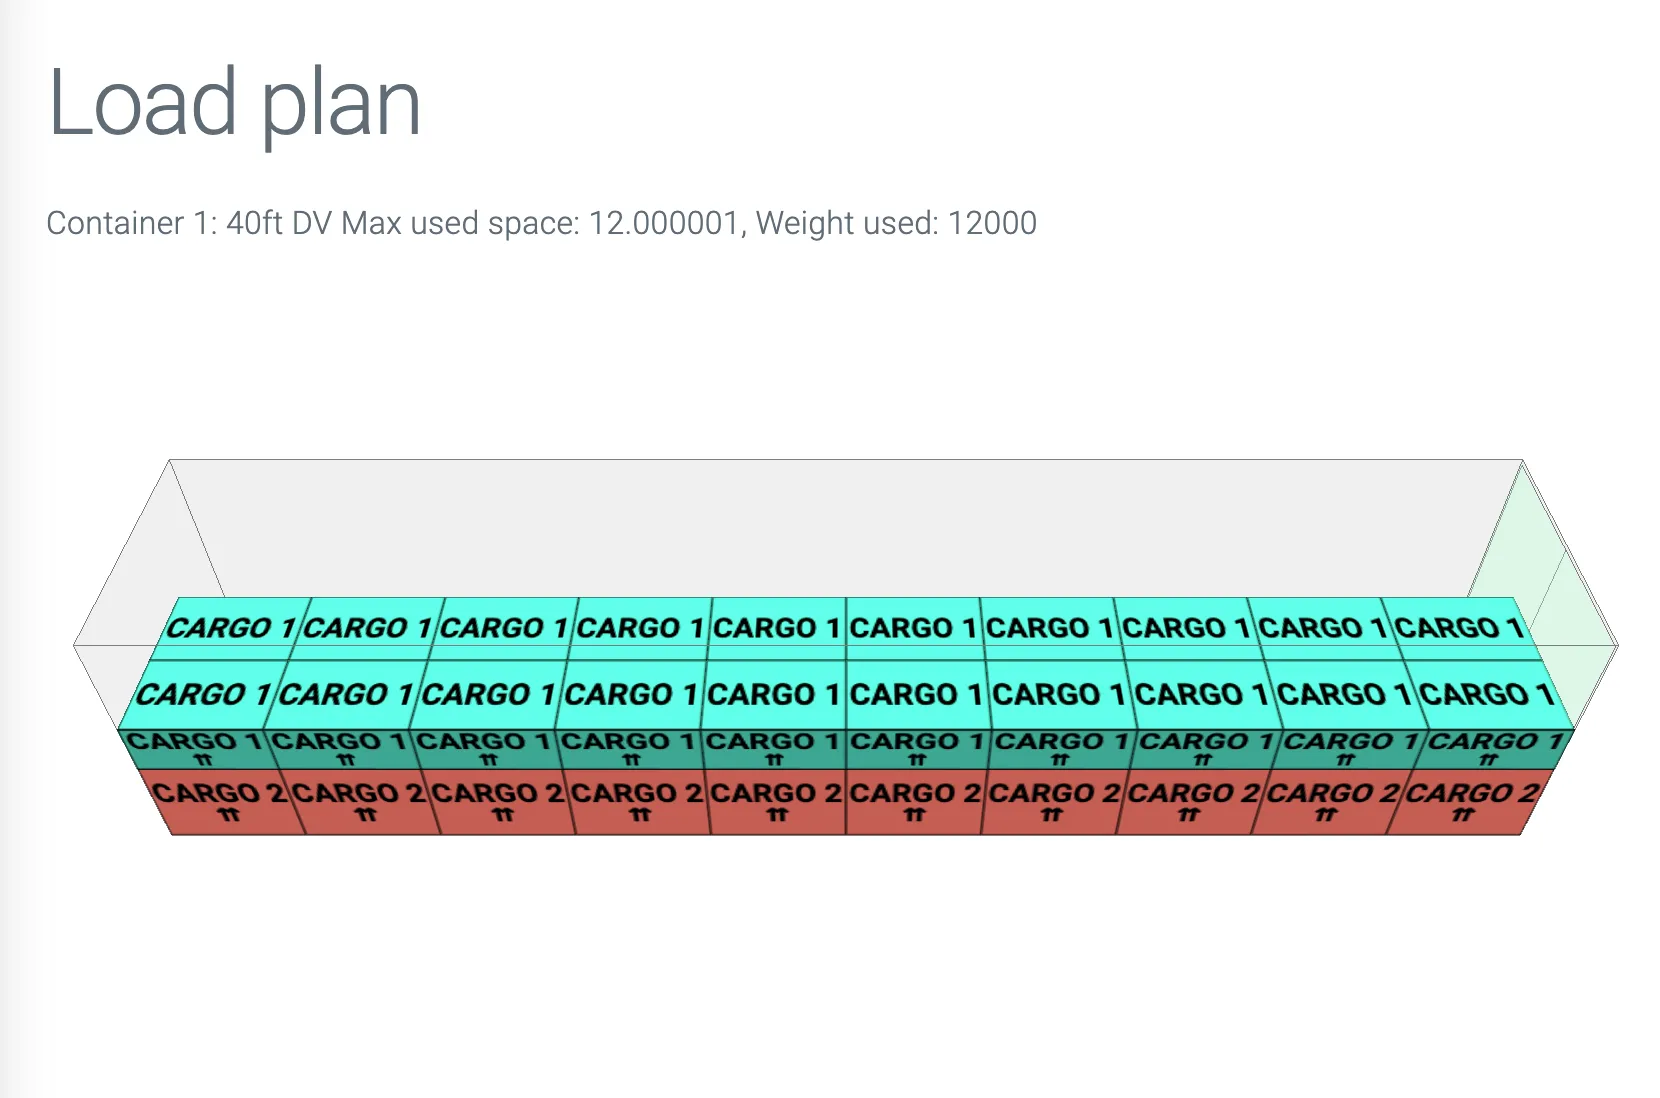
위의 예제는 아래와 같은 로드 계획을 생성합니다: