Cargo-Planner Docs
User management
Overview
The user management view is accessible from the main toolbar on the left side while logged in.
Only users with the Administrator role are able to perform below tasks
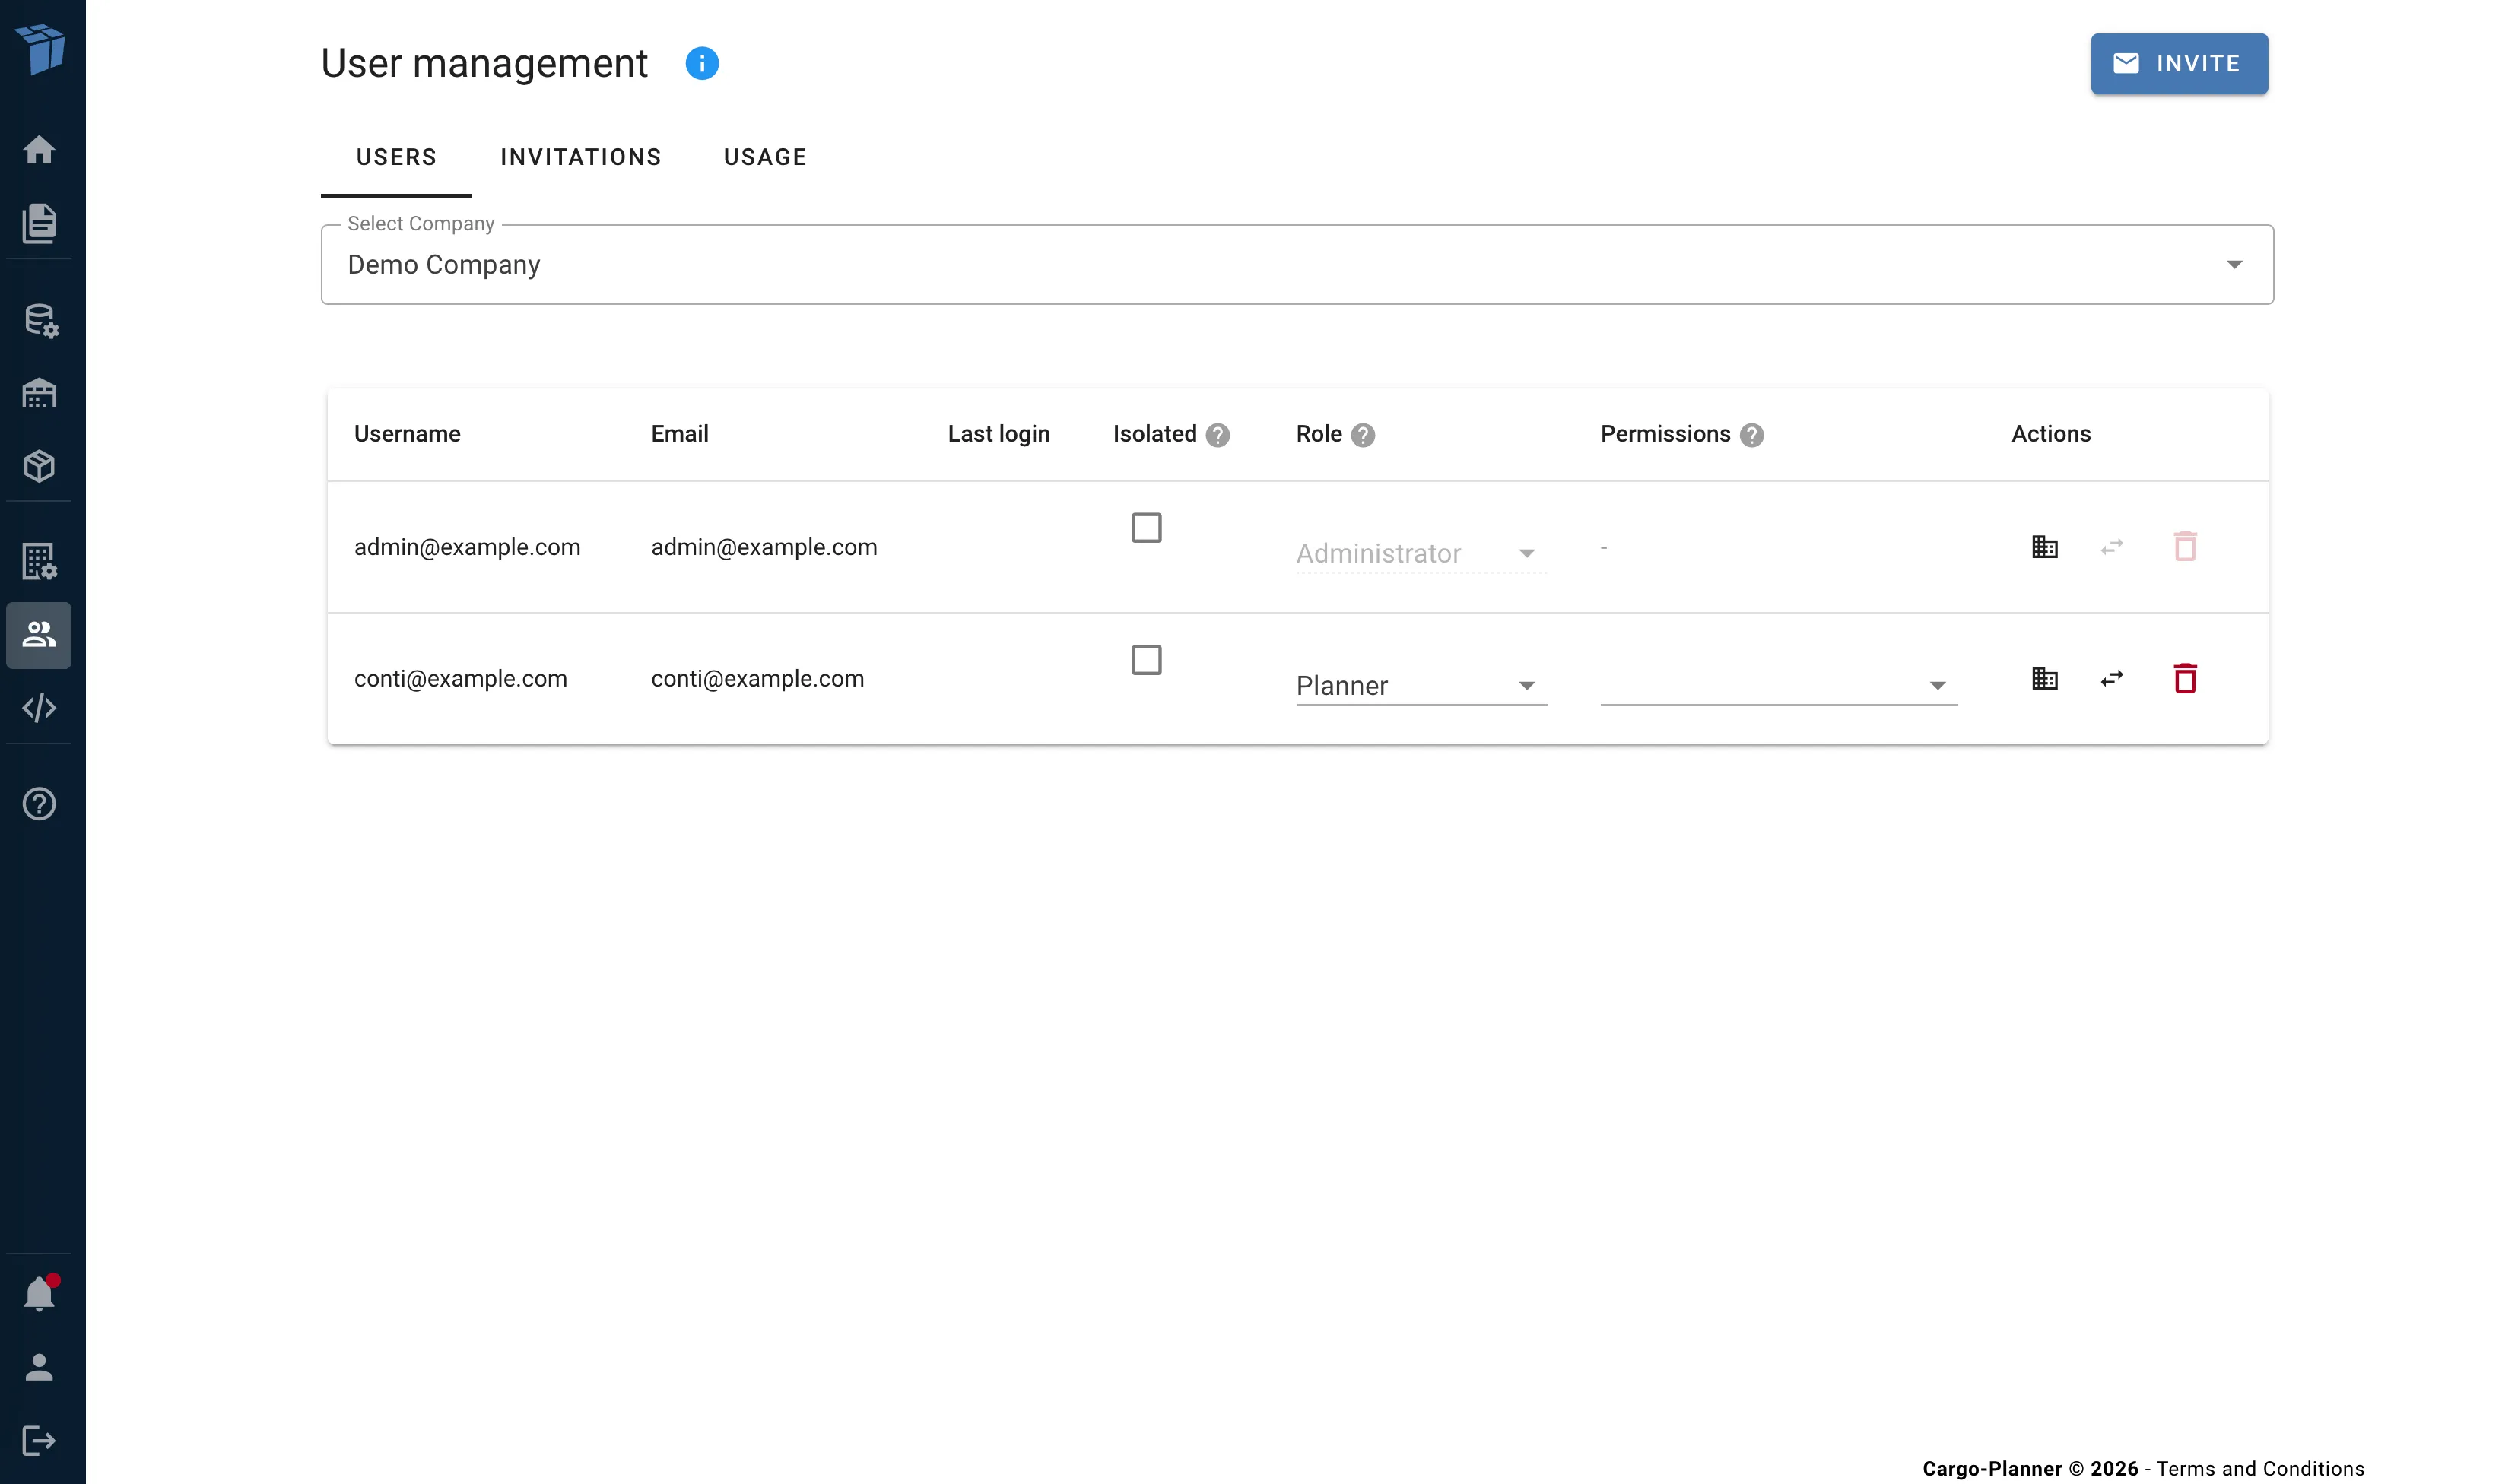
The user management view is organized into three tabs: Users, Invitations and Usage.
Selecting a company
If your account has access to multiple companies (Enterprise accounts), you will see a company selector at the top of the page. Select the company you want to manage.
Managing users
The Users tab shows all users belonging to the selected company. For each user you can see their username, email, last login, and current role and permissions.
Changing a user’s role
Each user has a single role. You can change a user’s role by selecting a different role from the role selector on the user row. The available roles in order of access level are: Planner, Editor, Developer and Administrator.
You cannot change your own Administrator role.
Feature permissions
Users with the Planner role can be granted additional feature permissions to allow editing specific resource types without giving them the full Editor role. The available feature permissions are:
- Cargo Editor - Create and modify cargo library items
- Equipment Editor - Create and modify equipment (containers, trailers, etc.)
- Project Editor - Create and modify projects
- Preset Editor - Create and modify load presets
- Company Editor - Modify company details
These permissions are only available for Planners. Users with the Editor role or above already have all of these permissions included in their role, so the permissions column will not be shown for them.
Setting a user as isolated
Toggle the Isolated checkbox on a user to enable or disable isolated mode. Isolated users can only see their own load lists. This is useful for giving external users (customers, partners) access to plan their own shipments without seeing other users’ data.
An isolated user cannot be an Administrator.
Adding users
Click the Invite button and enter the email address of the person you want to invite. You can also pre-assign their role and set them as isolated. The user will receive an invitation link valid for 14 days, through which they can fill in their own details.
If you have exceeded the maximum number of users for your account, you will not be able to add more users. Either remove existing users or contact us to increase your user limit.
Deleting a user
Click the delete button on a user row to remove them. A dialog will appear asking if you want to transfer the user’s load lists to another user in your organization.
If you do not transfer the load lists, all load lists created by this user will be permanently deleted.
Accessible companies
For Enterprise accounts with multiple companies, you can control which companies a user can access. Click the company icon on a user row to open the accessible companies dialog.
Here you can select which additional companies the user should have access to. The user will then be able to switch between these companies within the application. The user’s primary company (the one they belong to) is always accessible and does not need to be selected here.
Moving users between companies
For Enterprise accounts, you can move a user from one company to another. Click the swap icon on a user row and select the target company from the dropdown. The user will be removed from the current company and added to the selected company.
You cannot move yourself to another company.
Invitations tab
The Invitations tab shows all pending invitations. You can see the email, status (active or expired) and revoke invitations that are no longer needed.
Usage tab
The Usage tab shows calculation statistics for your company, including the total number of unique load plans created during the past 12 months.
You can also download monthly access logs as CSV files by selecting a year and month and clicking the download button.