Cargo-Planner Docs
Load settings
Sometimes you might want to adjust the default load settings in order to better suit your requirements. The Load settings can be accessed and customized from the Setup view.
Primary
Primary load settings are used to configure the apps load plan calculation process and customize certain variables.
Cargo
Error margin
A value in % (from -50 to 50) that describes how the dimensions of the cargoes should be interpreted.
If set to for example 10 - then a cargo that is 1x1x1 m will be enlarged so that its volume will be 1.1 m³. This might be useful if the cargo dimensions are not totally accurate.
In the same way if a value of -10 is provided then the cargo will be smaller than the provided dimension. This might be useful to simulate cargoes that can be “compressed” when loading by pushing and squeezing.
Shipping factor
Shipping factor is used to calculate volumetric weight. The entered factor is applied based on the provided unit (cm3/kg, kg/m3, cu in/lb or lb/cu ft).
Volumetric weight is calculated by multiplying the volume of each cargo by the provided shipping factor. The volumetric weight is compared against the package’s actual weight. Whichever number is higher is used as the chargeable weight which may affect the loading of cargoes.
Stacking
Allowed overhang
If you allow a cargo to not have full support from below you can change the allowed overhang setting. Setting it to 0 means all cargoes need full support from below.
Allow heavy on light
Usually a cargo weighing 100kg cannot be loaded on a cargo weighing 50kg. However a box weighing 5kg can usually be loaded on a box weighing 4 kg. There are different opinions on this so you can change it here to fit your requirements. It will likely affect the utilization. It is set to true by default.
Note: This setting will have an effect on the entire load list. If you want greater control over specific cargo items and how they should be allowed to be stacked, you might want to have a look at custom rules here.
Max stacking height
This setting is used to control how high cargo is allowed to be stacked. Individual cargo can still have a height that is above this limits, but stacks of cargo cannot.
Height tolerance
In a situation where you have different cargo being used as support, what is the largest accepted difference in height between the packages the system should allow to consider the space on top a single loadable area? Defaults to 5mm.
Max Layers per SKU
Cargo max layer option is only applicable on items with same SKU. This means that when this is enabled, even if SKU-A has max layers set to 3, we can still stack SKA-B on top of it.
Single Cargo Support
Each cargo can only be supported by max one cargo below. This means that if a cargo item is not fully supported by one individual piece of cargo or pallet below, it will not be stacked.
Performance
Max calculation time
A number (defaults to 2), between 0 and 15 that sets the timeout for the load engine (in seconds). In general if you have multiple container types and many different cargo types a better result can be generated by increasing this number.
Long running job (Minutes)
If you have a wide range, and a large amount of cargo and/or pallets for preloading, the calculations quickly become complex and require a lot of processing power. In these cases, allowing the calculation engine to work for minutes can produce better results. If you create a long running job, you will get an estimated time when the load plan will be done. Then, the load plan will be calculated in the background, as you can continue working in the app. When a load plan has been produced, you will receive an email with a link to the loadplan.
Loading Style
| Option | Description |
|---|---|
| Auto | Will be set automatically depending on the characteristics of the container being loaded. For trucks and ocean containers the cargoes will be loaded from front to back. For Pallets and containers with no side walls cargoes will be loaded bottom up. |
| Front To Back | Will load cargoes from the front to back. This is the default when creating truck and ocean container load plans. |
| Load from bottom up | Will load the cargoes from floor and upwards. As an example - when loading a sea container you do sometimes want to load stacks of boxes - outwards towards the door. For pallets though you usually build layer by layer which is why this setting is set to true for air containers & pallets. |
Secondary goal
| Option | Description |
|---|---|
| Minimize Length | Will try to “compress” the used length. May be useful if calculating loading meters / feet on trucks. Use with care - will require extra juice from the calculation which could affect overall result |
| Minimize Height | Will try to “compress” the used height. Useful if you want to spread the load over the whole container area. Use with care - will require extra juice from the calculation which could affect overall result |
| Improve stability | Will try to pick solutions that are more stable |
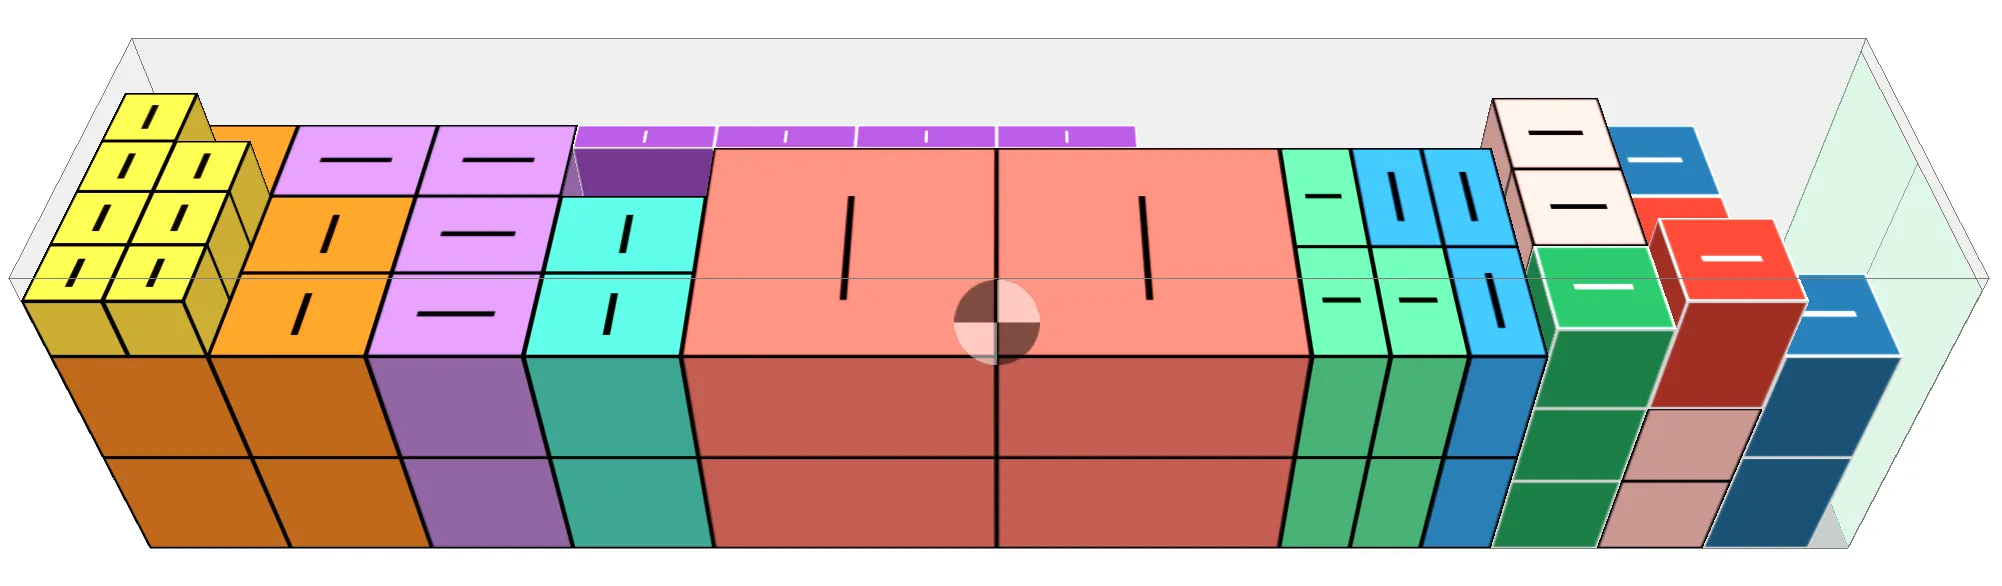
Stack filling order
Controls the order in which positions in the container are filled. This is an advanced setting — the default (Auto) works well in most cases.
| Option | Description | |
|---|---|---|
| Auto | Let the system decide based on the cargo and container type | |
| Row-by-row | Fill cargo across the full width one row at a time, advancing from front to back. Keeps height low and uniform. | 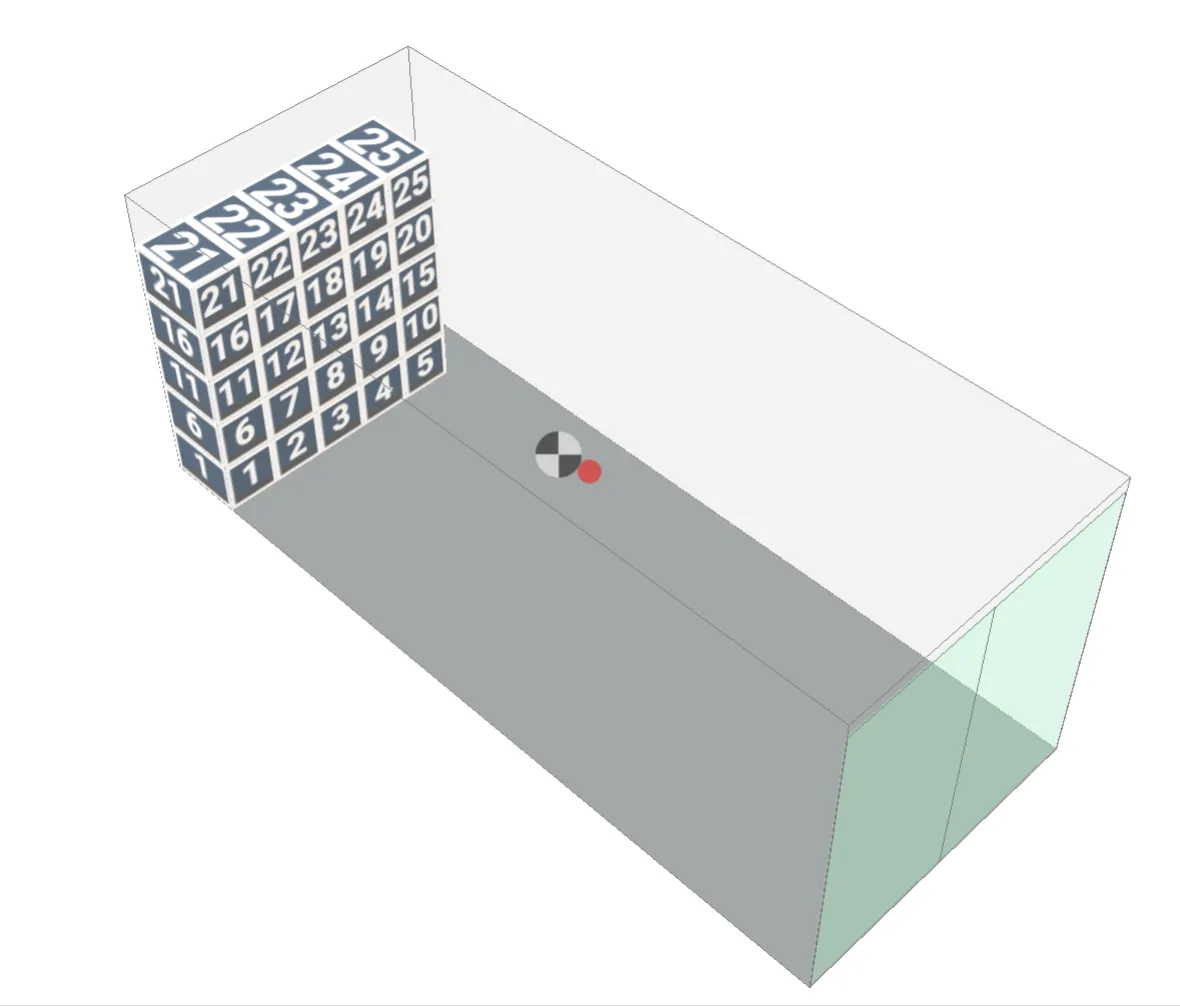 |
| Stack-by-stack: sweep across width | Complete each stack before moving on. Stacks are filled in depth-first order, sweeping left to right. | 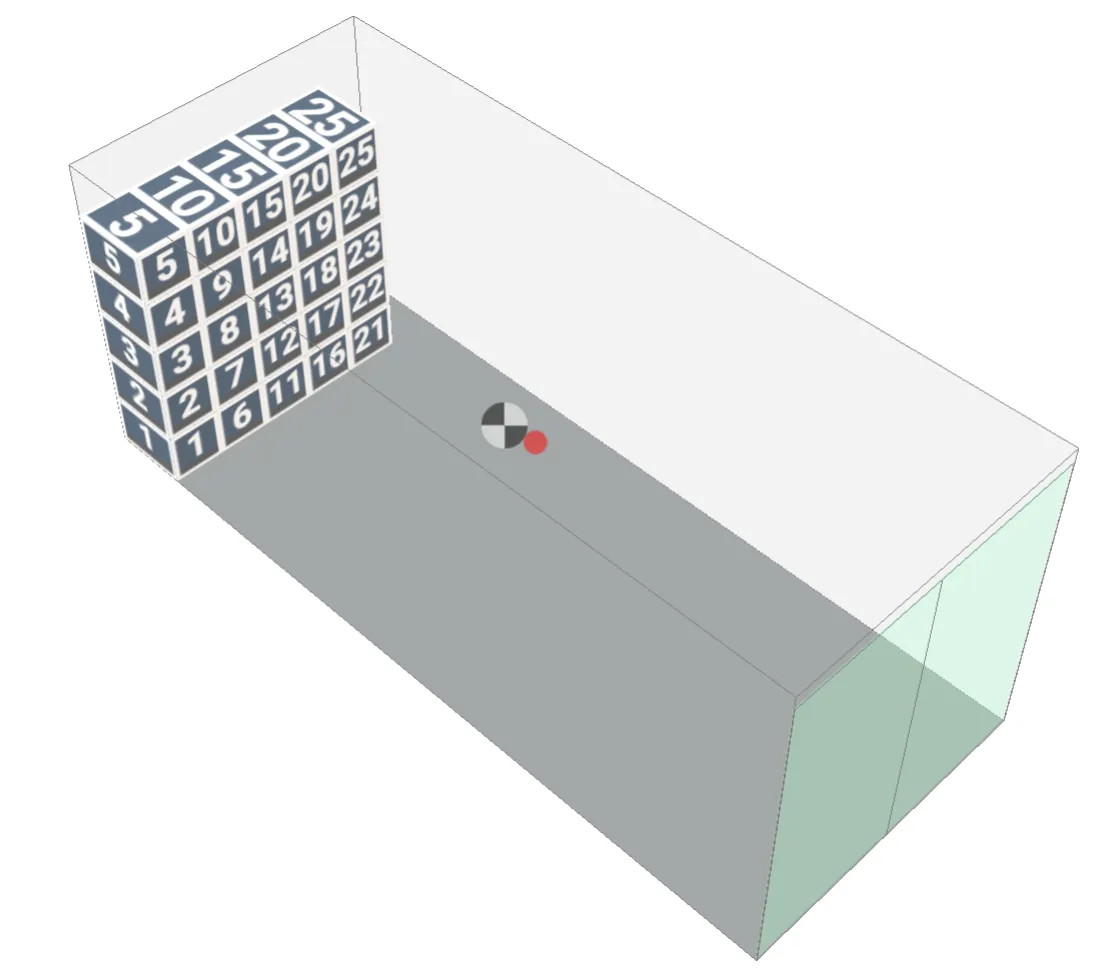 |
| Stack-by-stack: sweep along length | Complete each stack before moving on. Stacks are filled column by column, sweeping front to back. | 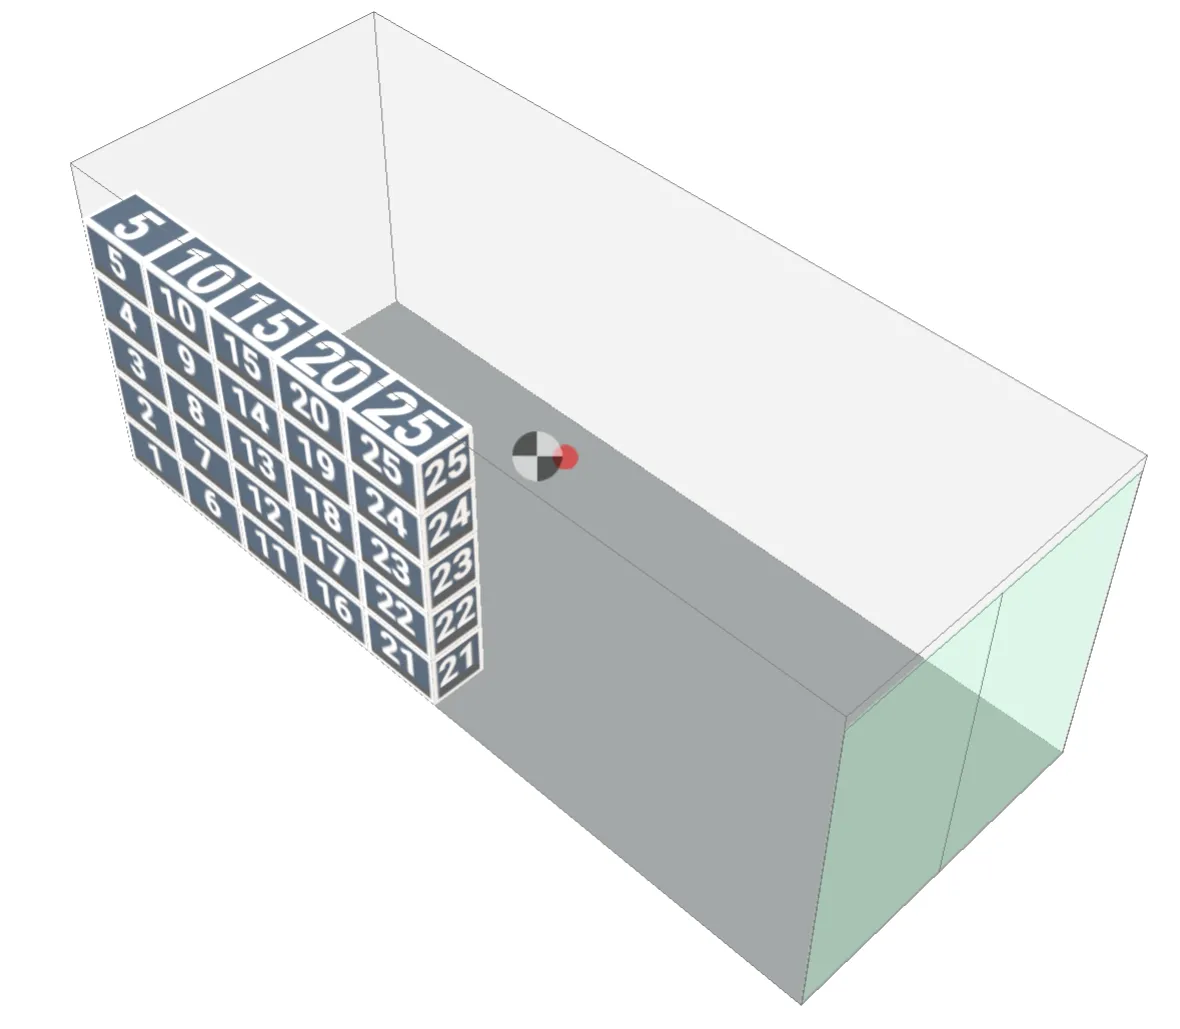 |
Max number of trailers to be used
Set an upper limit to how many containers are to be used for loading your imported cargo. Excess cargo will become unloaded items.
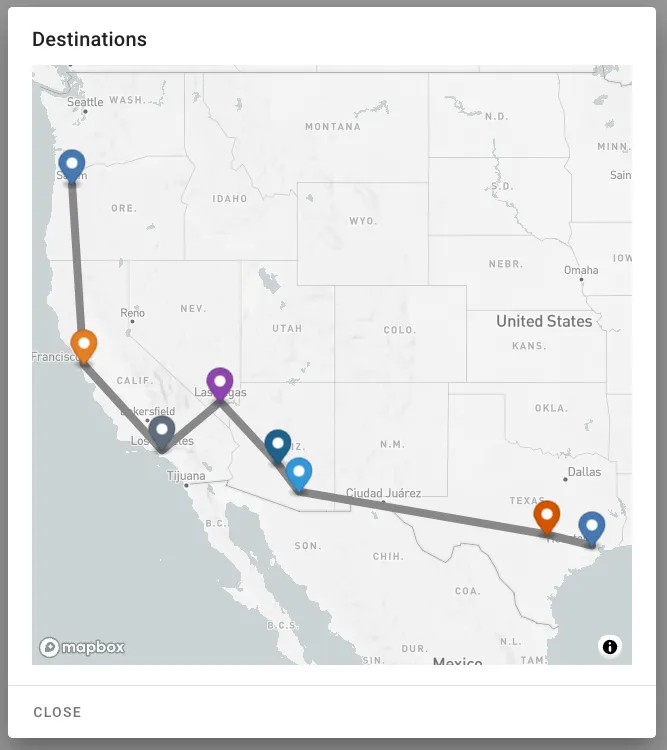
Enable routing
In loadplans for Road trailers there is a setting called “Enable Routing”. If you have a Port of Loading and the cargoes have the Destination field filled in, Cargo-Planner will create a delivery route and pack the cargoes in order of delivery.
This setting will override any priority set on an item
Strict priorities
A lower priority cargo is never allowed to be loaded before a higher priority, even if the higher priority can’t be loaded at all.
Limit the allowed center of gravity
This setting will make sure the center of gravity is put in the specified X (length) and Y (width) interval. Will most likely affect the utilization of the container in a negative way.
Prioritize Pallet Stability
If enabled pallets are built in layers, rather than towers, and stability is prioritized over utilization.
Load in sets
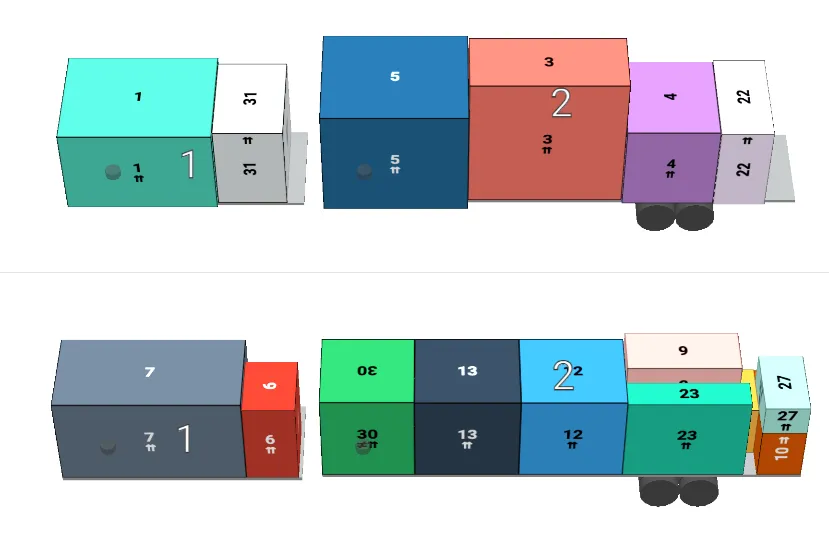
This setting is especially interesting for trucks & trailers. Lets say that you want to load a truck set with a front and rear trailer, like the commonly used Superlink in Africa. Then enable this setting and the selected equipment will alternate like below:
Shipments / Groups
These settings only affect cargoes that have a Group / Consignment ID set.
Shipments cannot be mixed
This setting will make sure that cargo from different shipments are not packed into the same container.
Group shipments together
This setting will make sure that cargo that belong to the same shipment are packed next to each other without cargo in between.
Use at most a single container per shipment
If this setting is enabled, a shipment will be packed into a single container. If the entire shipment does not fit, the entire shipment will be unloaded.
Entire shipments must be loaded or none
This setting ensures that entire shipments are packed. If one cargo item from the shipment is excluded from the load plan, then the entire shipment will be unloaded.
Secondary
These settings have the same parameters as the primary settings, but they only apply to preloaded hold types. A good use for this is if you are loading your cargo on pallets and then into a trailer, you might want different behaviour when loading the cargo on a pallet, like loading from the bottom up, than when loading the pallets into the trailer.
Custom Rules
Custom rules is a topic in itself which is covered here
Segregation table
The segregation table enables you to tell which cargoes can or cannot be loaded together in the same equipment. Start by creating classes for your segregation table. To add a new class enter a class name and press the add button.
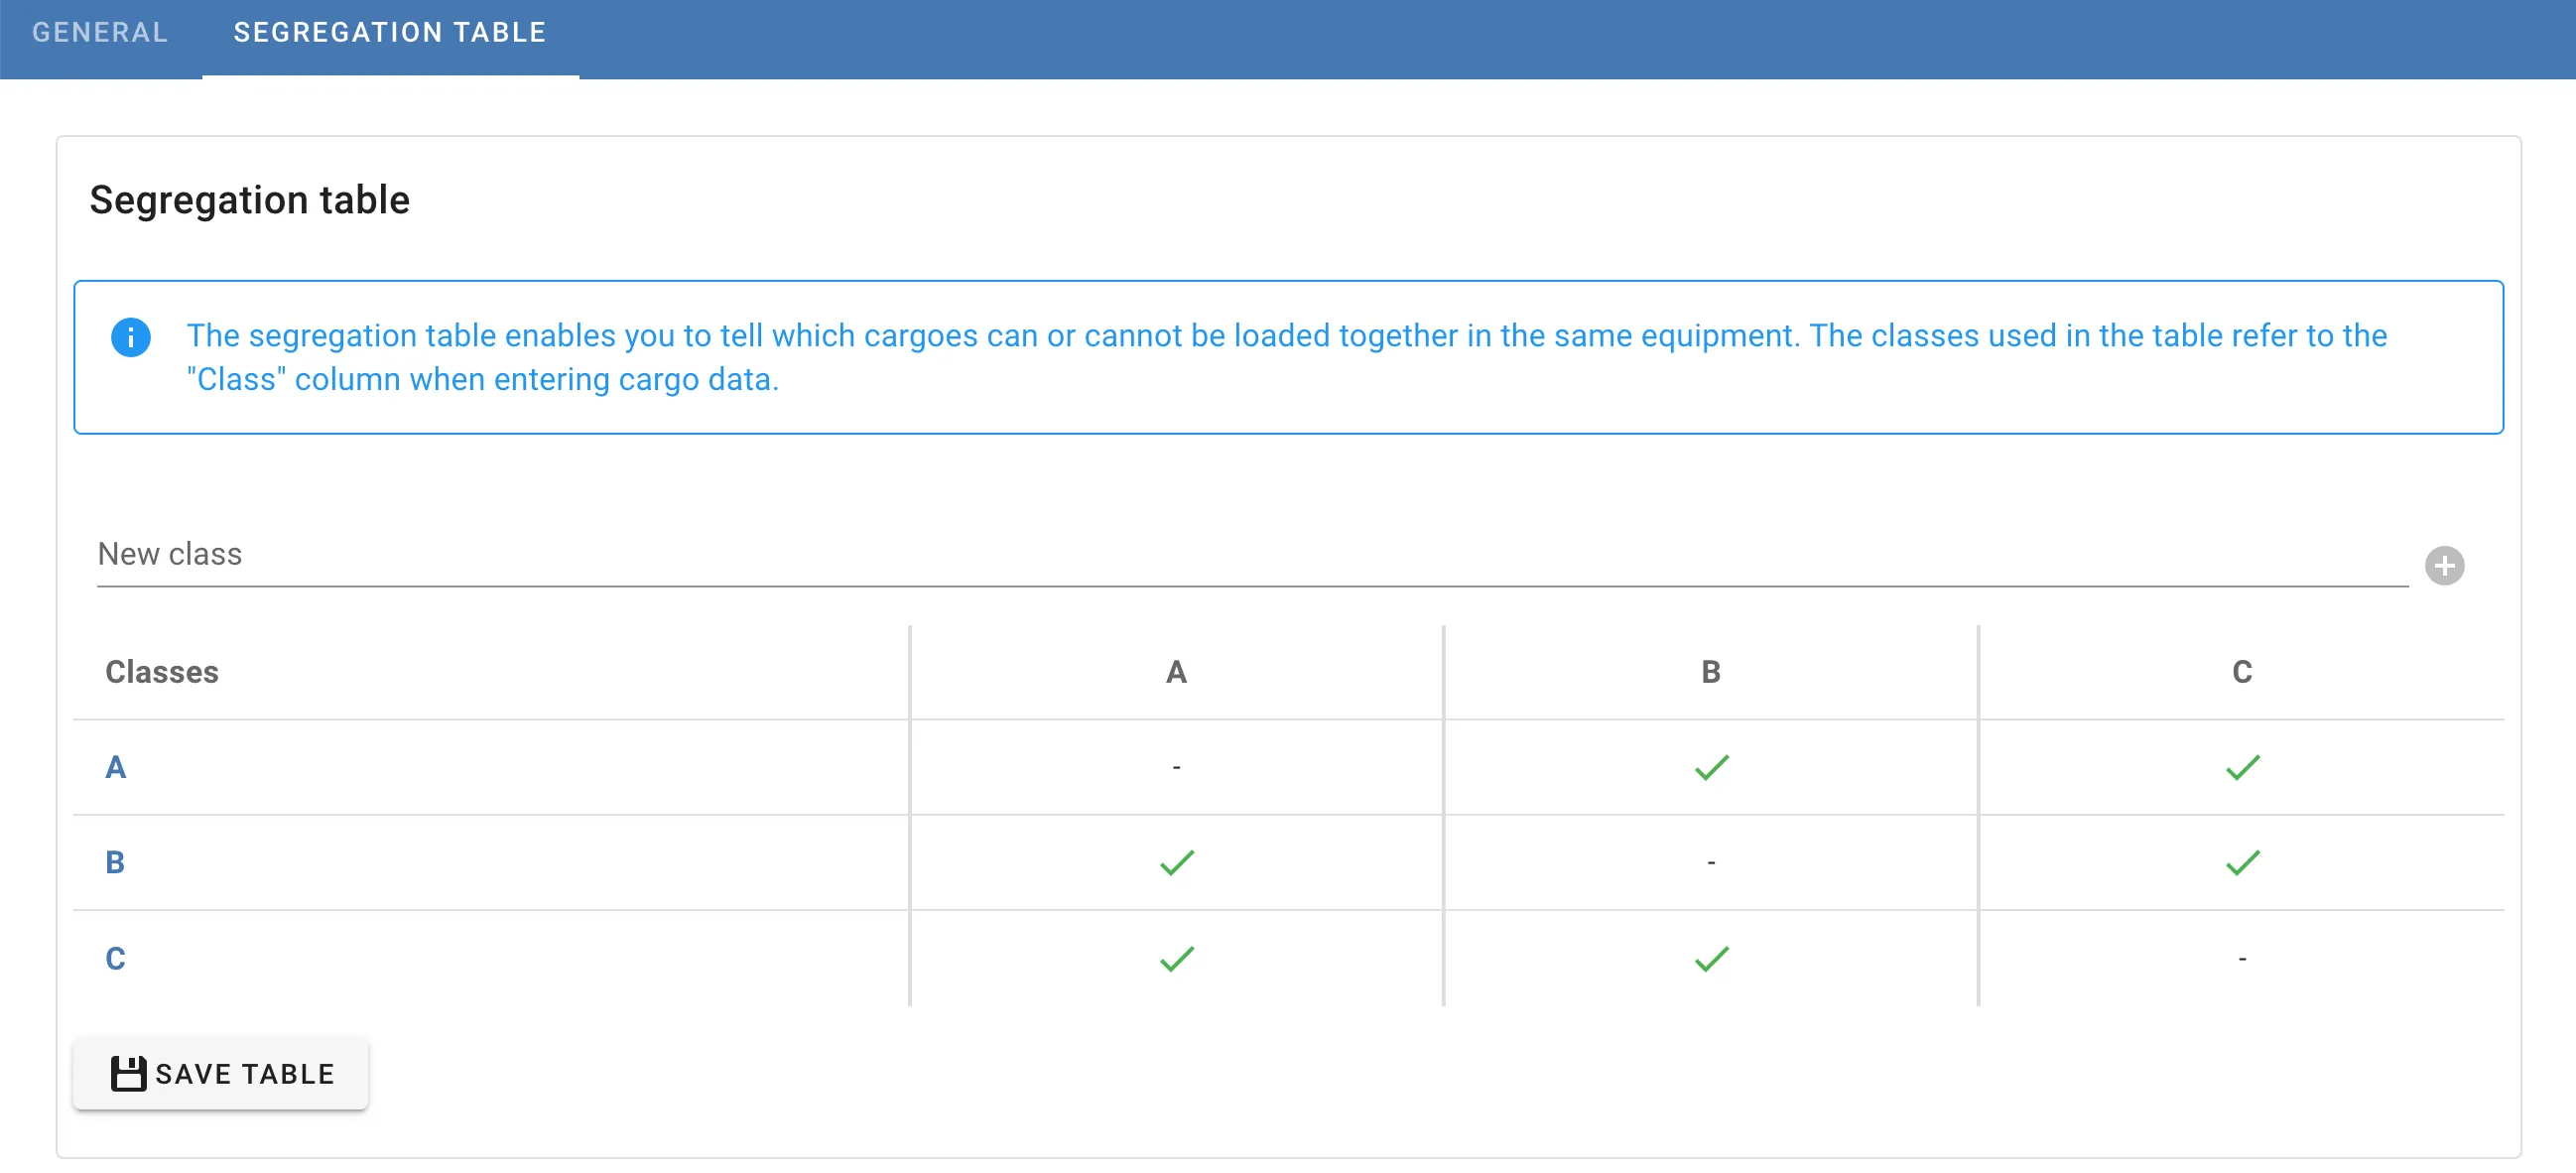
When you have created your classes you need to define which classes that can not be loaded together. If class B cannot be loaded together with class C, press the checkmark in column B on row C and click “Segregate”.
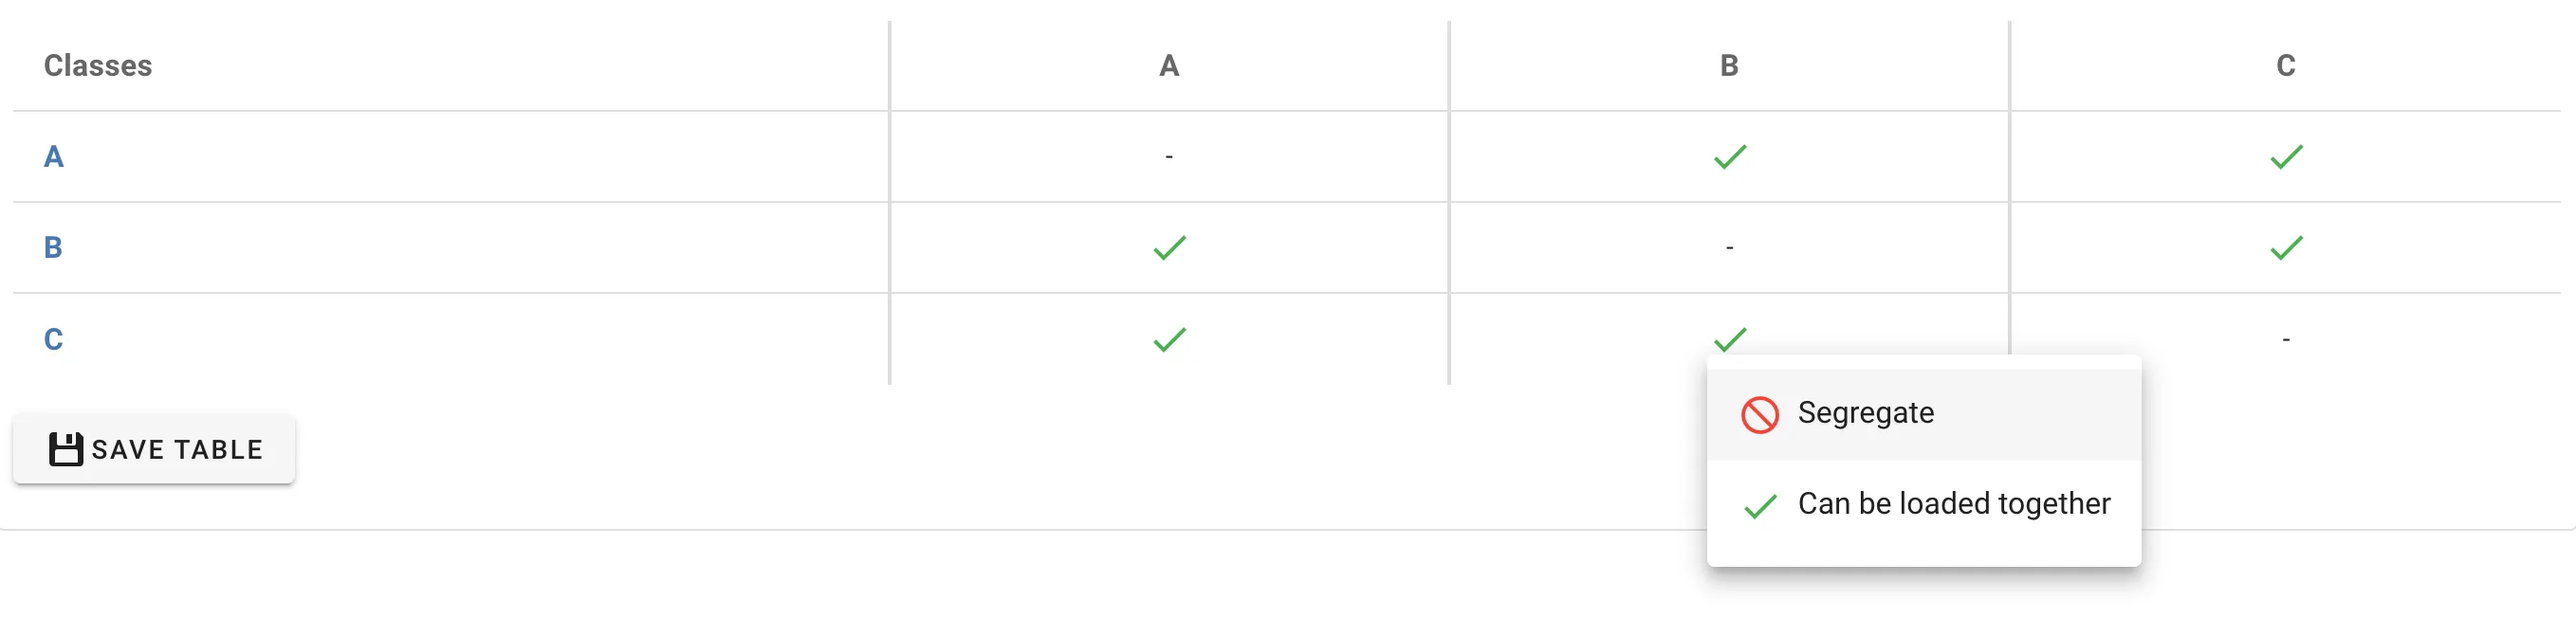
The table will be updated indicating that B and C are segregated on corresponding rows. To remove the restriction, click on the same cell and select “Can be loaded together”.
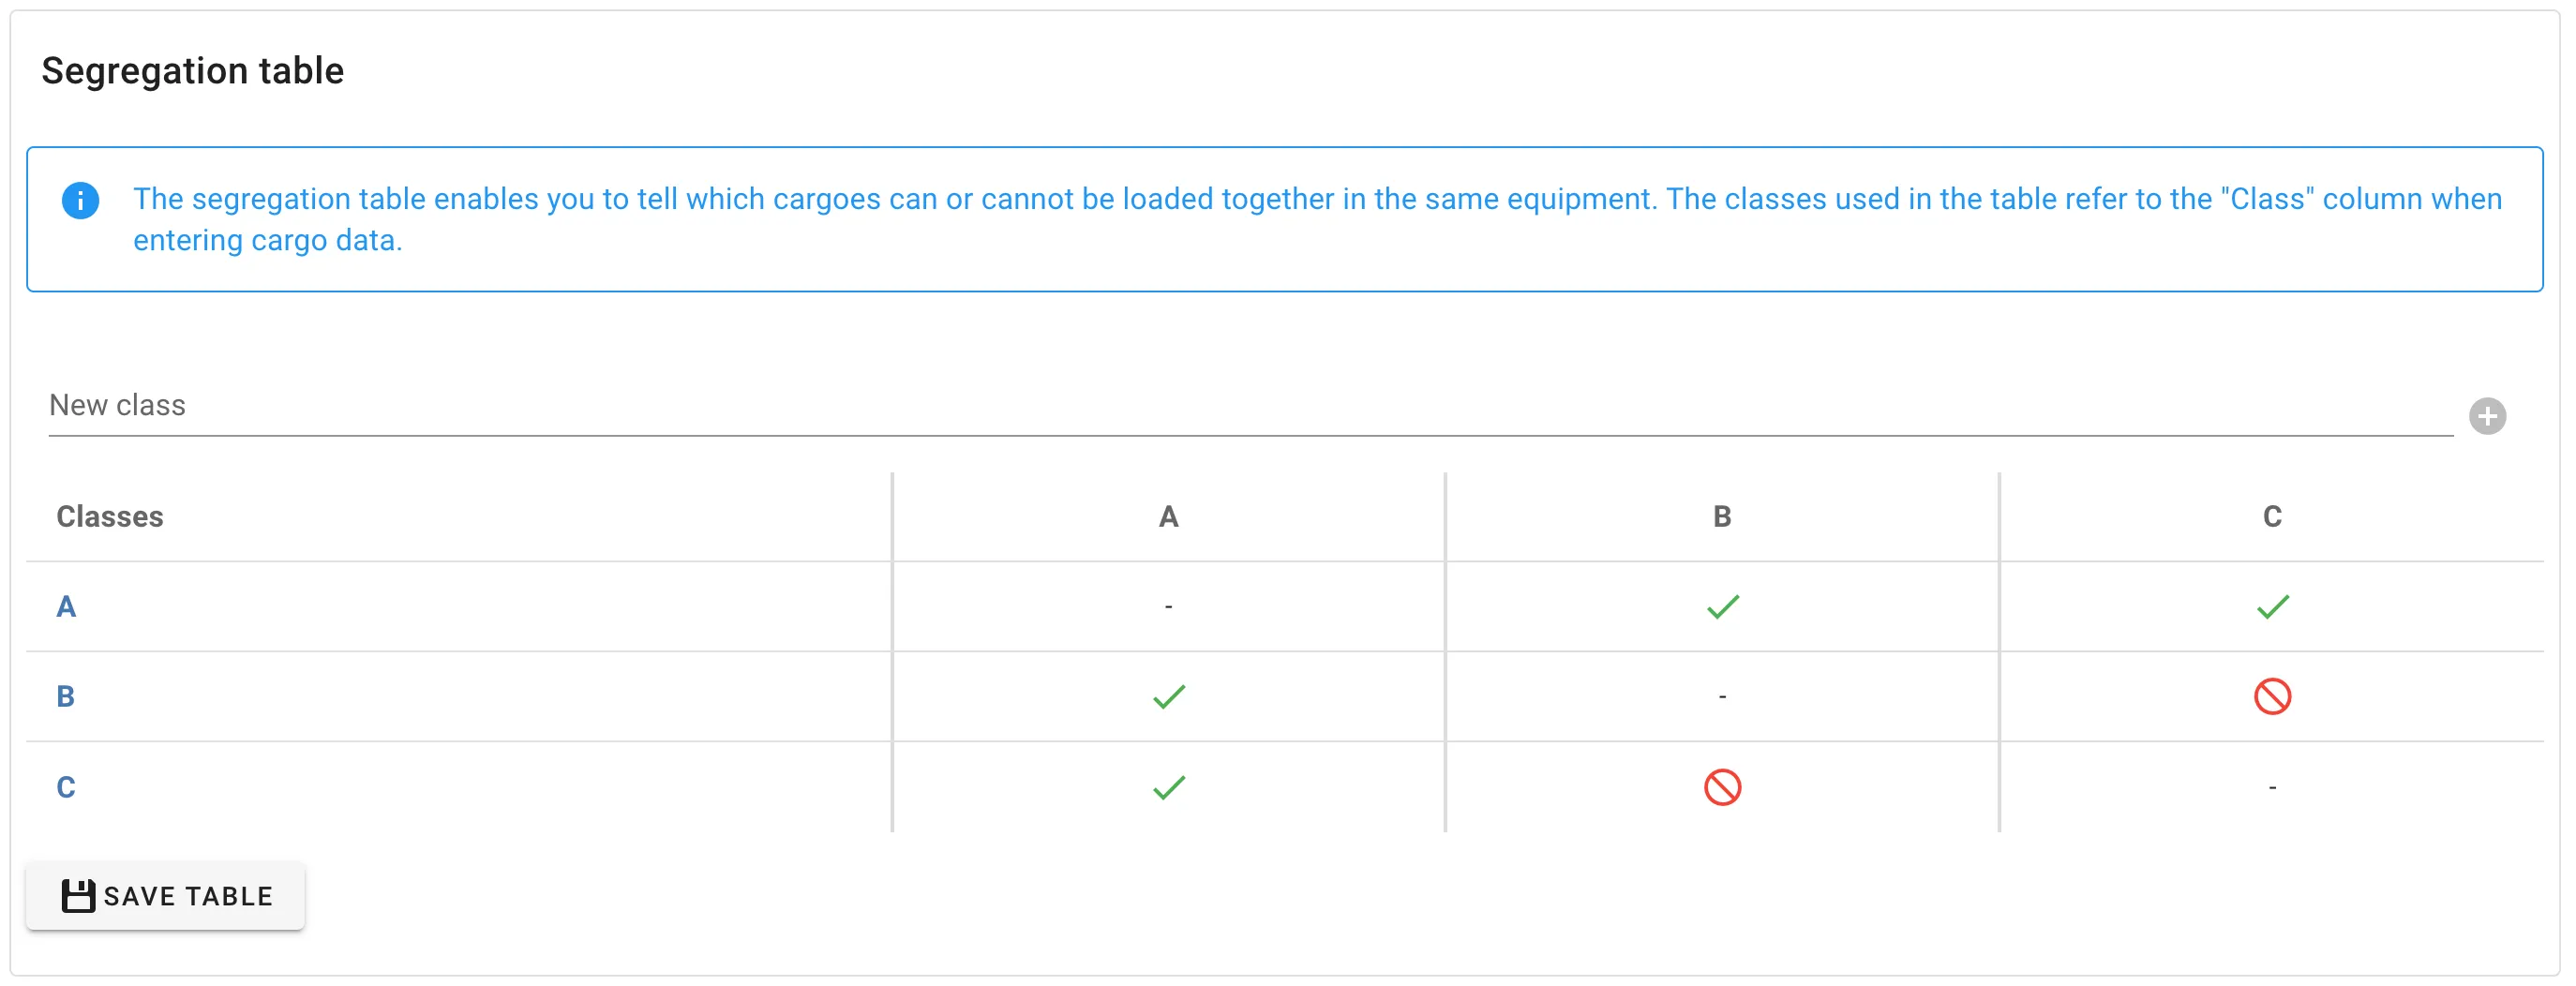
Note that you have to click SAVE TABLE for changes to take effect.
The classes used in the segregation table refers to the “Class” column when entering cargo data. In our case, thanks to the segregation table, the second item (Class B) will not be loaded in the same container as the third item (Class C).

Cost Function
A cost function can be used to optimize for specific goals in addition to loading utilization. The calculated function is added as an additional cost per loaded container. A low cost should reflect a good solution, and a high cost reflects a bad solution. That calculated cost gets added to the fixed container cost. Cargo-Planner will try to find a solution where the cost is minimal when calculating a load plan.
Cost functions are an advanced feature for experienced users. Get in contact with us if you need assistance in setting one up: [email protected]