Cargo-Planner Docs
Creating a load plan
In this guide we are going to go through the process of creating a load plan from scratch.
You create a new list through the “Load plans” view and hitting the top right corner:
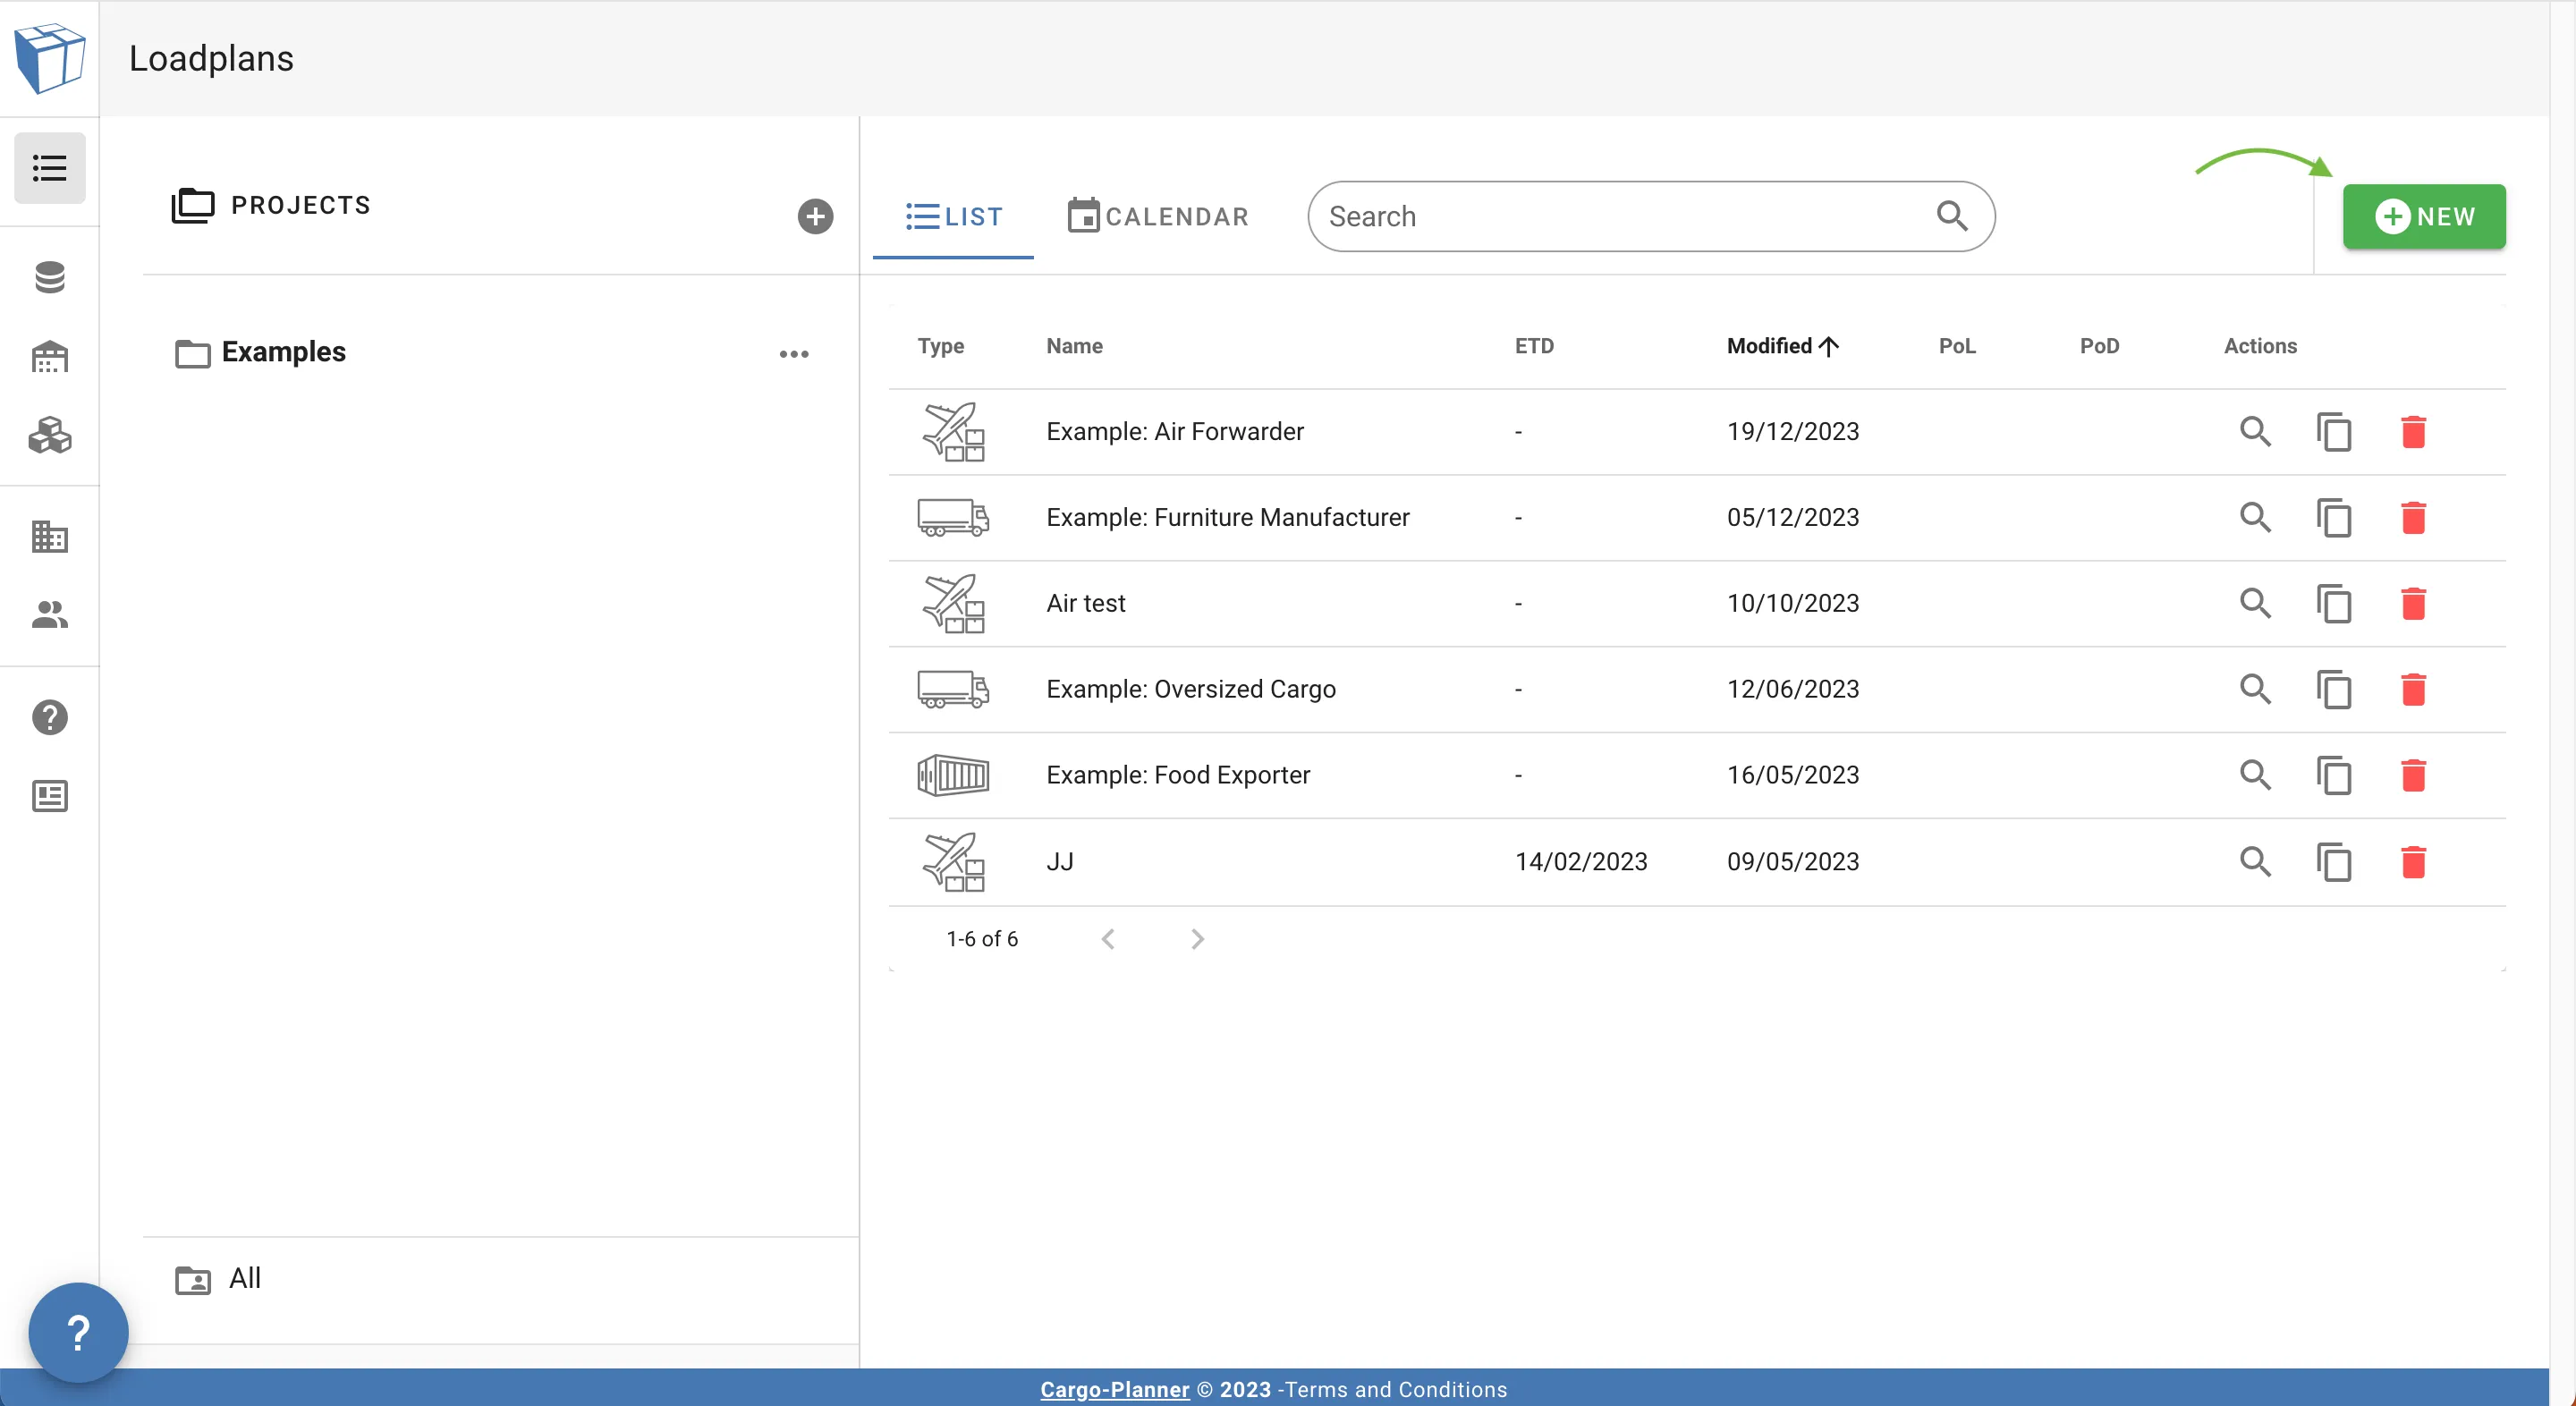
Now you are faced with a dialog where you can input the data to create the load plan.
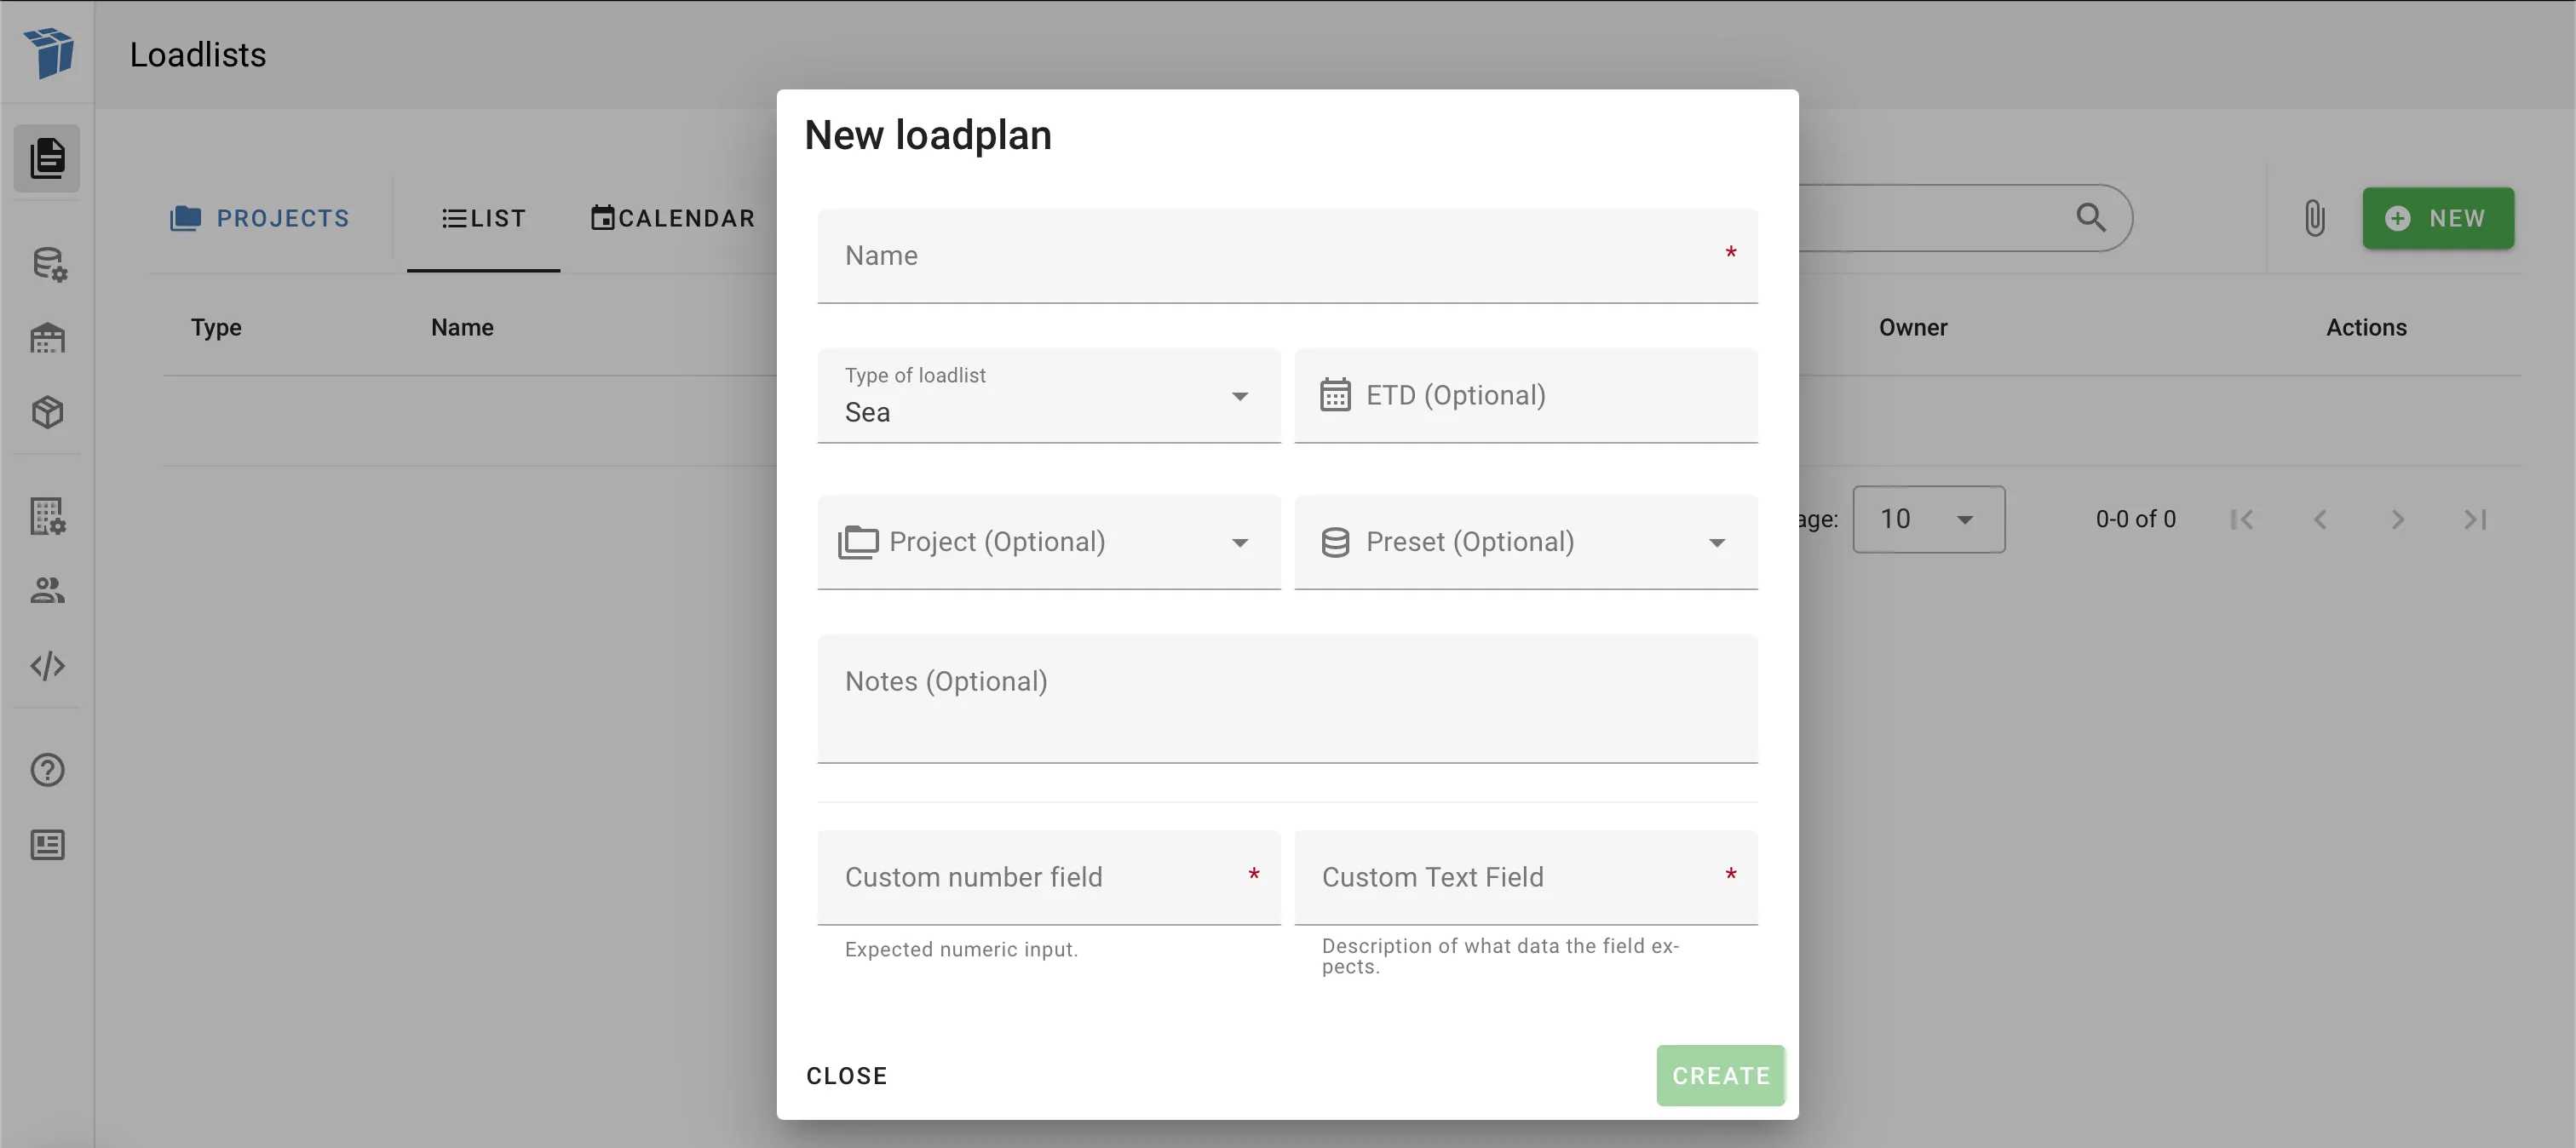
Mandatory information
The mandatory information that you need to input is marked with a red star to the right of the input field.
By default, this will only be the “Name” at the top of the dialog and “Type of loadlist” below it.
The “Type of loadlist” will have a default value, so make sure to make an active choice about what type of load plan to create.
Extra information
Furthermore, you are able to assign your new load plan with “ETD”, “Project”, “Preset”, “Notes”.
Custom fields
In the example above, two custom fields are displayed. They will appear in this dialog if they are created and marked as mandatory according to your company settings. Please, find more information about custom fields here.
In this guide we will create a load plan for Sea containers. The steps are however the same for the other modes of transportation.
The 4 steps
When working on a load plan in Cargo-Planner we have divided the process into 4 different steps:
- Data - this is where you enter the cargo data and cargo properties
- Setup - this is where you select the equipment you want to use as well as some additional settings
- Workspace - this is how the current load plan looks like where you can also modify it
- Load plan - this is the last step where you can do printouts etc
1. Data
This is the view where you enter your cargo data and cargo properties.
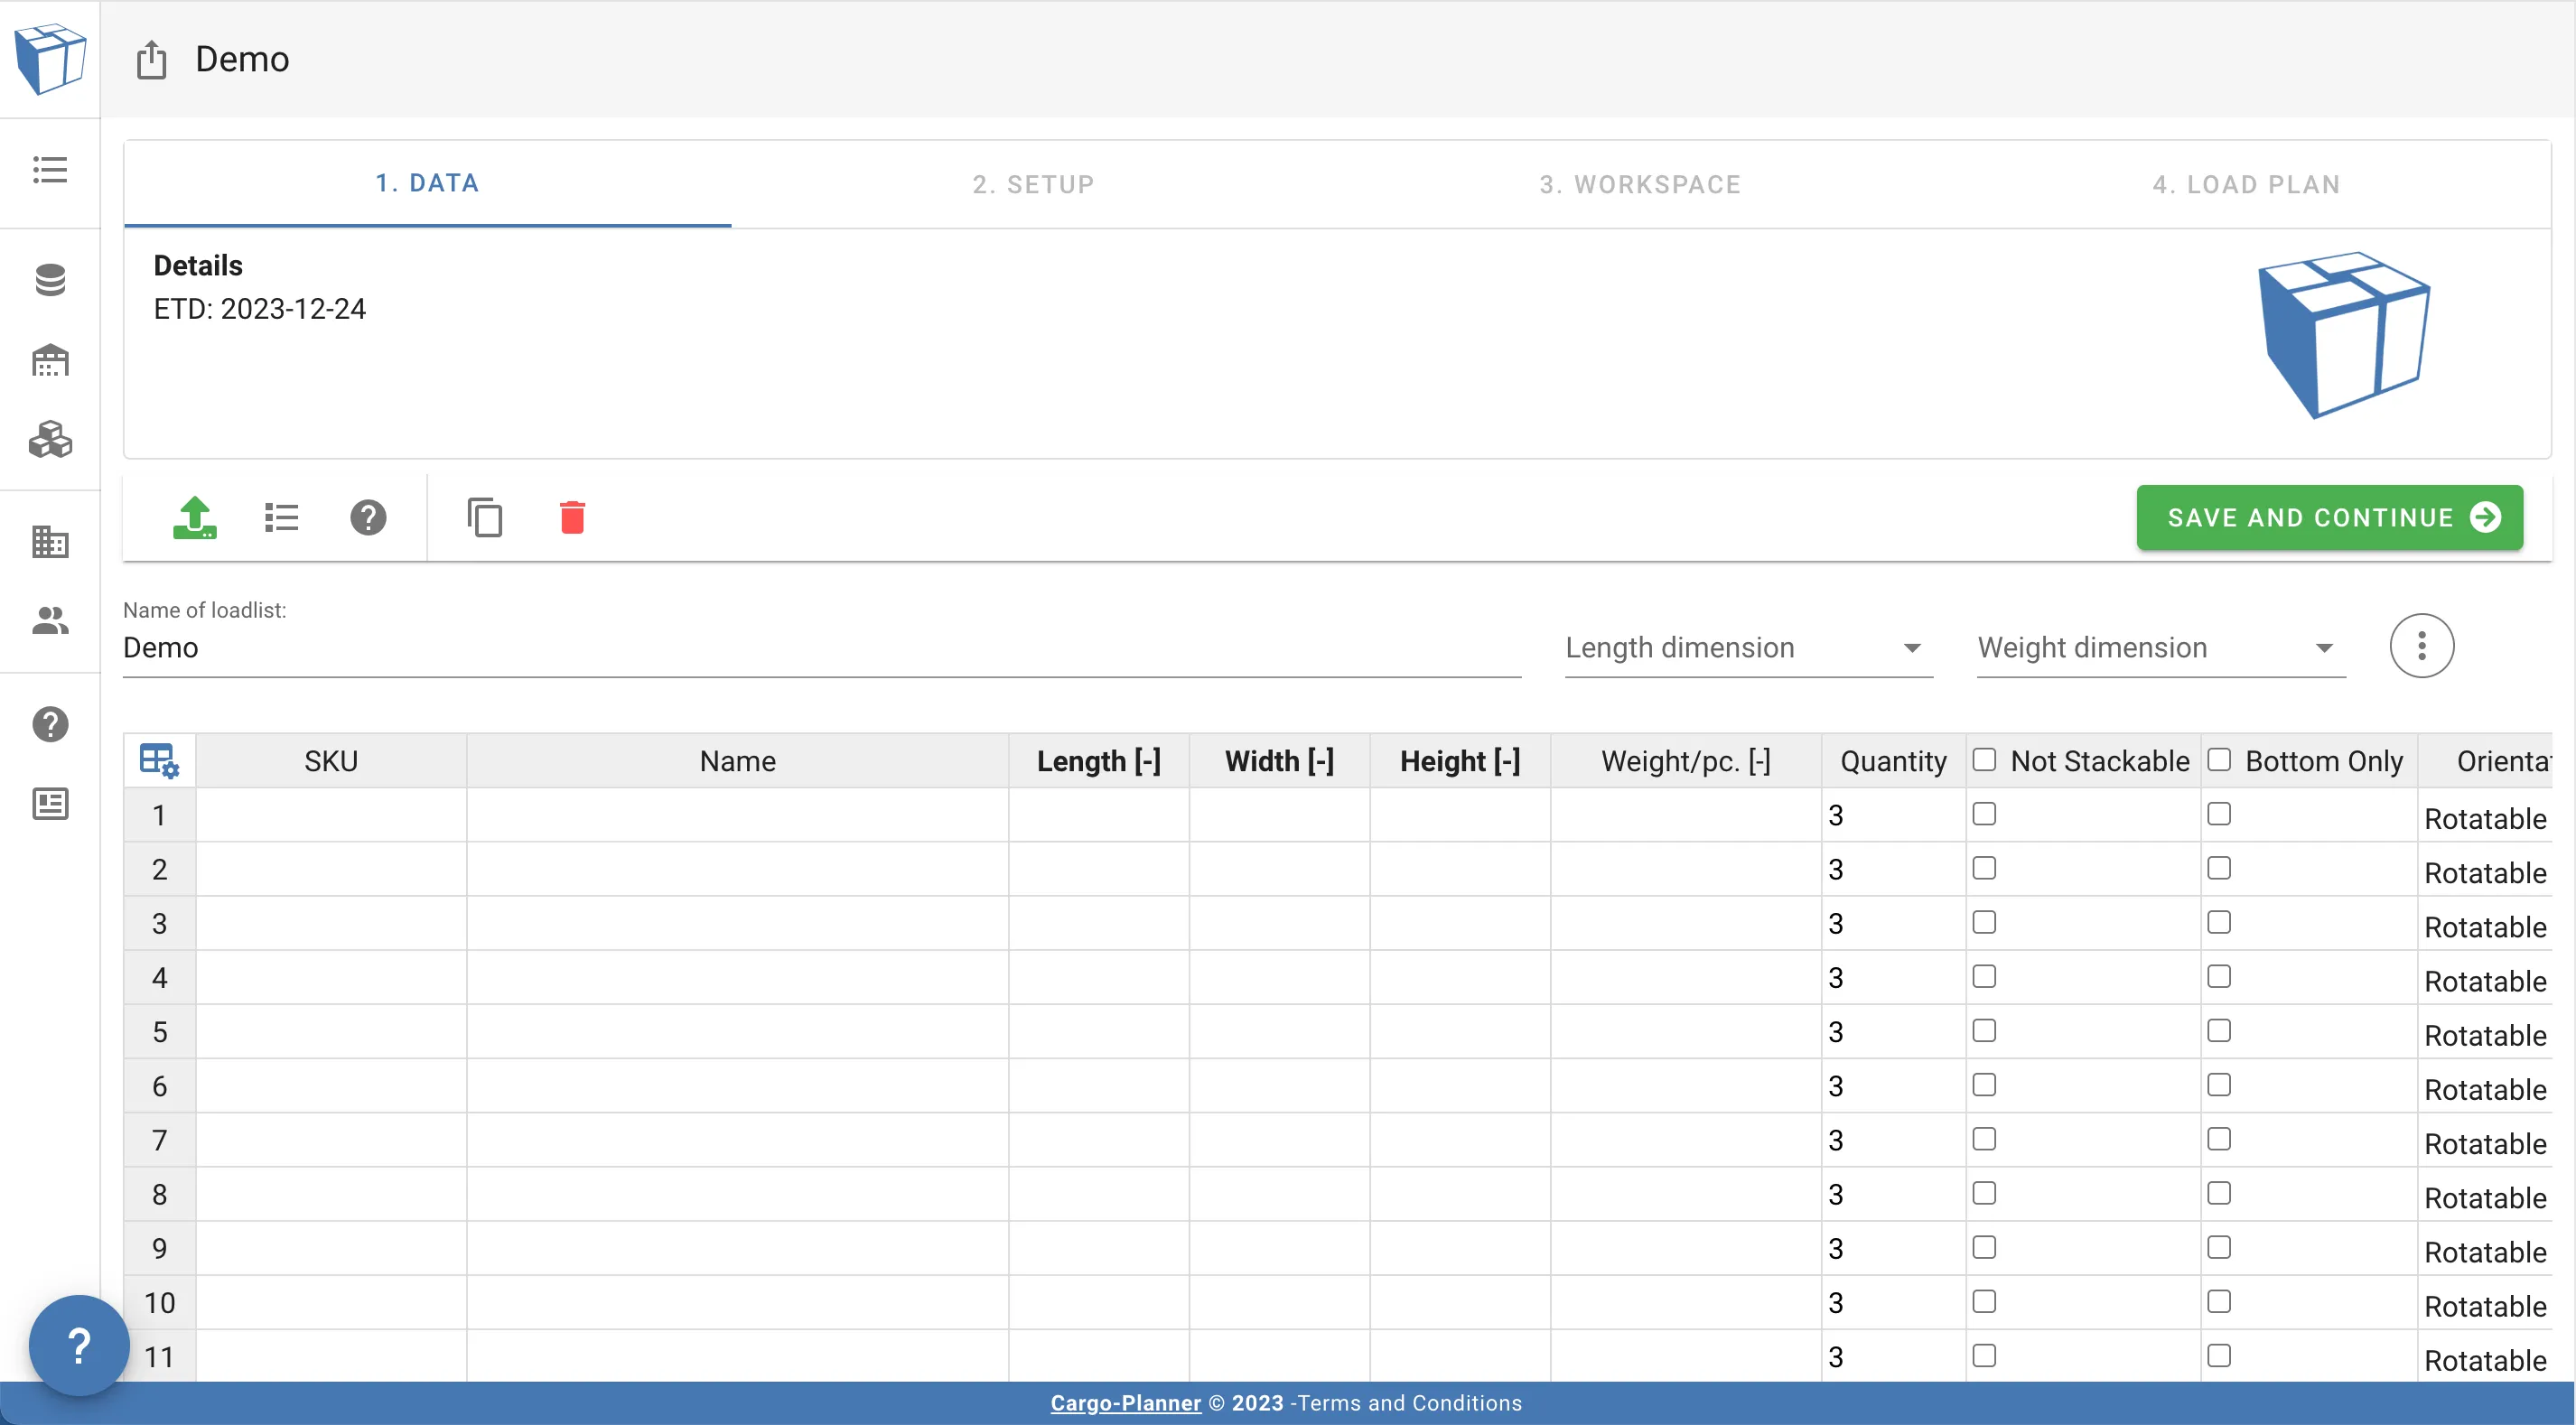
You can add cargo data in 3 different ways:
-
- Manually click on a cell with your mouse and enter the data with your keyboard. Use the Enter , Tab or arrow keys to move around the current cell.
-
- Copy Rows and / or columns straight from Excel or similar
-
- Use the Excel importer function. See the Import via Excel section for more details on how to import your Excel files.
Each row needs at least data for the following fields to be accepted:
- Length
- Width
- Height
- Weight
Have a look at the Cargo properties to find out more about the different properties you can assign to a cargo.
The Name column will act as an identifier for each cargo type. It can be a string or a number. In our case we just enter some numbers.
If no data is entered in the Name column - the items will be named automatically starting from 1 for the first row, 2 for the second row etc…
When you have added the data you also need to select what length and weight dimension is used. In our case we select CM and KG:
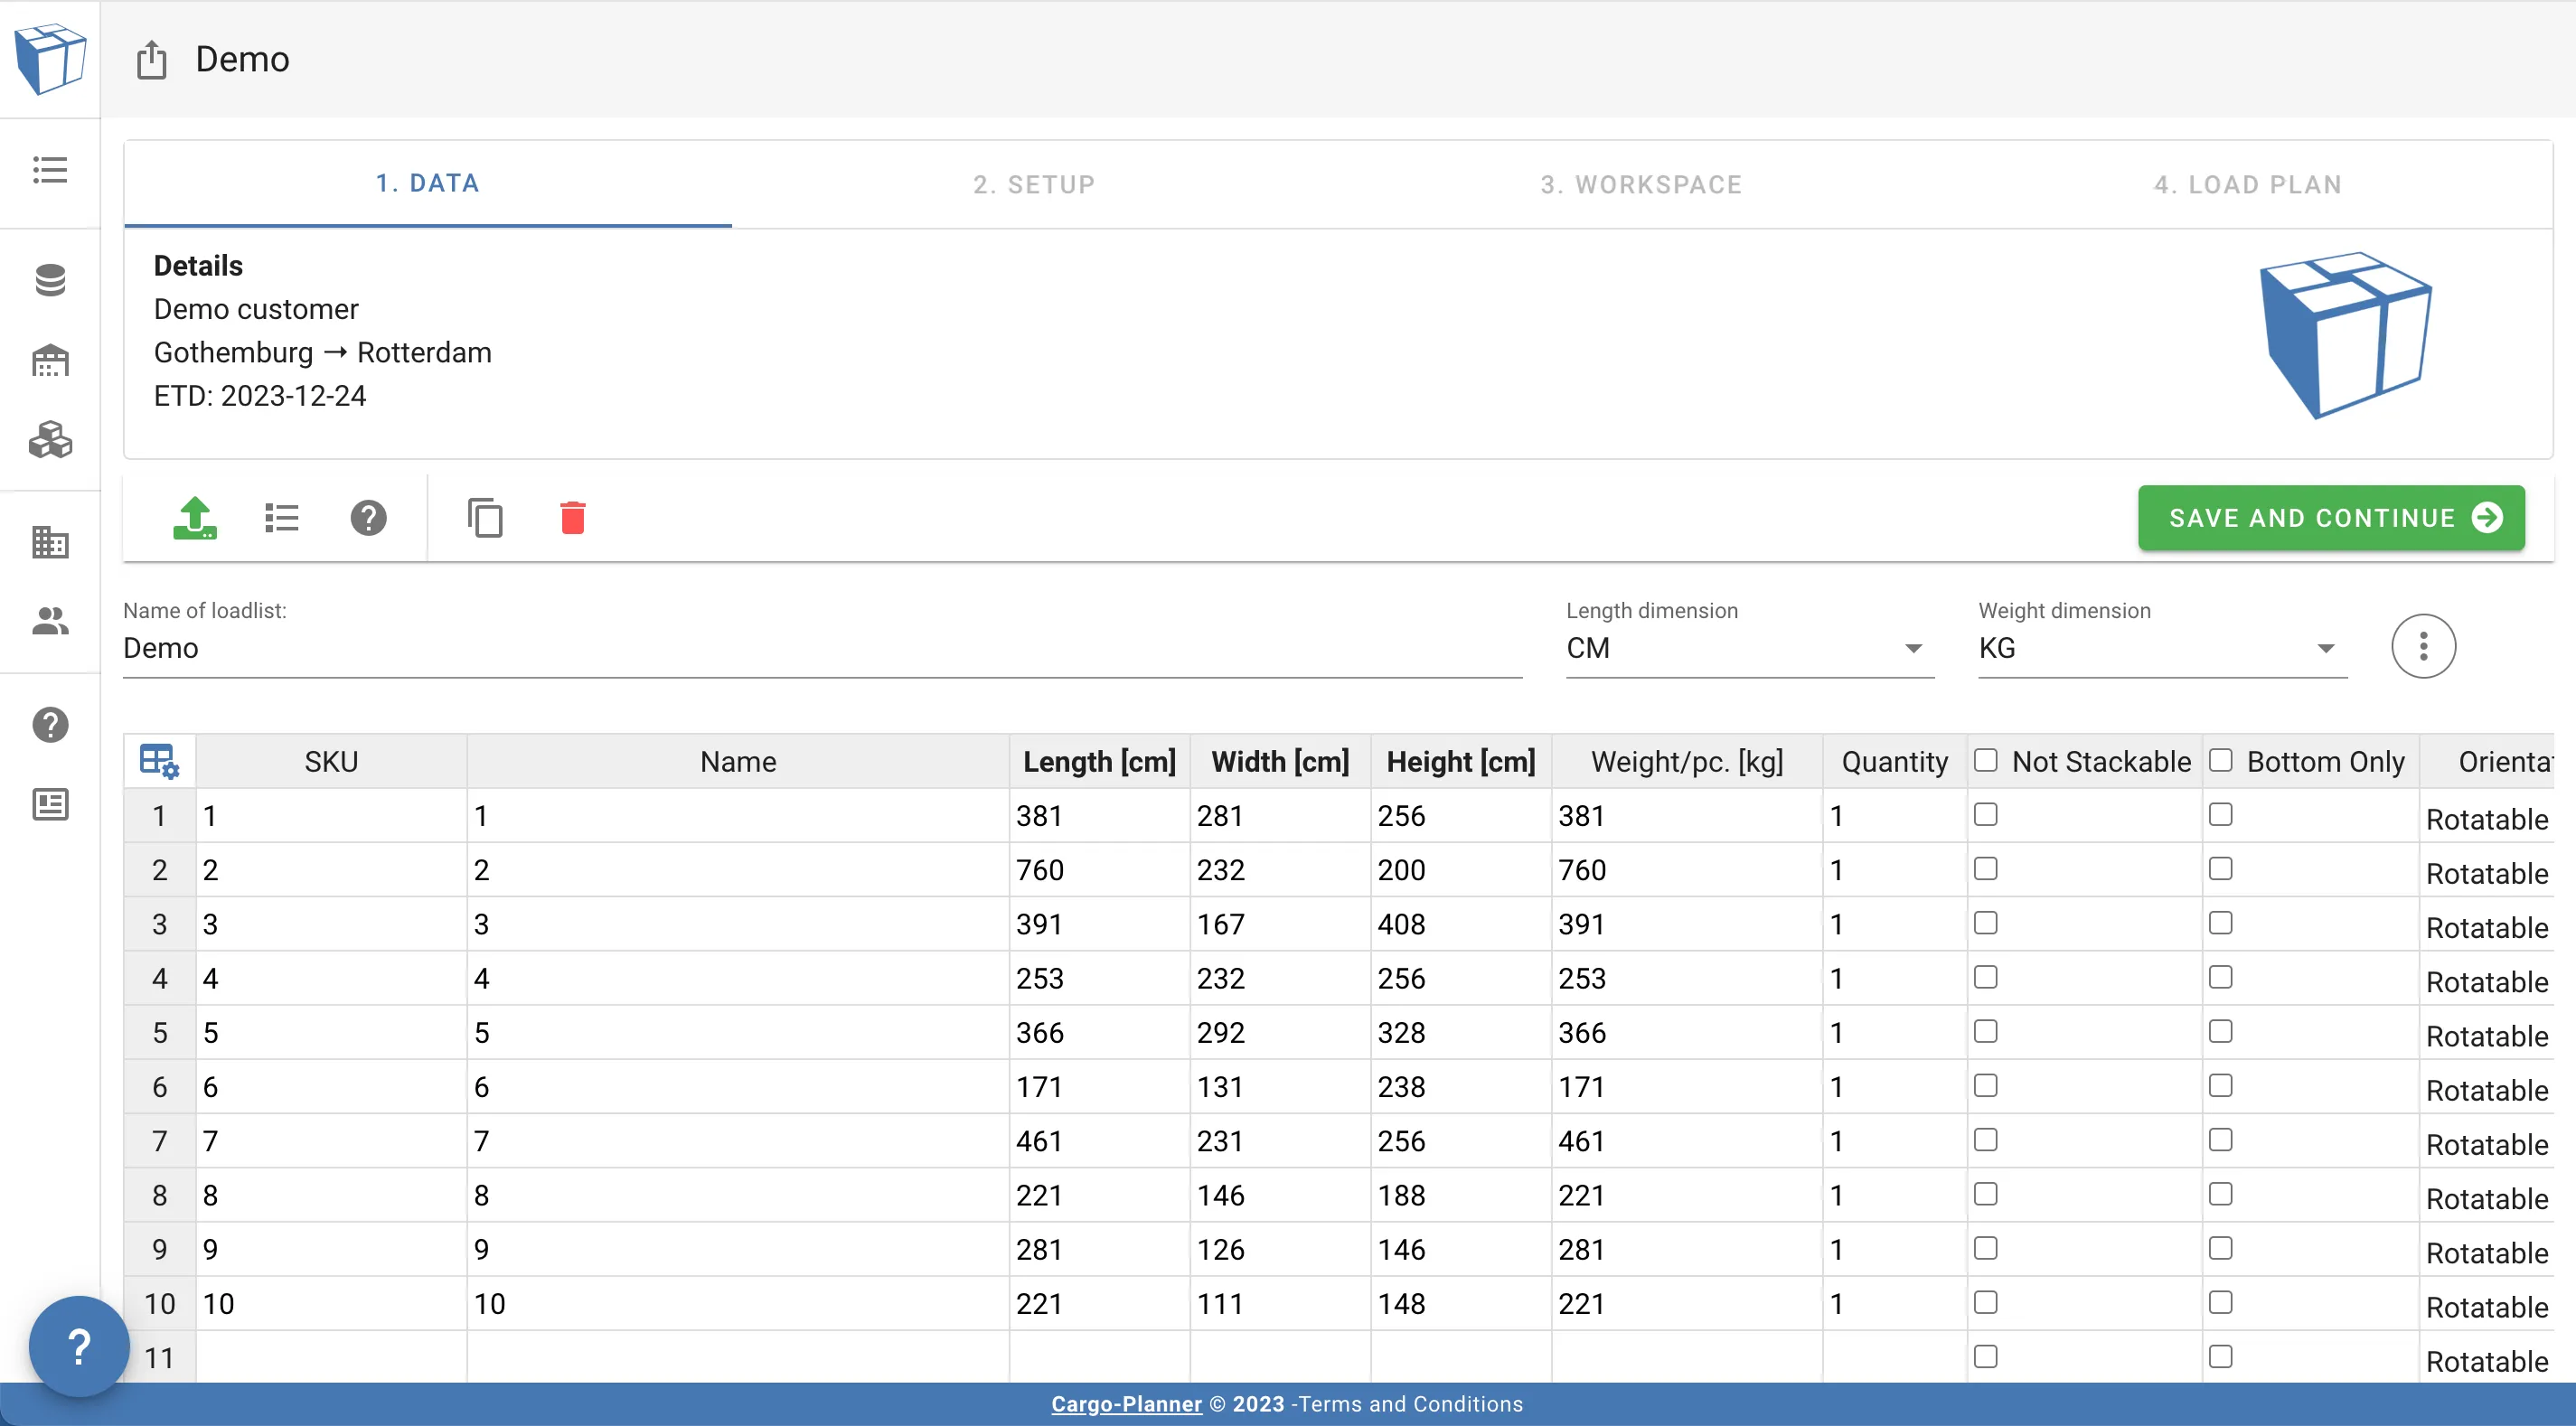
The tool will do a quick analysis of the provided data to assess its accuracy. If it detects potential issues, such as a possible selection error in dimensions or an imbalanced volume/weight ratio, a warning will be issued. If your data is indeed accurate, ignore the warning and proceed to the next step.
You can also enter additional meta data like port of loading, port of destination, customer and estimated time of departure, as well as some additional notes.
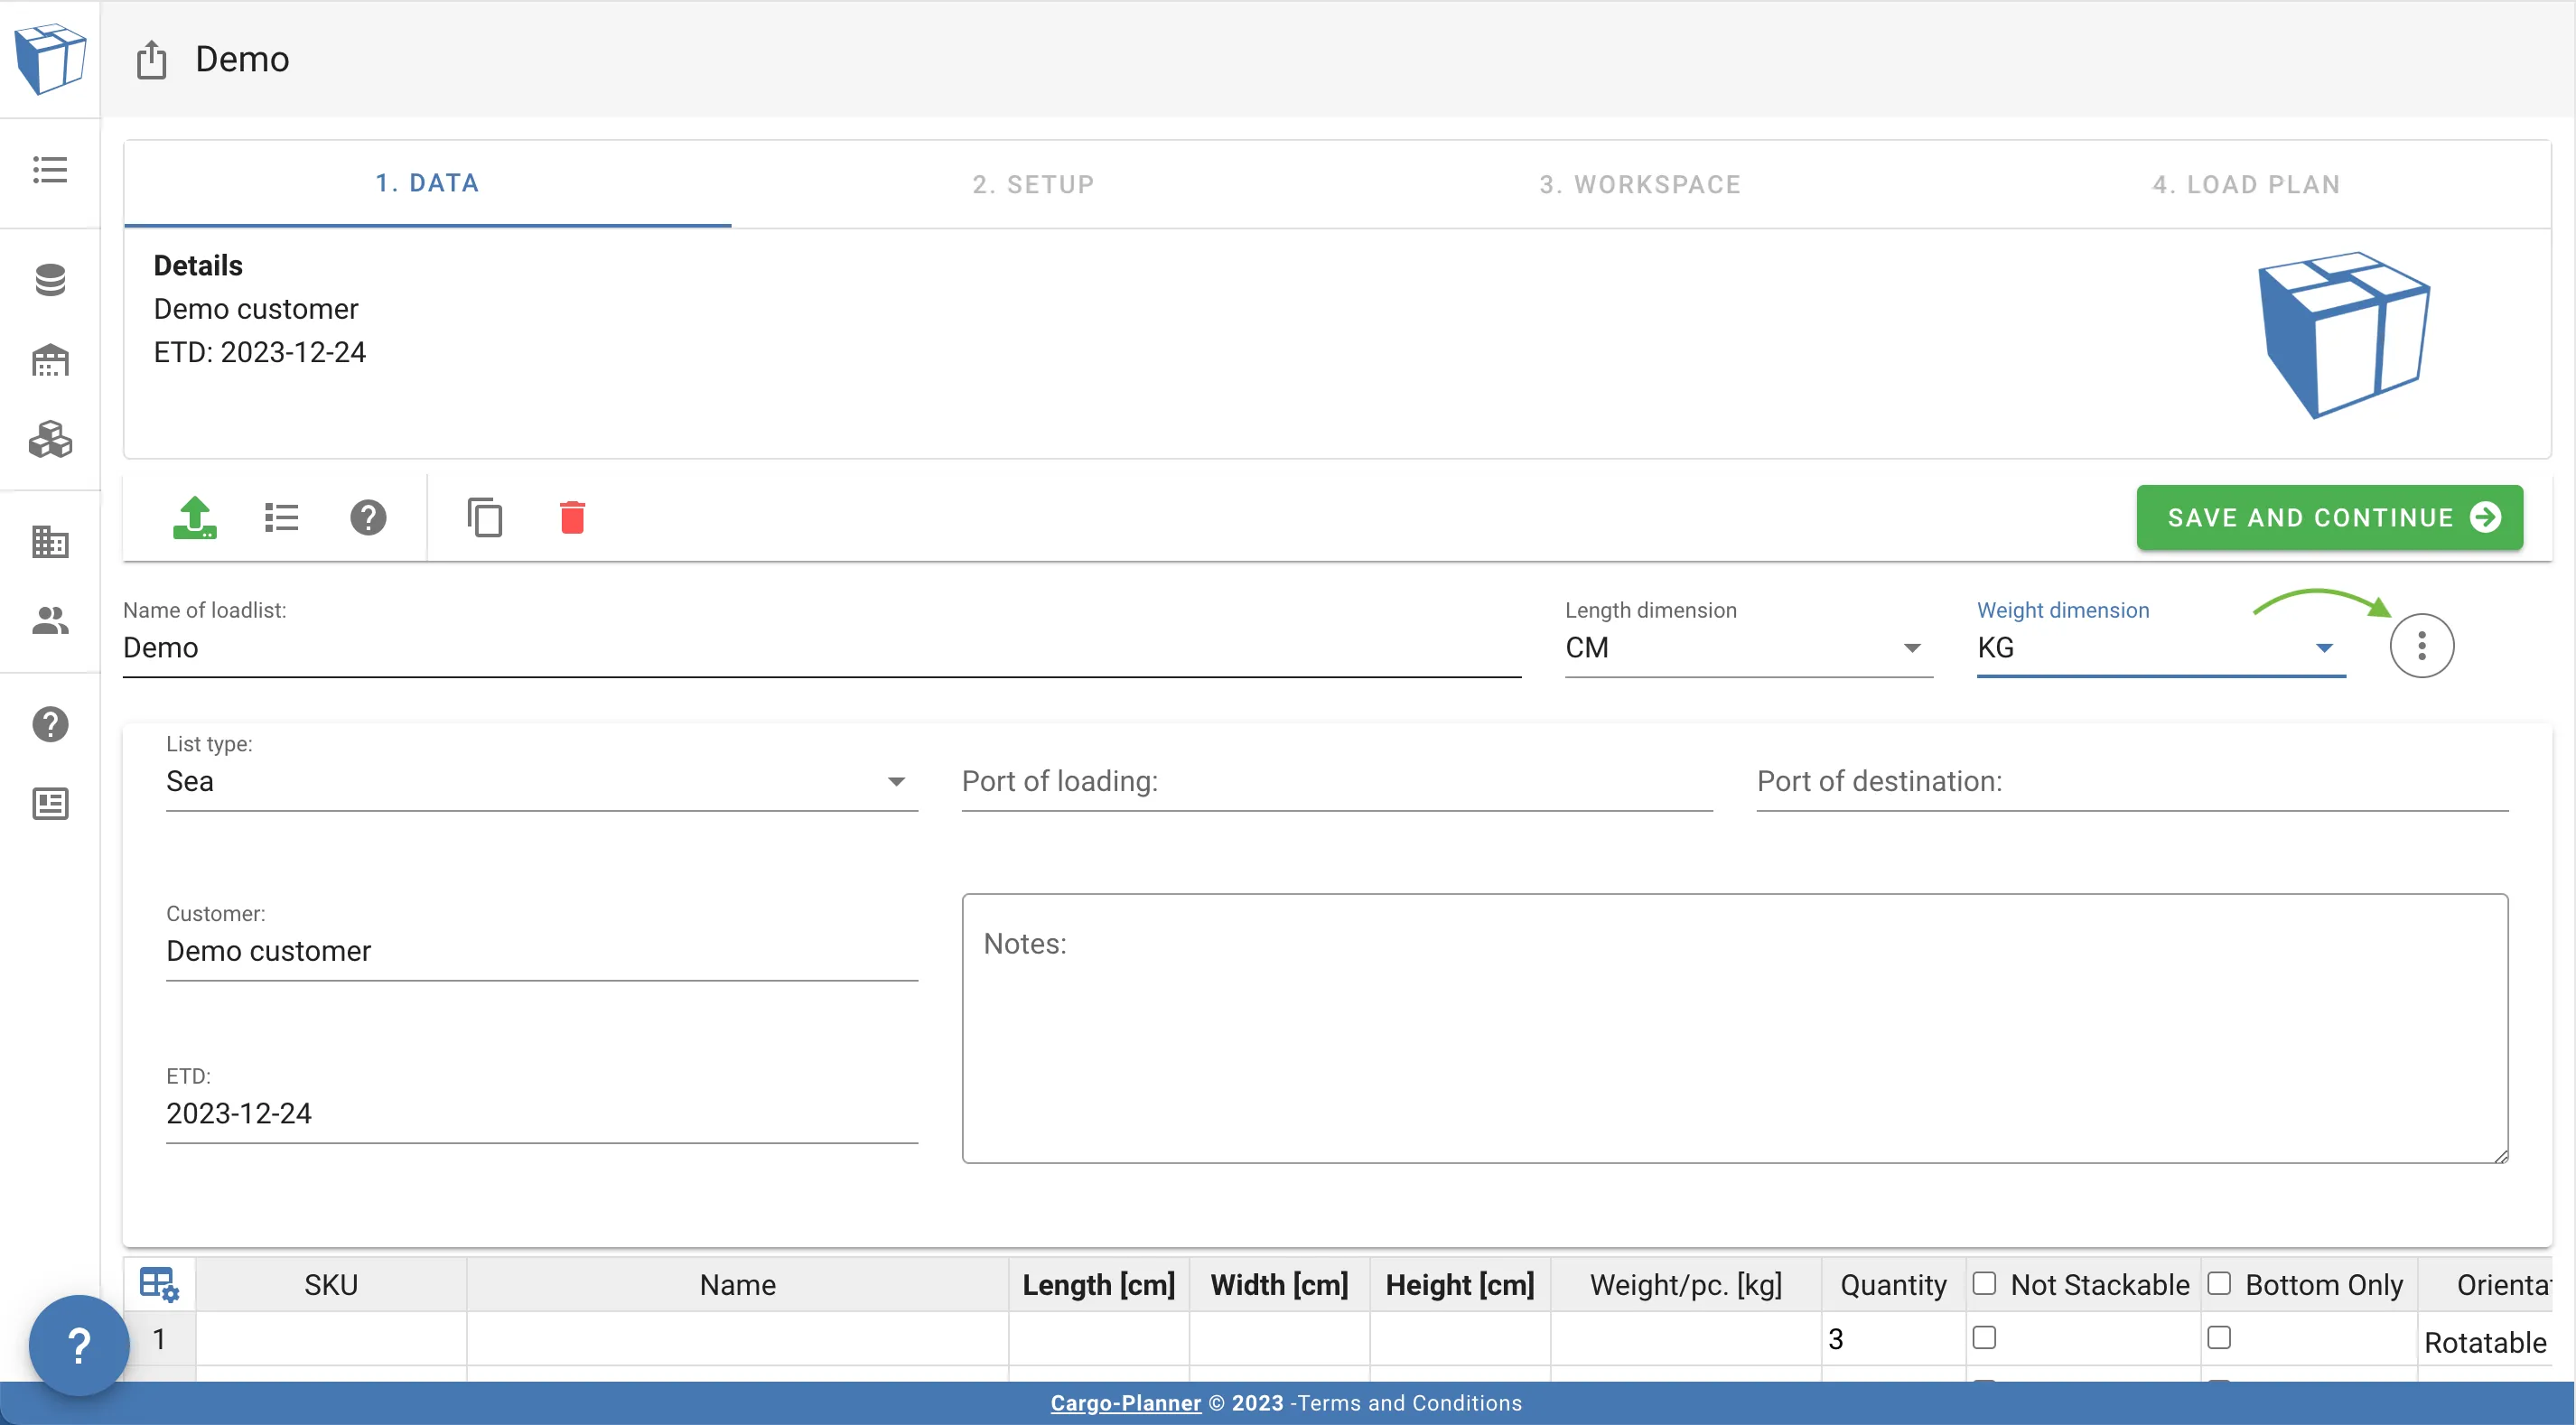
The estimated time of departure (ETD) field can be useful as you can then sort your different load plans according to this field so you can see which load plans are most urgent.
2. Setup
This is the step where you select what kind of equipment you have available for this particular load plan.
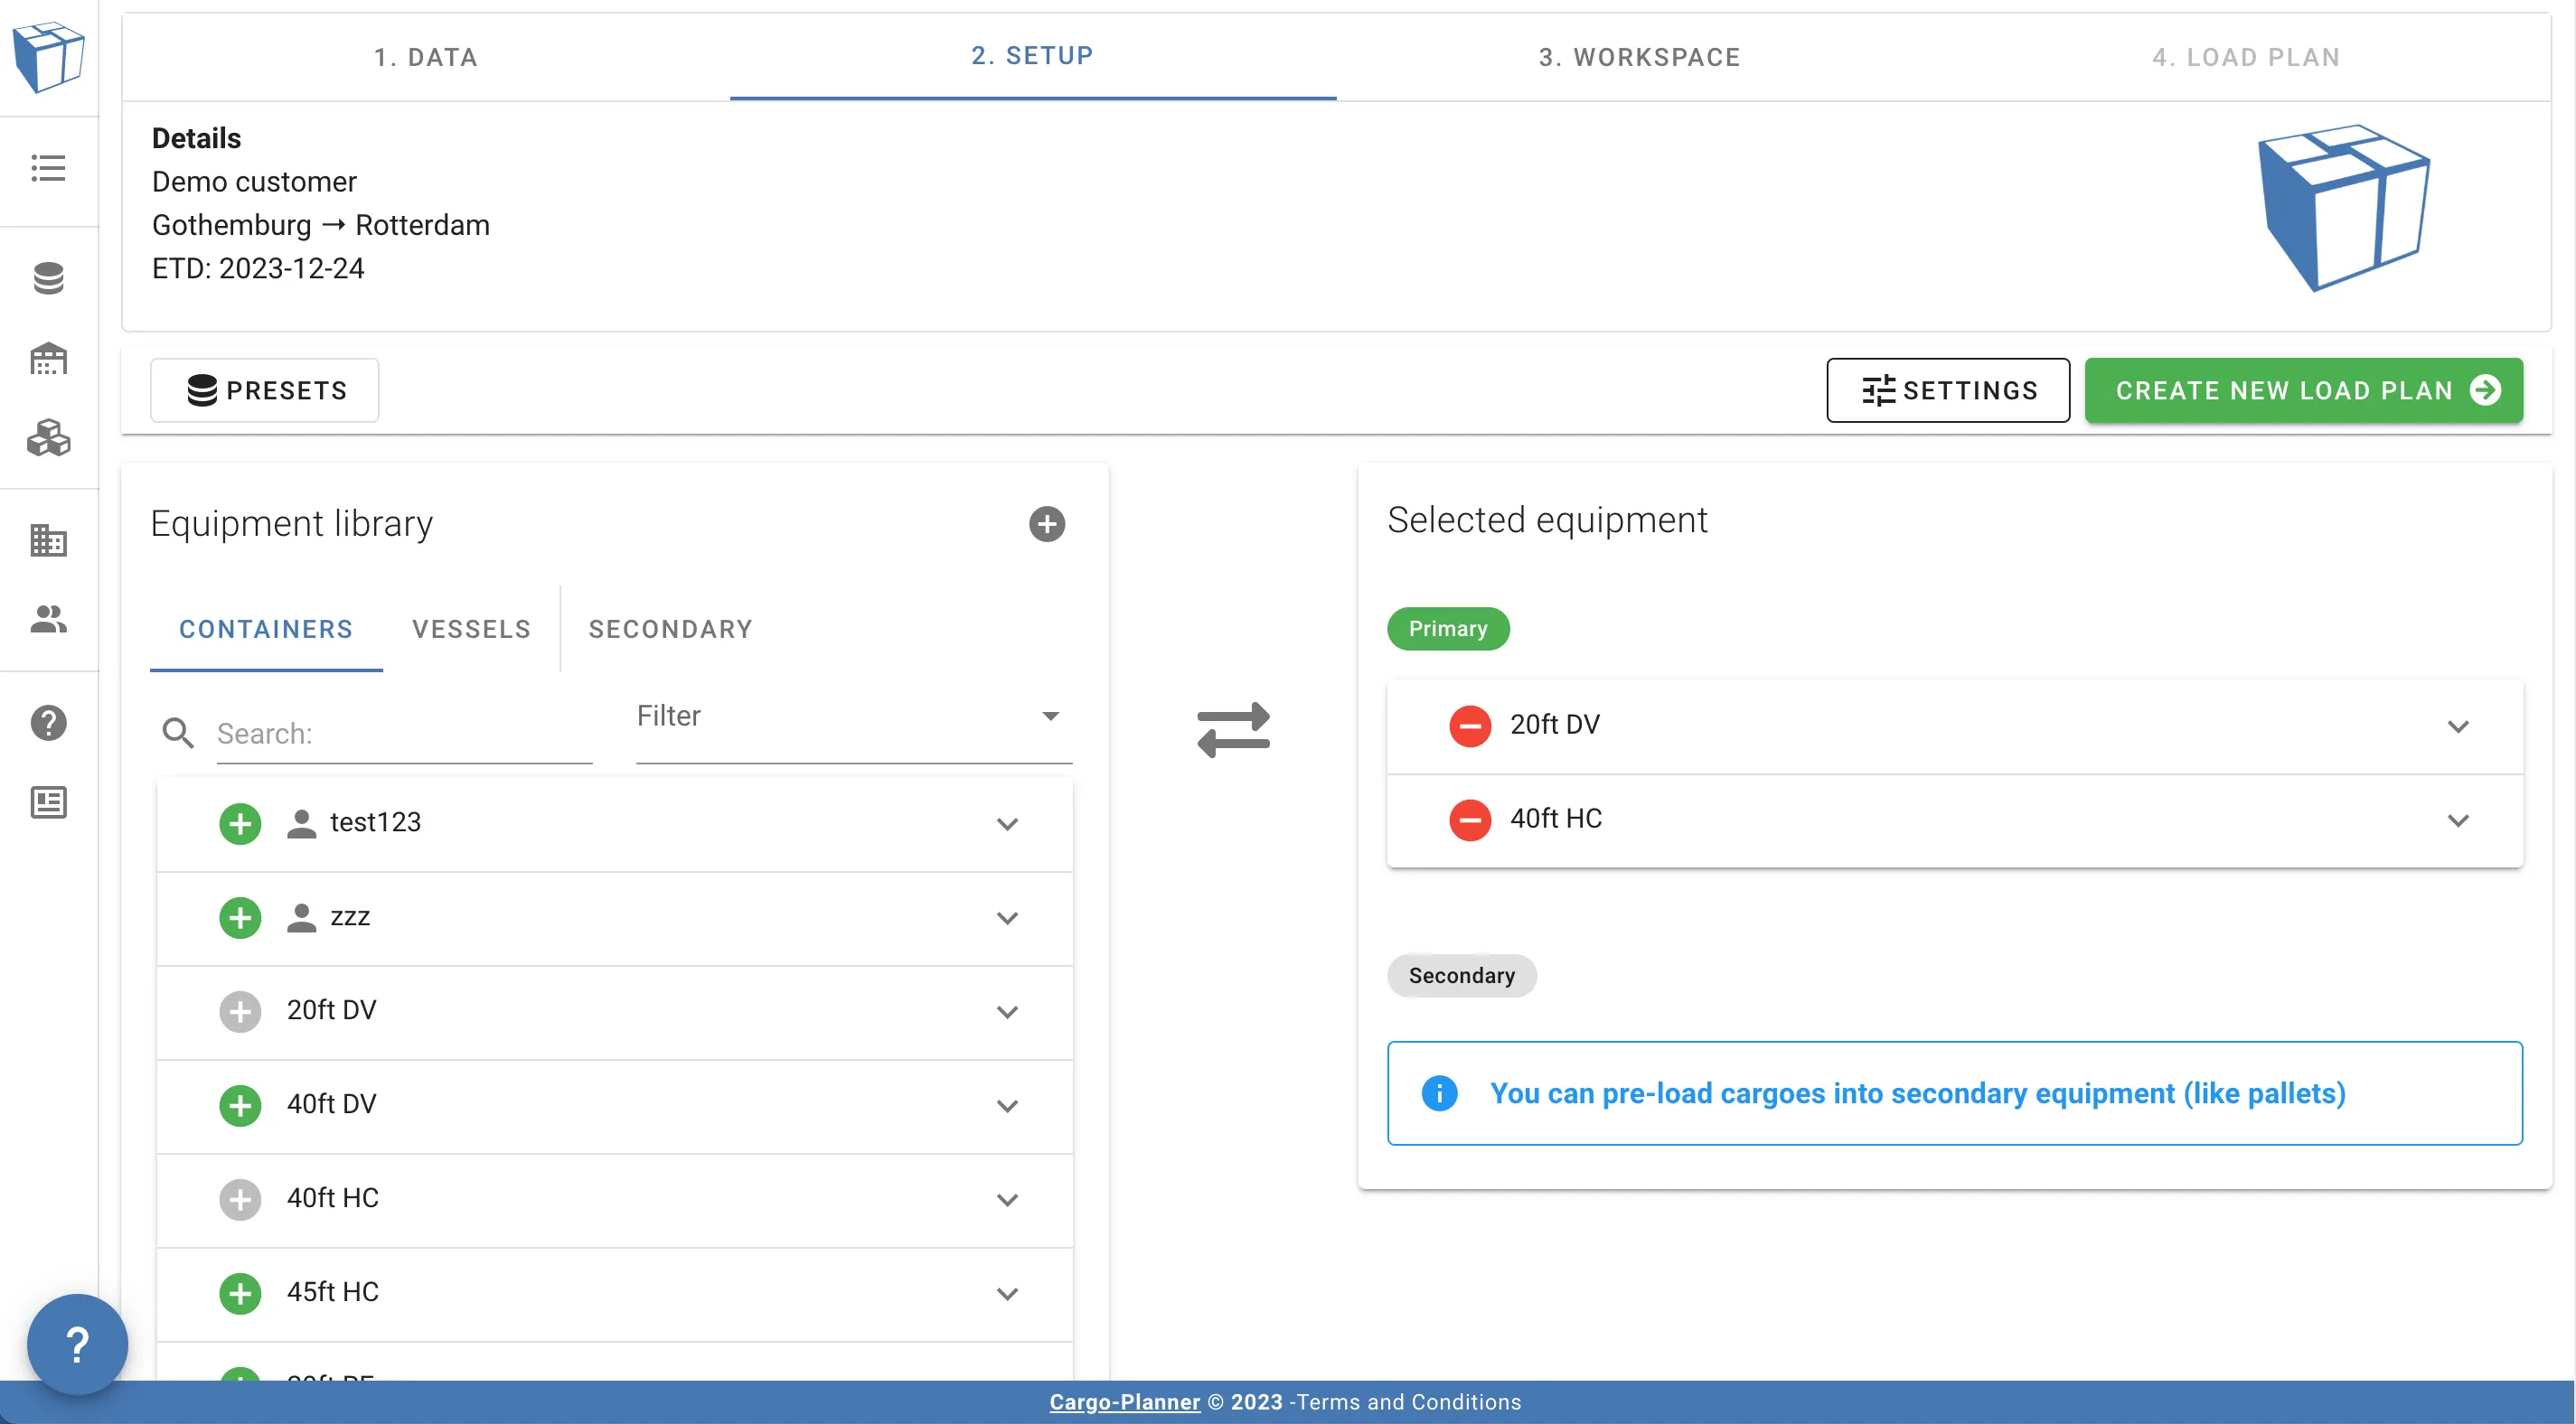
To the left is a panel with equipment available in the library. The library is divided into three sections:
- Containers - Types of predefined containers
- Vessels/Road trains/Aircrafts - Types of complete sets of containers. Ideal when planning entire shipments
- Secondary - Pallets, boxes, etc. that cargo can be preloaded in before being loaded into containers. See Working with pallets
You can expand each container to view its appearance and examine its specifications
To the right is a panel with selected equipment available to this particular load plan.
You move containers between the two panels by clicking on the green plus and the red minus buttons.
If more than one container type is available here then the tool will try to determine which one(s) is most suitable.
Each mode of transportation has a default set of containers that will populate this list by default.
You can change the default setup by creating a new or selecting an existing load configuration / preset
Please also have a look at the Load settings to have a look or change the used settings.
If you click on a container in this panel it will be expanded. Now you can change some container properties on the fly:

You can preload cargoes on pallets or boxes before being loaded into the containers. If you want to do that you need to select the “preload” column in the Data view for the cargoes you want to preload and also select a pallet type. You can read more about pallets under Working with pallets.
If you want to minimize the work done in this step, we again recommend to create a load configuration under presets.
When you are done, press “Create load plan” and watch the magic!
3. Workspace
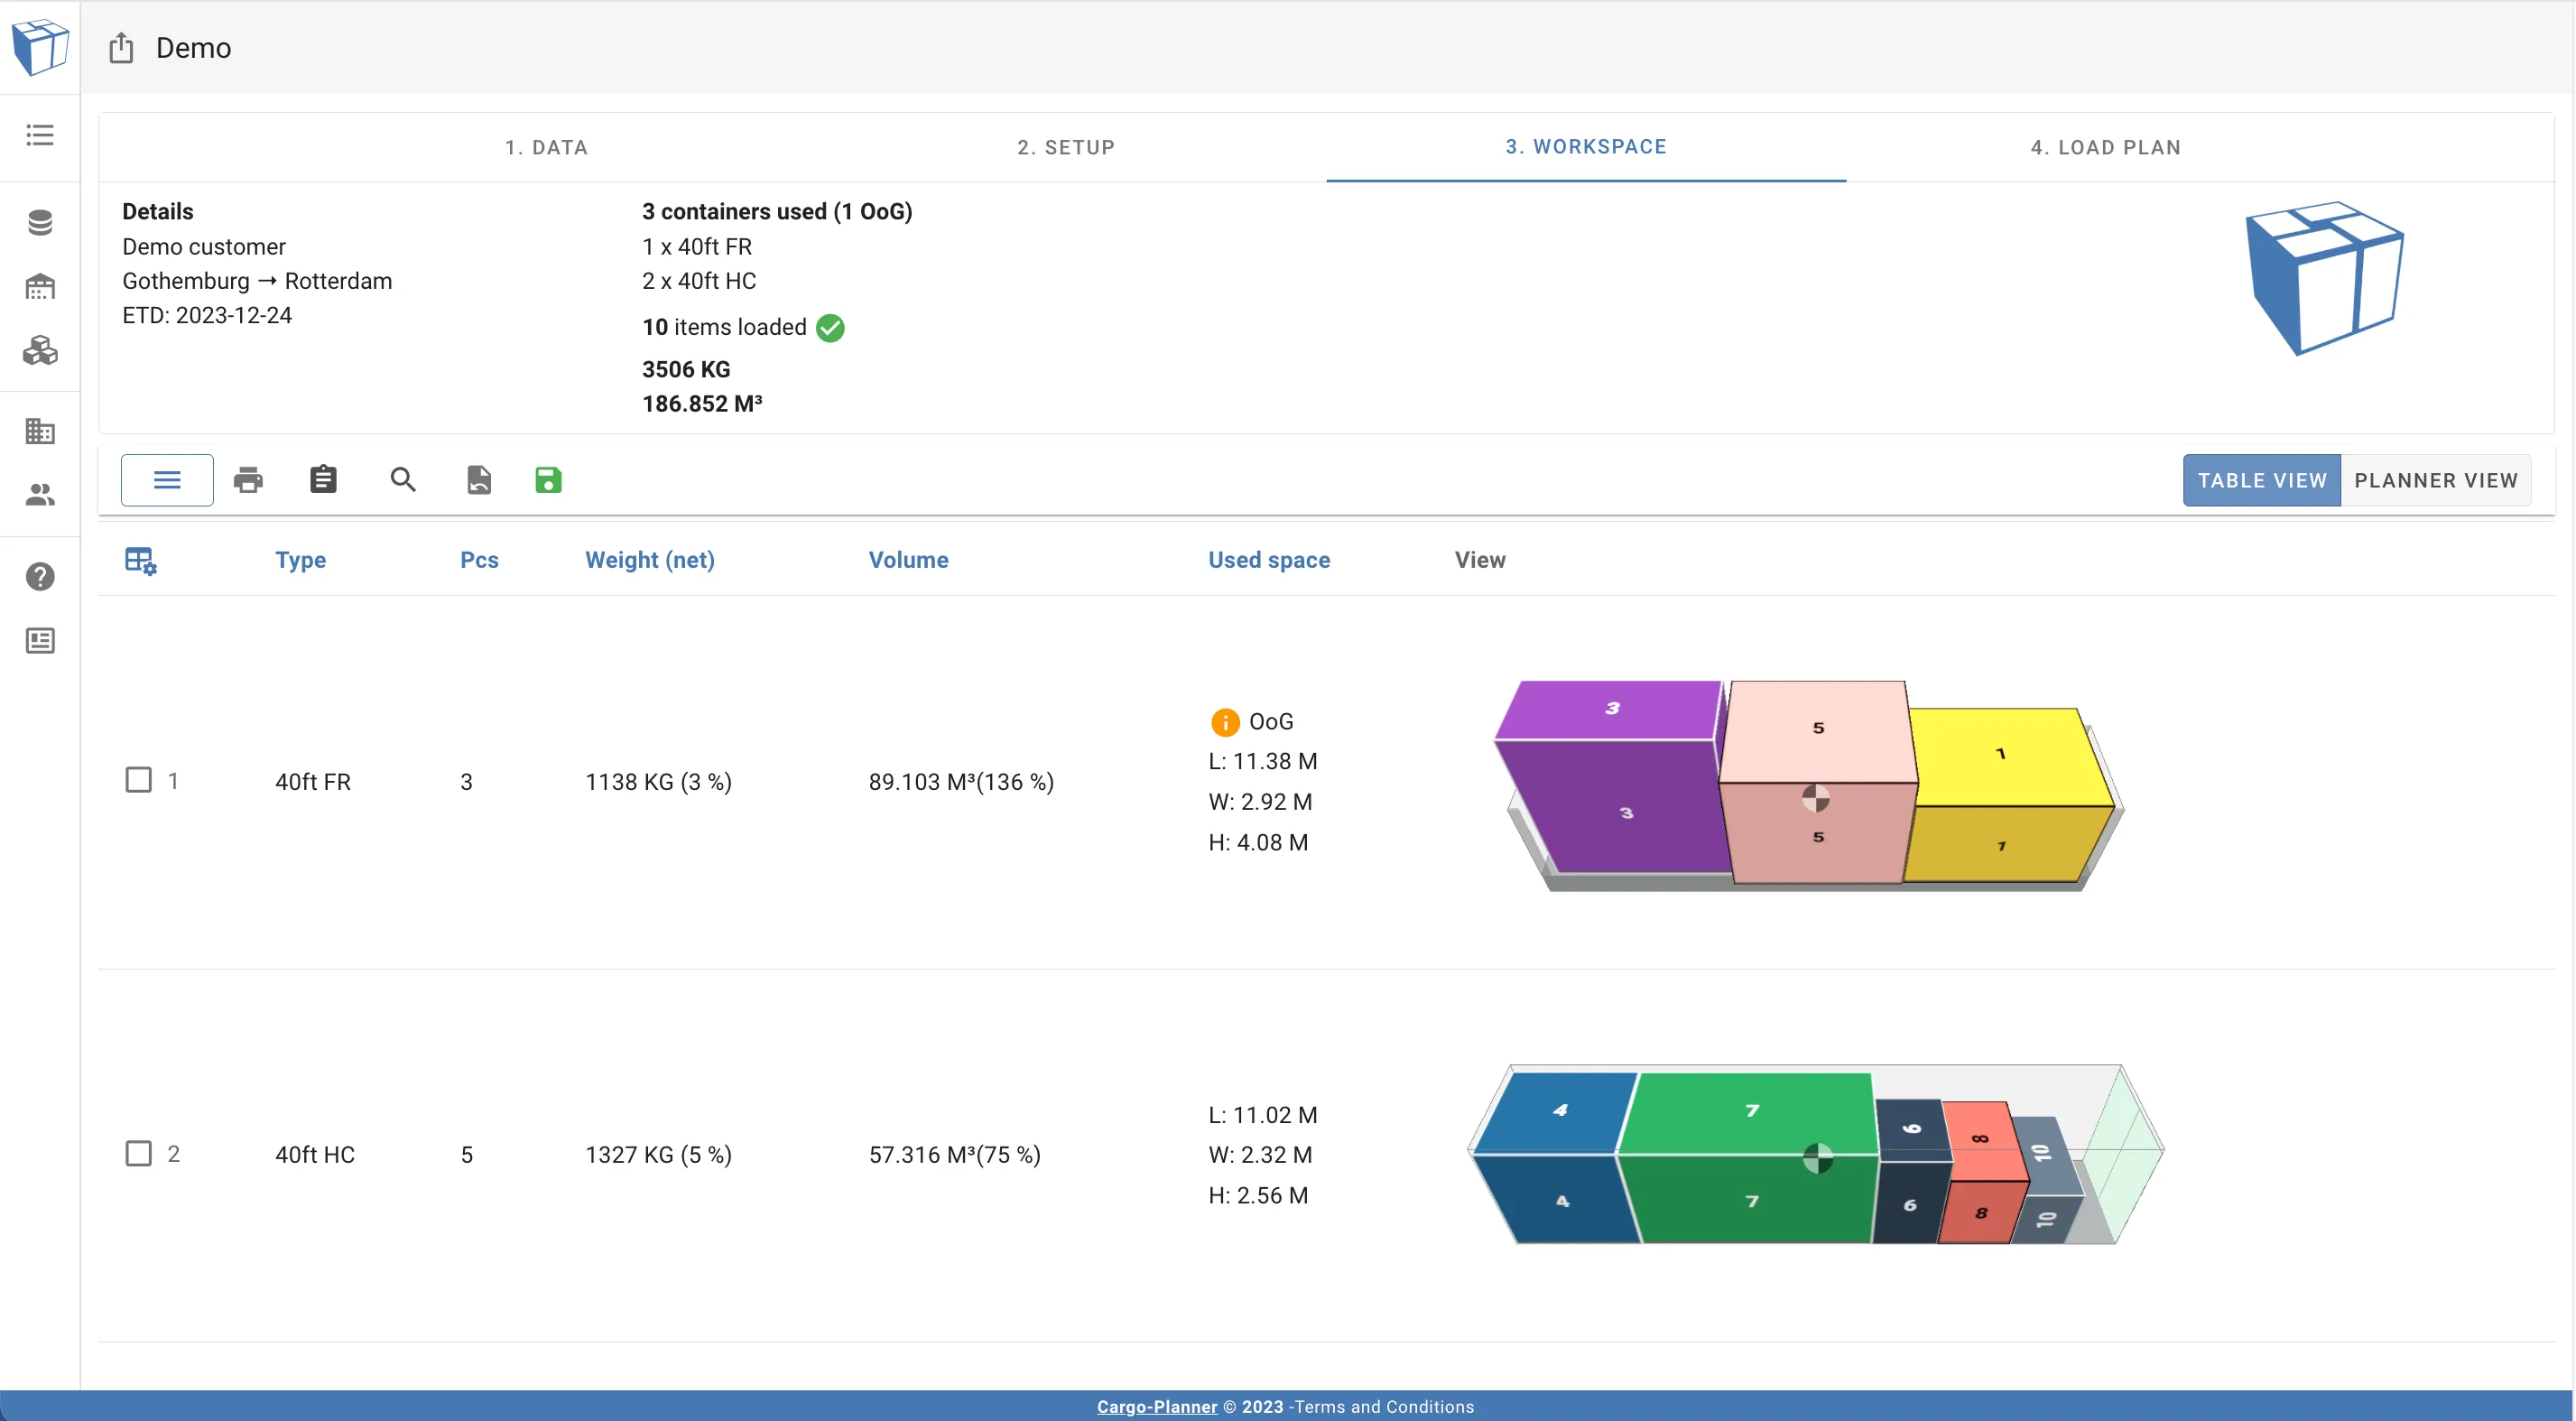
If all went well a load plan has been calculated for us:
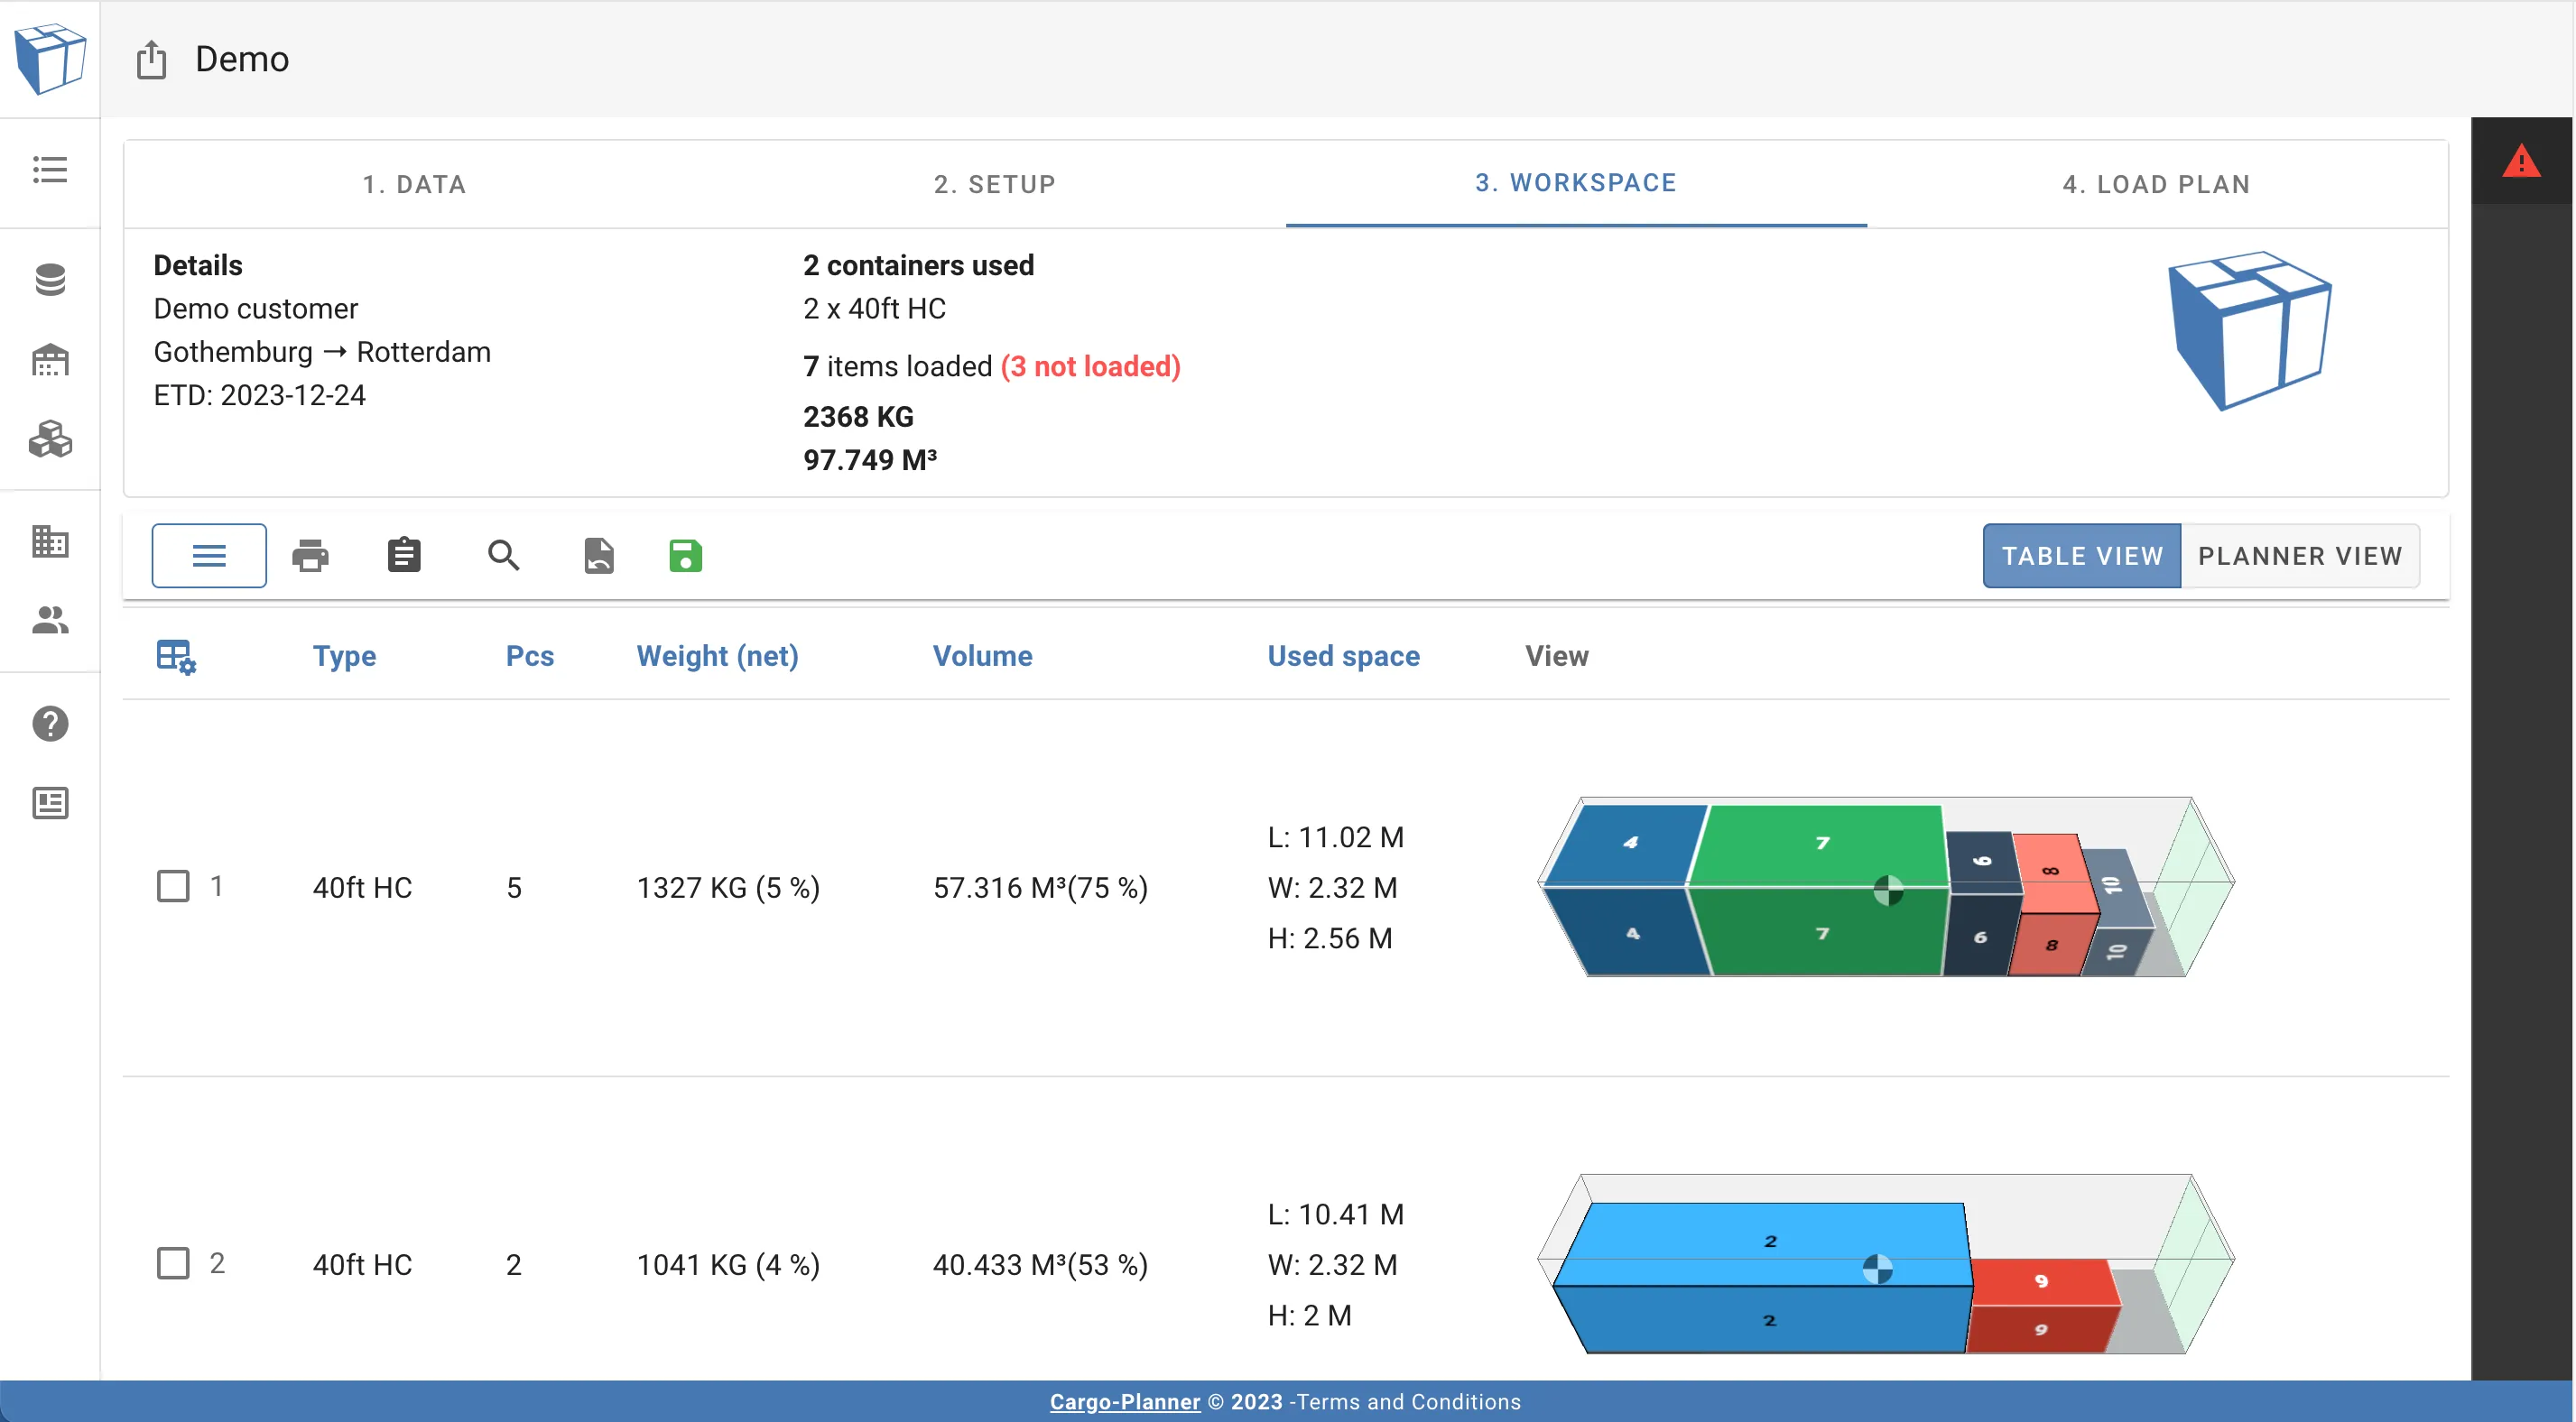
This view contains all the containers needed to load the provided cargoes. In the top there is a summary containing how many and what type of containers are used, and also the volume, weight and quantity of all the loaded cargoes.
You will also find a table where each row contains information about the specific containers as well as an image of the load layout. The columns should be quite straight forward. The “L x W x H” contains information on the used space in each of the directions.
If a container is open in any direction and it contains cargoes that are larger than the inside dimensions the OOG column will contain information on which side(s) have overhang.
If you click on the image of a container you will enter the interactive view. See The interactive 3D view for more details.
If you click on the menu on top of the table you will be able to modify the load plan which you can read more about here.
You’ll notice a menu to the right with a warning triangle. If you click on this panel it will expand - this is the unloaded items panel:

It’s a panel which contains cargoes from the load list not currently loaded into any container.
Usually you will encounter this view when you create a load plan where some of the cargoes are too big or too heavy to be fit in any of the selected container types. Cargoes may also pop up here if there are any other rules or properties set that for some reason do not permit the cargoes to be loaded.
You will also encounter this view if you are modifying a load plan.
As we see in this example, some of the cargoes found here are either too tall or too wide to be fit in the selected containers. Let’s fix that. We go back to 2. Setup view. We then add a 40ft Flat rack container which should be able to house those large cargoes:
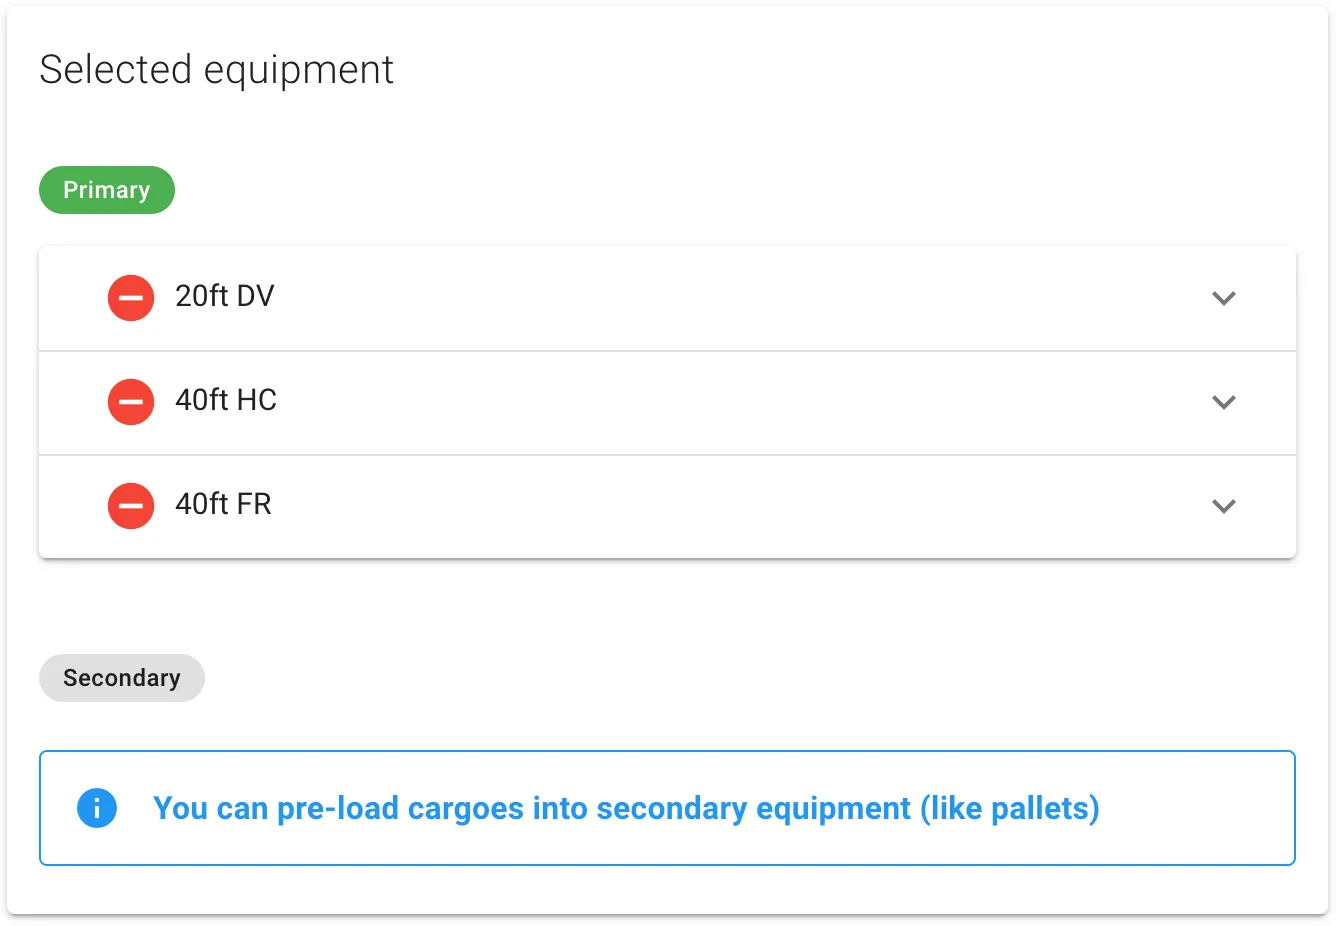
We press calculate again and we now see that all cargoes are loaded!
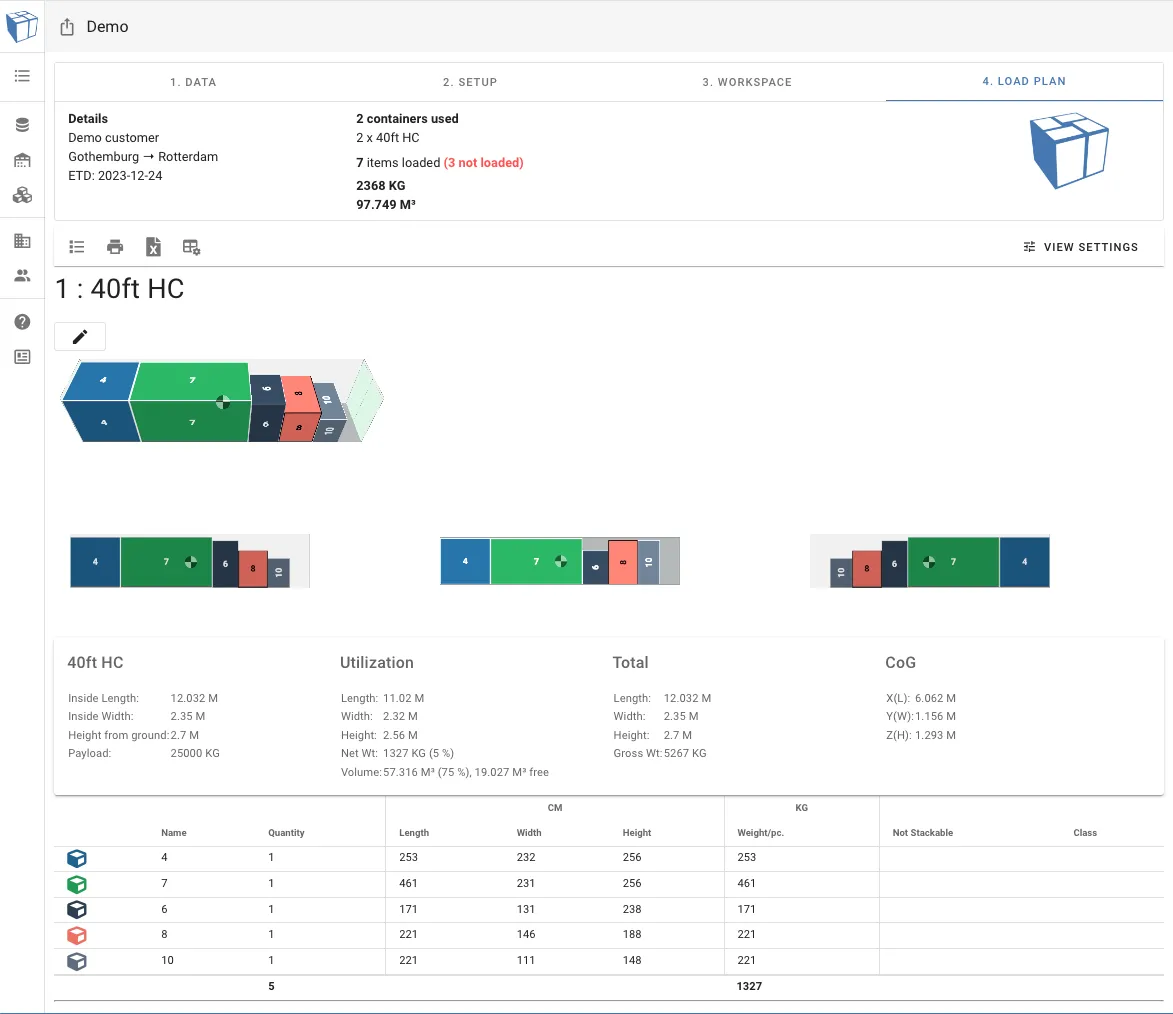
4. Load plan
The last step is where you will find a detailed list of which cargoes are to be loaded on which containers:
You can also under view settings select Show instructions to show how to load the cargoes in steps - which could be useful for the warehouse:
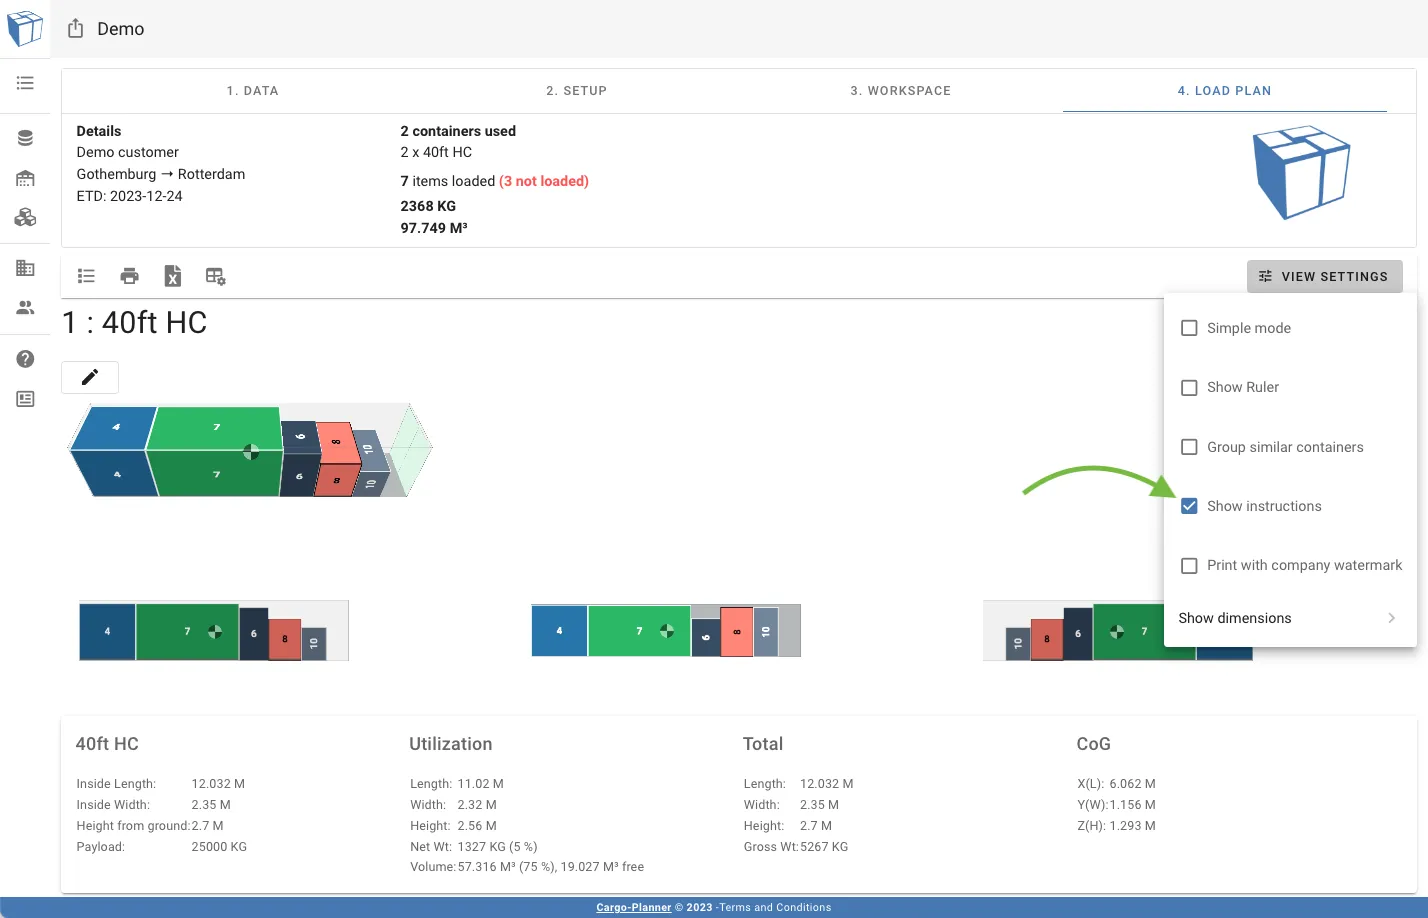
The loading order will then be shown under each container.

If you wish to collaborate with your colleagues by sharing your load plan, you can effortlessly achieve this by pressing the share button in the top left corner of the load plan. More information about sharing your load plan is described under Load plan sharing.