Cargo-Planner Docs
Inner Spaces
Inner spaces allow you to define hollow areas inside cargo that can be used for additional loading space. This feature is useful for items like cabinets, shelving units, L-shaped furniture, and any cargo with usable internal cavities.
Use Cases
- Cabinets and shelving: Define the internal shelf space where smaller items can be loaded
- L-shaped furniture: Create sofas, chairs, or desks with complex shapes by carving out sections
- Crates with openings: Model crates or containers with accessible interior space
- Equipment housings: Represent machinery with hollow compartments
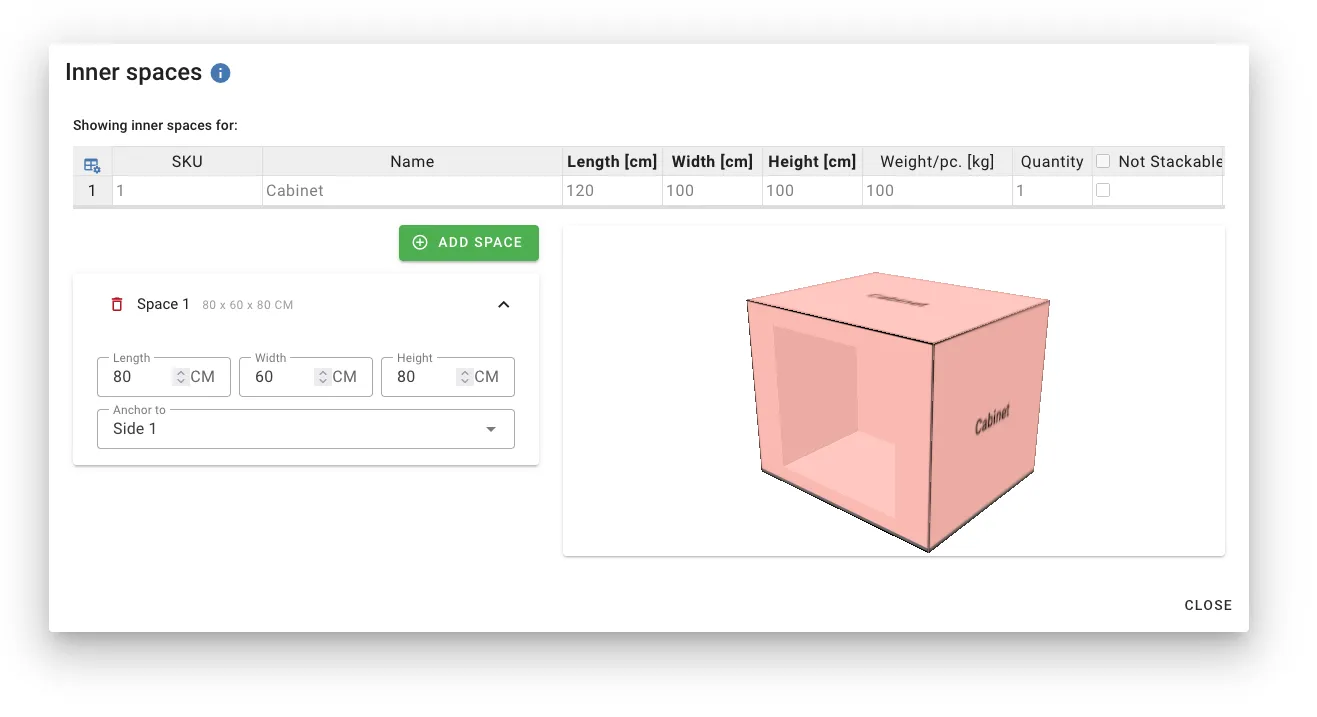
Accessing Inner Spaces
- In the cargo data table, locate the Inner Spaces column
- Double-click the cell for the cargo you want to modify
- The Inner Spaces modal will open with a 3D preview

Creating a Space
- Click Add space to create a new inner space
- Set the dimensions (Length, Width, Height) for the cavity
- Choose anchor points to position the space within the cargo
Dimensions
Each space has three dimensions that define the size of the hollow cavity:
- Length: The size along the cargo’s length axis
- Width: The size along the cargo’s width axis
- Height: The size along the cargo’s height axis
Dimensions are automatically clamped to not exceed the parent cargo’s dimensions.
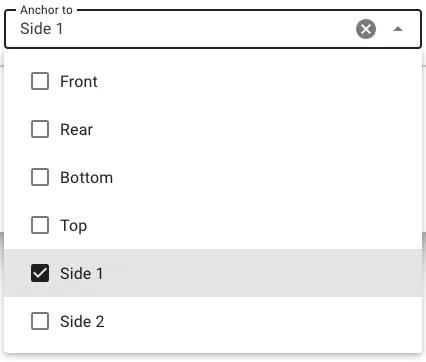
Anchoring
Anchors determine where the space is positioned within the cargo. You can anchor to one or more sides:
| Anchor | Position |
|---|---|
| Front | Space starts at the front face (x = 0) |
| Rear | Space ends at the rear face |
| Side 1 | Space starts at the first side (y = 0) |
| Side 2 | Space ends at the second side |
| Bottom | Space starts at the bottom (z = 0) |
| Top | Space ends at the top |
When no anchors are selected, you can manually position the space using X, Y, Z coordinates.
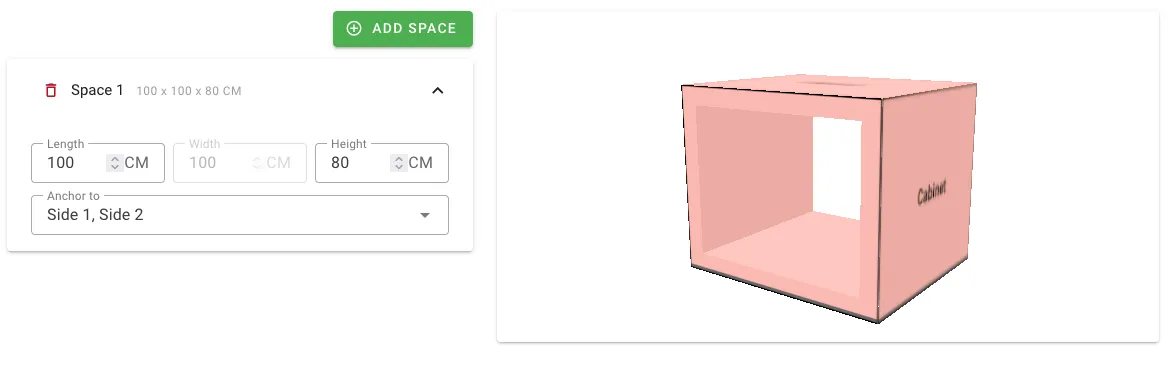
Spanning Full Dimensions
When you select opposing anchors (e.g., Front + Rear), the space automatically spans the full dimension of the cargo in that axis. This is useful for creating:
- Through-holes: Anchor to Front + Rear for a tunnel through the cargo
- Full-width shelves: Anchor to Side 1 + Side 2 for a shelf spanning the entire width
- Floor-to-ceiling cavities: Anchor to Bottom + Top for a vertical shaft
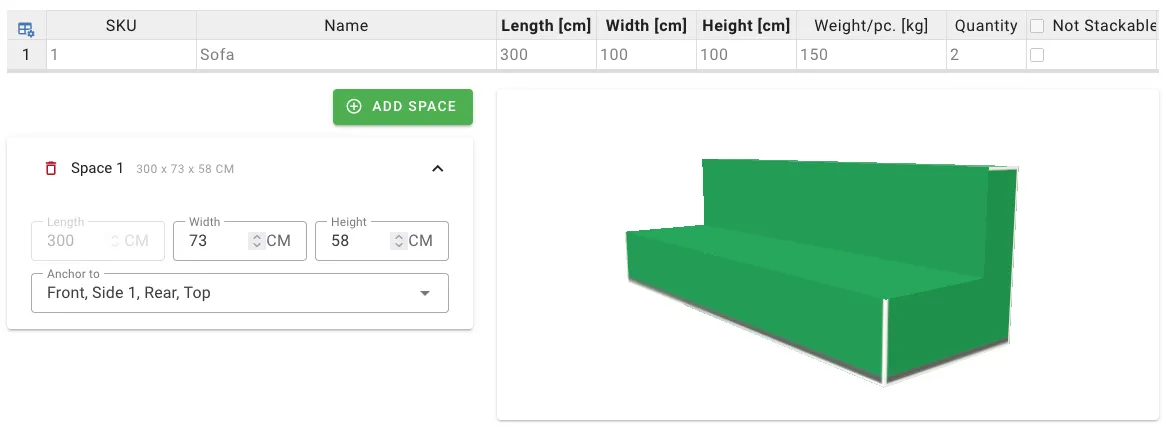
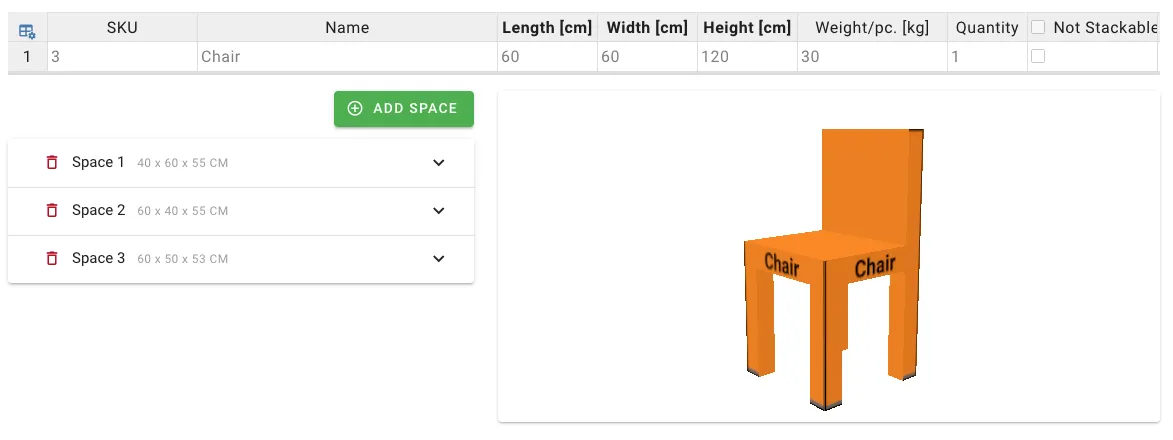
Creating L-Shaped Objects
To create an L-shaped cargo like a sofa or desk:
- Add a space and anchor it to Top and one side (e.g., Side 1)
- Adjust dimensions to carve out the desired L-shape
- The 3D preview shows the resulting geometry in real-time
Creating Hollow Containers
For cargo like cabinets or crates with internal loading space:
- Add a space that represents the interior cavity
- Anchor to Side 1
- Set dimensions smaller than the cargo to create wall thickness
Multiple Spaces
You can add up to 10 inner spaces per cargo item. This allows for complex geometries:
- Multiple shelves at different heights
- Compartmentalized storage units
- Complex furniture shapes
3D Preview
The modal includes a real-time 3D preview that updates as you modify spaces. The preview shows:
- The outer cargo geometry (semi-transparent)
- Each inner space as a visible cavity
- How spaces interact with each other
Use the preview to verify your configuration before saving.
How Inner Spaces Affect Loading
When the load planning algorithm runs:
- The cargo is placed in the container based on its outer dimensions
- The inner spaces become available loading areas
- Smaller cargo items can be loaded into the inner cavities
- Weight and stacking rules still apply within inner spaces
This allows efficient use of hollow cargo, maximizing space utilization in your load plans.