Cargo-Planner Docs
Modifying a load plan
Even though Cargo-Planner usually creates good to go load plans you might sometimes need to change and modify the generated result. Maybe your customer has special requirements of the chosen containers and cargo positions. That is why we have made it extremely easy to do that in Cargo-Planner.
For a full list of the buttons and menu options in the Workspace, see The Workspace toolbar.
Let us look at an example:
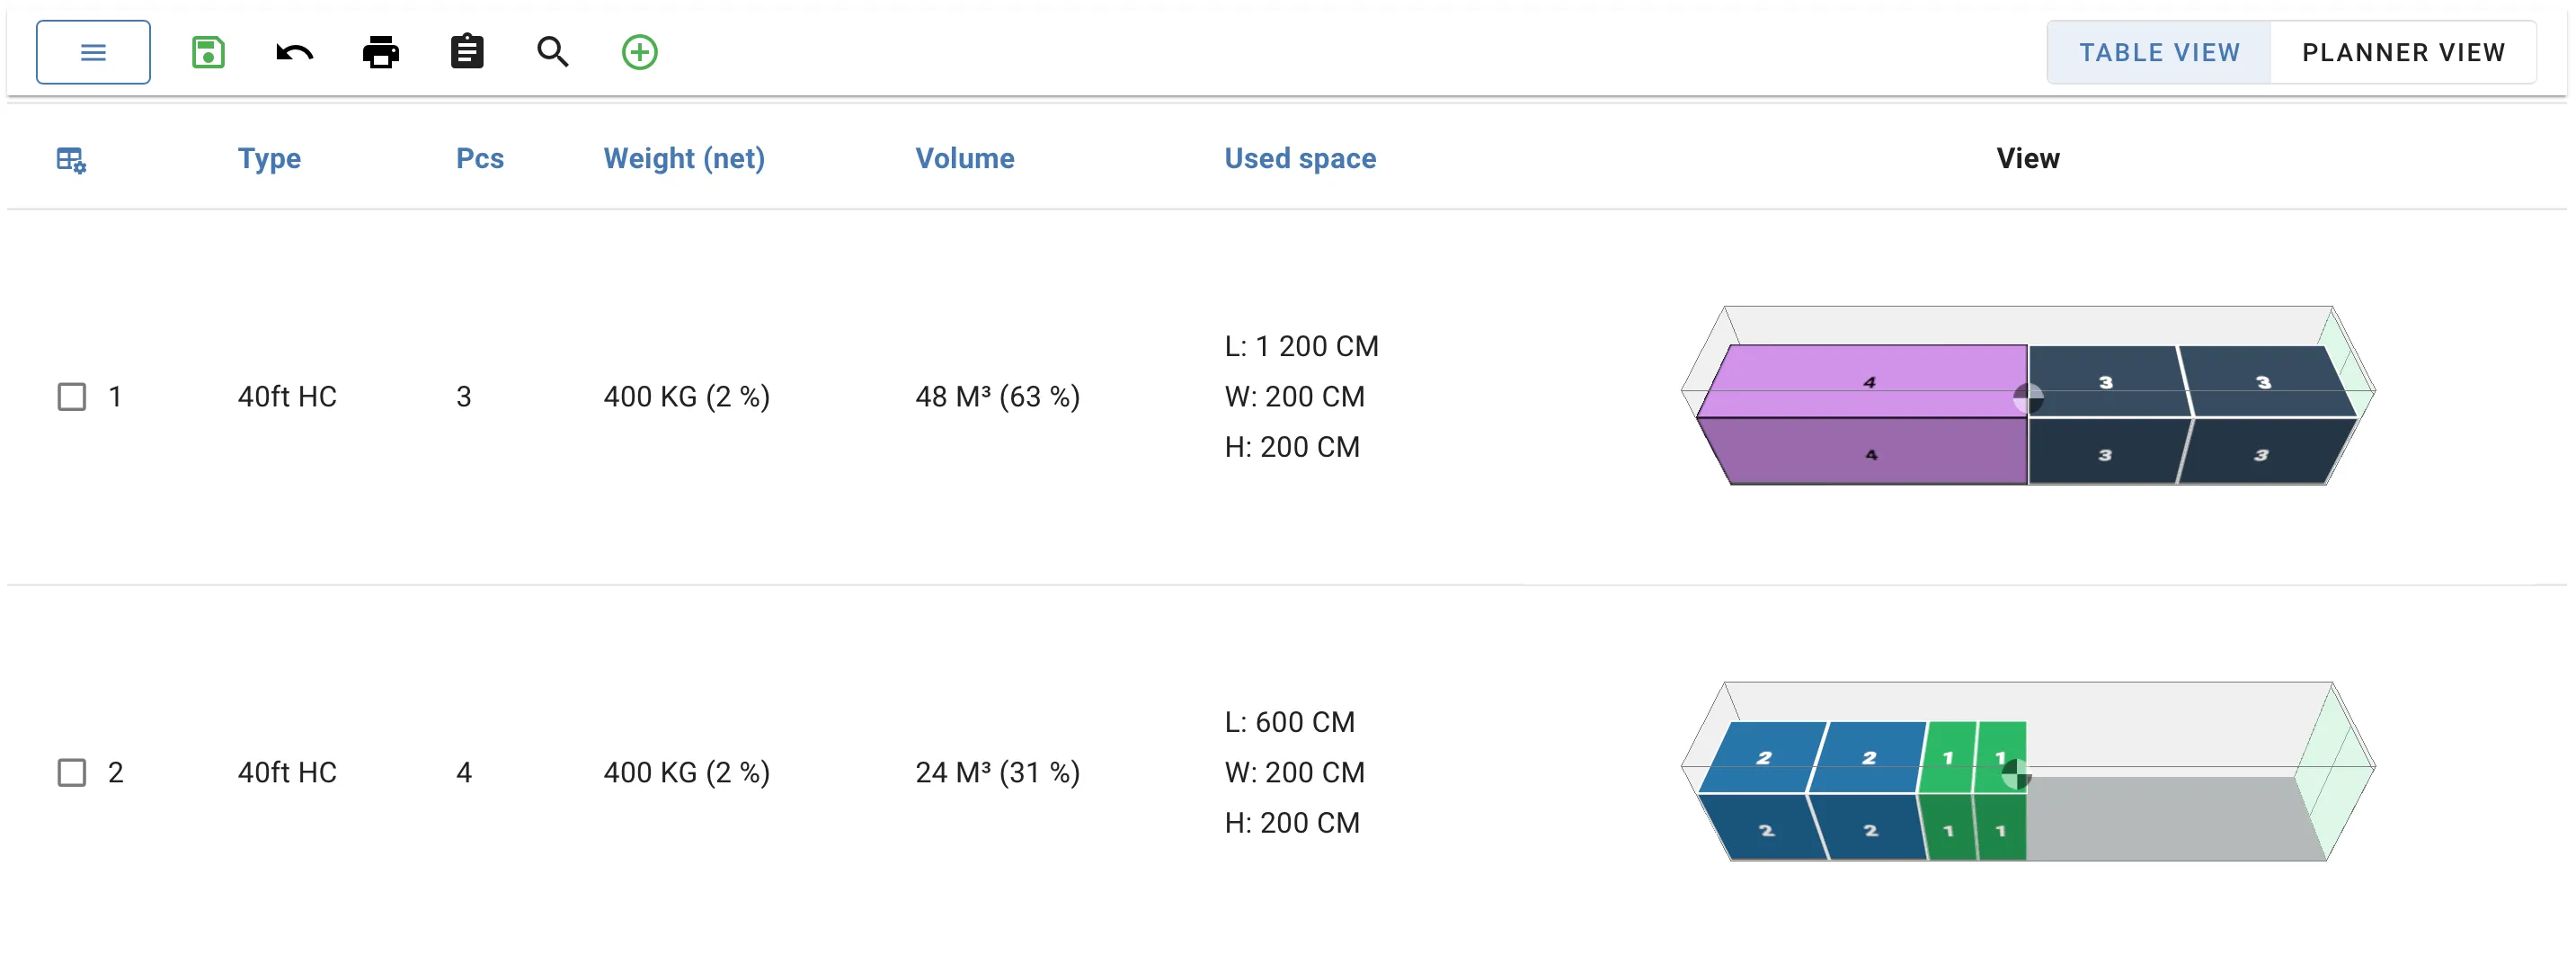
Container number 1 holds a big cargo which we would rather not load in a 40 ft HC but use a Flatrack instead.
The first thing we do is to change this container. In the Workspace view we select the container and then change the container to a Flatrack instead:

Great, it is now a flat rack container instead. However, because all the cargo did not fit in a flat rack, it loaded the excess cargo in a new container.
The Interactive view
To correct this we go into the Interactive view by clicking on the 3D visualization of the container. When inside the interactive view, we click on the cargo that we want to unload and press the unload button.

You can also unload selected cargo(s) by pressing the Del or Backspace button. The cargo is then popped up in the “Unloaded items” view meaning it is not currently loaded into any container.
We then go back and enter the interactive view of the 40ft HC container and open up the unloaded items view. We use our mouse to drag the item into the container:

The drag and drop functionality also works outside of the interactive view.
Before wrapping up, we remove the empty container.

In similar ways you can create and delete containers from the load plan. This gives you the freedom to modify the result according to your preferences.
The Planner View
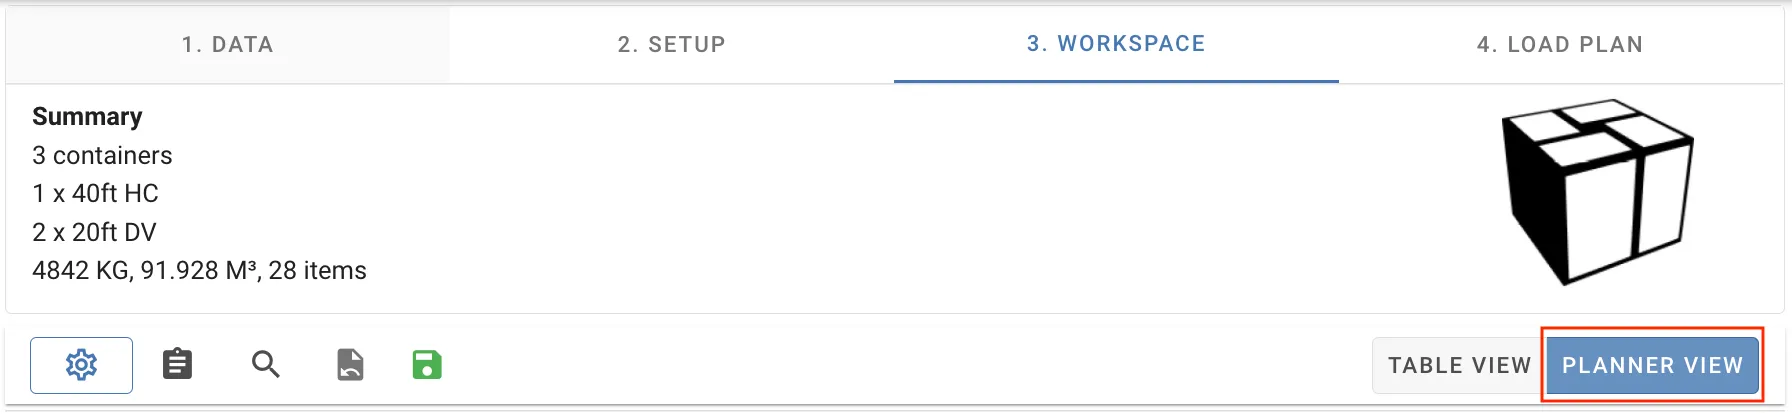
If you often need to move cargoes inside a container or between containers we suggest that you instead use the planner view. It has been created to simplify loading and moving cargoes. You can easily access it by toggling the view setting in the top right corner:

We can move cargo between containers, as well as rearrange the loading order of cargo, simply by dragging and dropping it.

When we are happy with our modifications to the containers, we delete the empty container and save our results.
Secondary Equipment
The same functionality is available for secondary equipment when included in your load plan. Simply toggle between viewing your primary and secondary equipment in your list. Access the interactive view as before. See below;

The Workspace toolbar
The toolbar at the top of the Workspace holds the tools for changing the load plan as a whole: adding, converting, removing and locking containers, and moving them into new load lists.

Labels adapt to the mode of transport. Where this article says container, the app shows ULD, trailer or pallet depending on the load list type.
Most tools act on the selected containers. Select a container by ticking the checkbox in its row in the Table or Planner view. When similar containers are grouped, one checkbox selects the whole group.
Toolbar buttons
| Button | What it does |
|---|---|
| Menu (☰) | Opens the Workspace menu with all options below and a few more. |
| Undo loadplan change | Reverts the last change made to the load plan in the Workspace or the Interactive view. |
| Prints the Table view. Only shown in the Table view. | |
| Loadplan notes | Shows a notes field. Notes are saved with the load plan and included in the exported load plan. |
| Search for cargo | Shows a search field. Only containers holding a cargo whose name, SKU or shipment ID matches are listed. Cargo inside pallets is included. |
| Add empty container | Opens the add or convert dialog to add an empty container. |
| Primary / Secondary | Switches between the containers and the pallets loaded in them. Only shown when the load plan contains pallets. |
| Overview / Table view / Planner view | Switches the Workspace view. Overview is only shown when the load plan uses sets. |
When one or more containers are selected, these buttons also appear:
| Button | What it does |
|---|---|
| Change type of selected | Opens the add or convert dialog to replace the selected containers with another type. |
| Remove selected | Deletes the selected containers and their cargo from the load plan. |
| Empty selected | Unloads all cargo from the selected containers but keeps the empty containers. The cargo goes to Unloaded items. |
| Lock / Unlock selected | Locks the selected containers. See Locking containers. |
The Workspace menu
The menu button on the left of the toolbar opens a list of all Workspace operations. Options that need a selection are greyed out until you select at least one container.
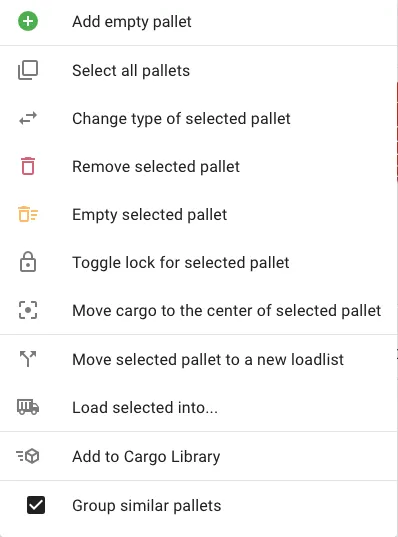
| Menu option | What it does |
|---|---|
| Add empty container | Same as the toolbar button. |
| Select all / Deselect all containers | Selects every container in the list. With an active search, only the matching containers are selected. |
| Change type of selected containers | Same as the toolbar button. |
| Remove selected containers | Same as the toolbar button. |
| Empty selected containers | Same as the toolbar button. |
| Toggle lock for selected containers | Same as the toolbar lock button. |
| Move cargo to the center of selected pallets | Pallet load lists only. Moves the cargo on each pallet so it is centred on the pallet’s length and width. With nothing selected, it applies to all pallets. |
| Move selected containers to a new loadlist | Creates a new load list with the selected containers and their cargo, and removes them from the current load plan. See Splitting a load plan. |
| Load selected pallets into… | Pallet load lists only. Creates a new load list with the pallets as cargo, ready to be loaded into containers, ULDs or trailers. See Loading pallets into another mode of transport. |
| New loadlist from secondary equipment | Container, ULD and trailer load lists only. Creates a new pallet load list from the pallets inside the selected containers. See Working on the pallets separately. |
| Add to Cargo Library | Saves the selected container, with its cargo, to the Cargo Library as one pre-planned cargo. Exactly one container must be selected. |
| Group similar containers | Shows identical containers as a single row. Turn it off to list every container separately. |
In the Overview view the menu instead lists Empty selected and Remove selected for the selected sets (vessels, aircraft, road trains or warehouses).
Adding and converting containers
Add empty container and Change type of selected open the same dialog. Choose the equipment from the Selected Equipment tab (the equipment chosen in Setup) or the Library tab, then:
- Add this adds one empty container. Use Place new container to put it first, last or at a given position in the list.
- Convert to removes the selected containers and loads their cargo into the chosen type. The cargo is recalculated, so it may need more or fewer containers than you started with.
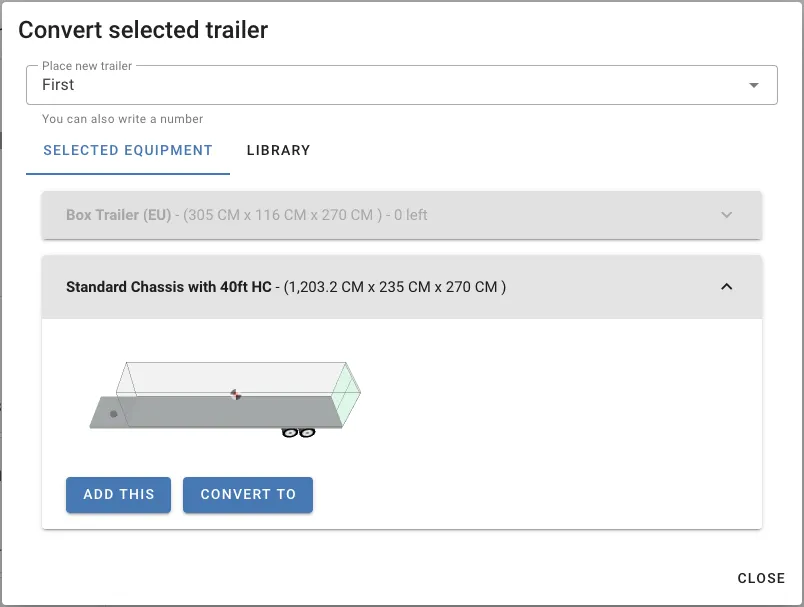
In the Secondary view, Add this adds an empty pallet next to the first container. Converting pallets is not available.
Locking containers
A locked container is marked with a lock icon and cannot be opened in the Interactive view or changed by drag and drop. When you return to Setup and click New load plan, the locked containers and their cargo are kept as they are, and only the rest of the cargo is recalculated.
Use this to keep the containers you are happy with while you rework the rest.
Splitting a load plan
Move selected containers to a new loadlist opens the new load list dialog. The new load list contains the selected containers exactly as they are loaded, and their cargo. The containers and cargo are removed from the current load list, which is then saved.
Use this when part of a shipment goes on a different booking or departure.
Loading pallets into another mode of transport
In a pallet load list, Load selected pallets into… turns each pallet, with its cargo, into one piece of cargo in a new load list. The new cargo keeps the pallet’s built dimensions and its gross weight: the pallet’s own weight plus its cargo. In the dialog you choose the mode of transport (sea, air or road) for the new load list. With nothing selected, all pallets are included.
If the load plan has unloaded items, tick Include unloaded cargo to add them as loose cargo in the new load list.
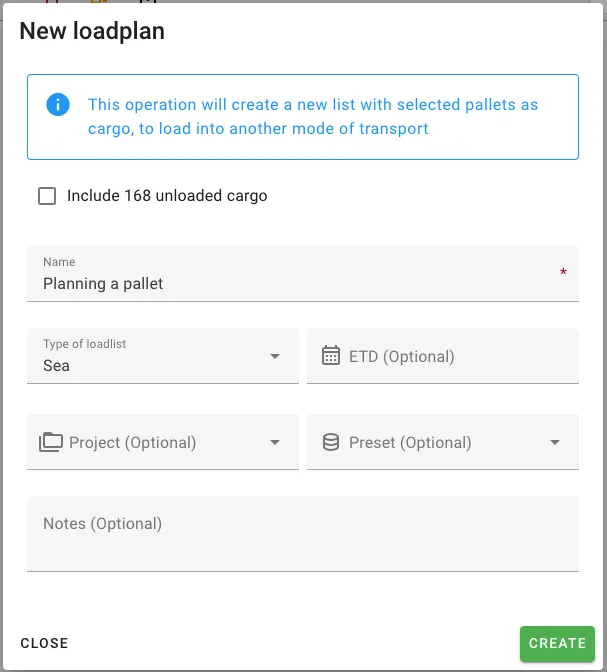
The original pallet load list is left unchanged. You then select equipment in Setup of the new load list and calculate as usual.
To plan pallets and containers in one go instead, see Working with pallets.
Working on the pallets separately
New loadlist from secondary equipment is the reverse. It creates a new pallet load list with the pallets from the selected containers, or from all containers if none are selected, keeping how the cargo is loaded on each pallet. Bundles are not included.
Use it to print or adjust pallet build instructions on their own, without the surrounding containers. The option is greyed out if none of the containers hold pallets.