Cargo-Planner Docs
Segregation table
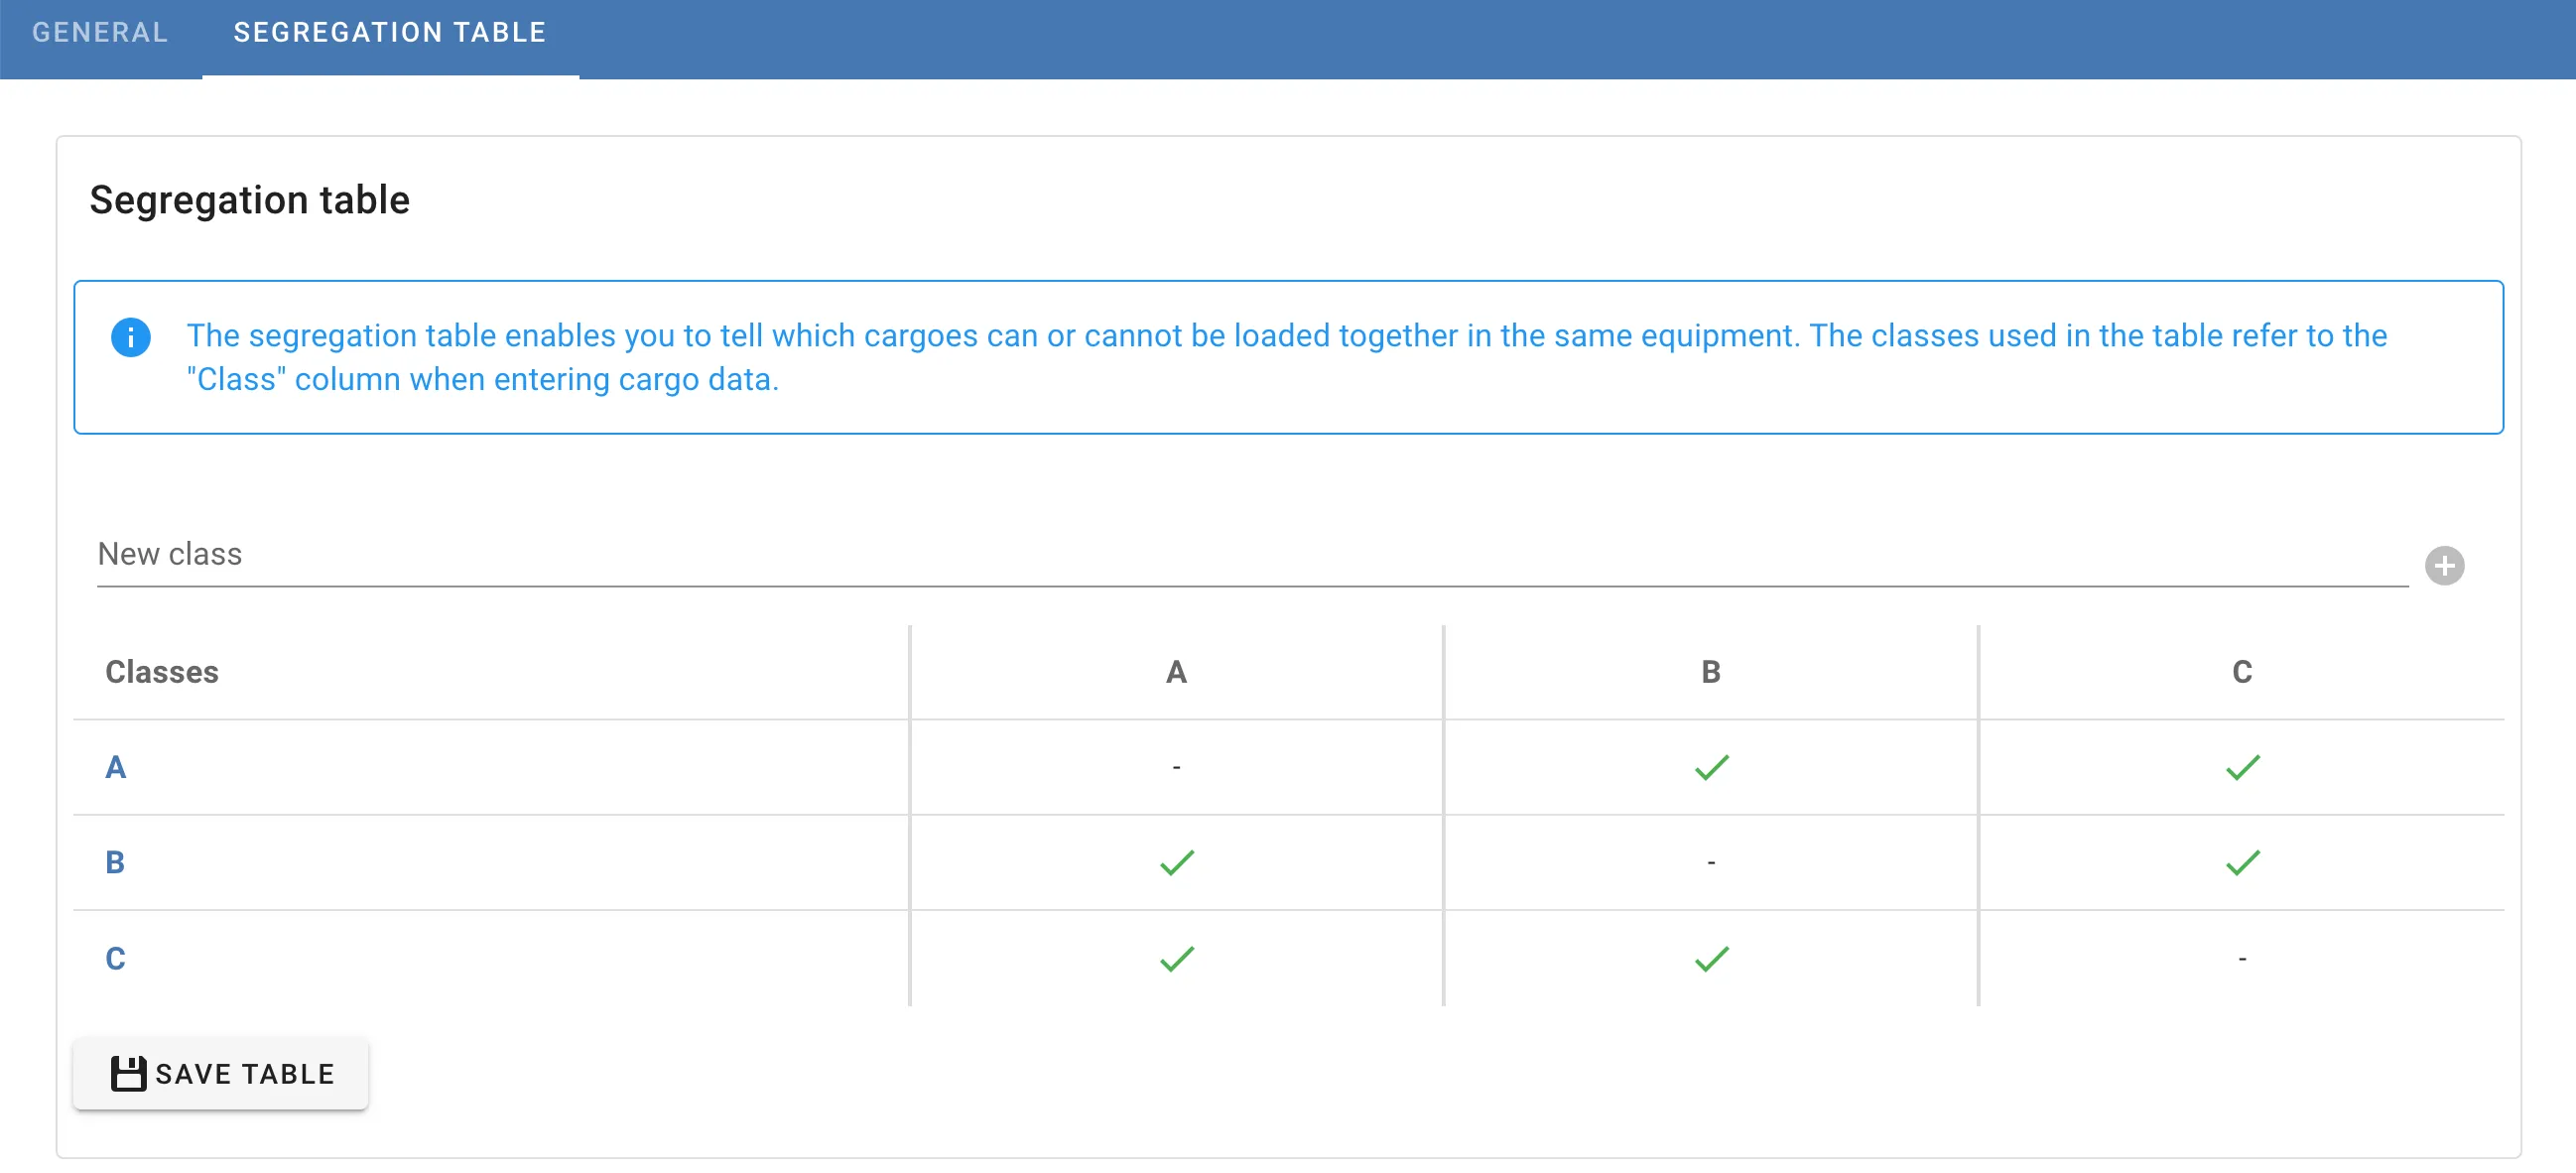
The segregation table enables you to tell which cargoes can or cannot be loaded together in the same equipment.
It is the fourth tab of the Load settings dialog, reachable from the Setup view.
Creating classes
Start by creating classes for your segregation table. To add a new class enter a class name and press the add button.
Segregating classes
When you have created your classes you need to define which classes that can not be loaded together. If class B cannot be loaded together with class C, press the checkmark in column B on row C and click “Segregate”.
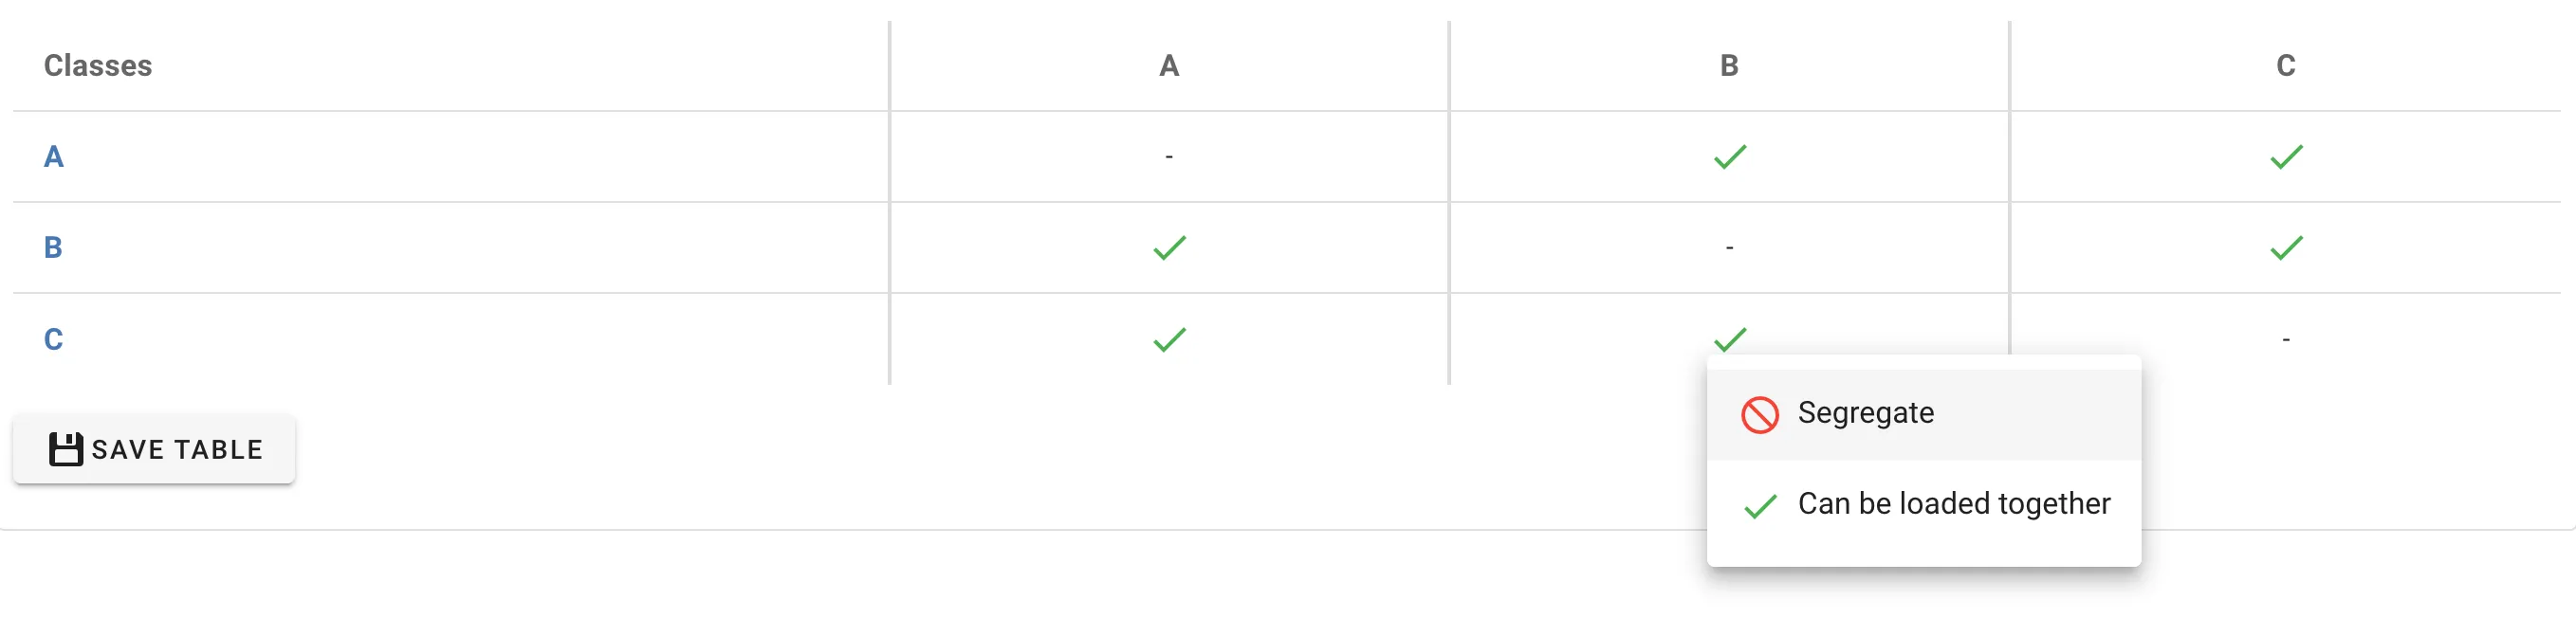
The table will be updated indicating that B and C are segregated on corresponding rows. To remove the restriction, click on the same cell and select “Can be loaded together”.
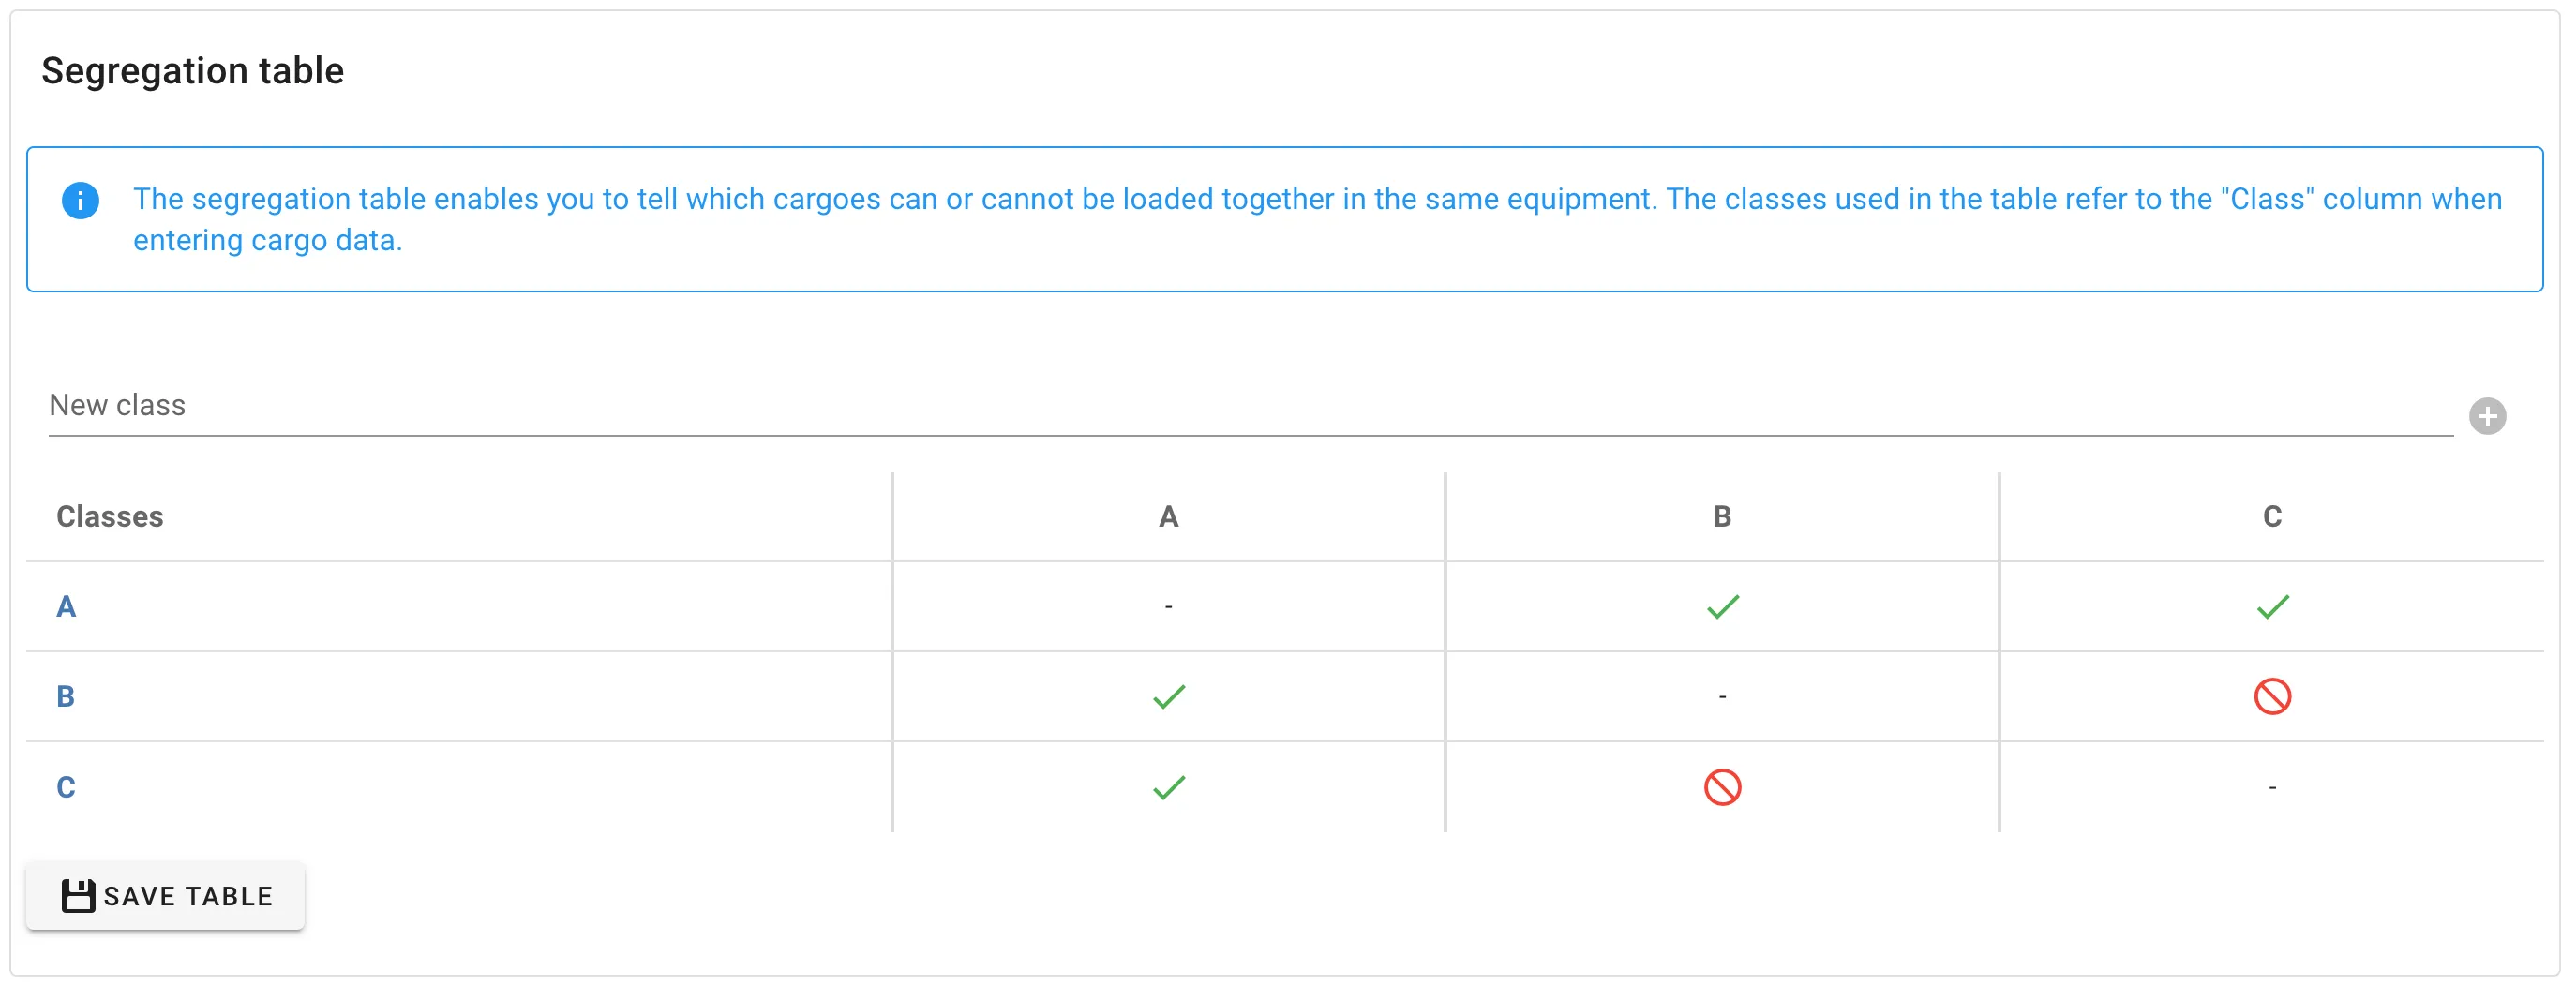
Note that you have to click SAVE TABLE for changes to take effect.
Assigning a class to cargo
The classes used in the segregation table refers to the “Class” column when entering cargo data. In our case, thanks to the segregation table, the second item (Class B) will not be loaded in the same container as the third item (Class C).
