Cargo-Planner Docs
Resizable equipment
Some secondary equipment has no fixed size. A carton can be designed around what goes in it, a slipsheet is cut to the load, and runners are cut on the warehouse floor to fit the cargo they carry. Give a dimension a range instead of a single value, and the calculation picks the size within it.
Resizable equipment is set up on secondary equipment — the Packages and pallets type in the equipment library — with three settings in the General tab of the equipment editor:
| Setting | What it does |
|---|---|
| Size range | Length, width or height becomes a min–max range |
| Outer margins | Adds wall thickness or a tab outside the inside dimensions |
| Floor type | Pallet, runners or a flat base — also decides how a range is sized |
Editing library equipment requires the Equipment Editor permission.
Size ranges
On secondary equipment, the length, width and height fields have an icon in the top right corner. Click it to turn the field into a range: a min and a max in the same field. Both start at the current value, so nothing changes until you move one of them. Click ✕ to go back to a fixed size — the max becomes the fixed value.
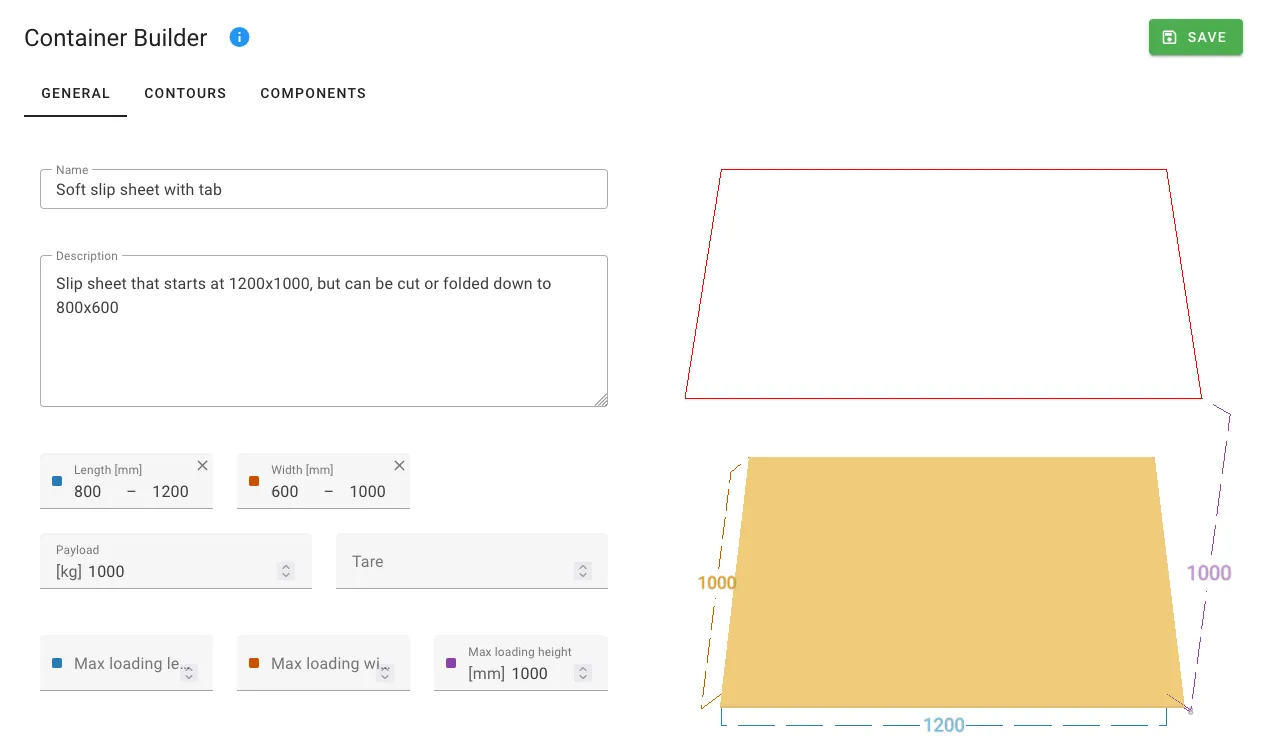
- The min cannot be greater than the max, and for length and width it must be at least 10 cm. The editor does not save until both are true.
- The 3D preview shows the largest size, the max.
- Equipment lists and selectors show the range, for example
400–800 x 700 x 560 mm.
To try a range for a single load plan without changing the library, expand the equipment in the selected equipment list in 2. Setup — the same fields are there.
Which size the calculation picks
The calculation shrinks the equipment to its load, within the range. What it measures depends on the floor type:
| Floor type | Sized to | Typical for |
|---|---|---|
| Runners (skids) | The first cargo loaded on it | Runners cut to the cargo |
| Pallet or Flat | All cargo loaded on it, once loading is finished | Cartons, crates, slipsheets |
After calculating, the Length, Width and Height columns in the workspace show the inside size the calculation picked.
Outer margins
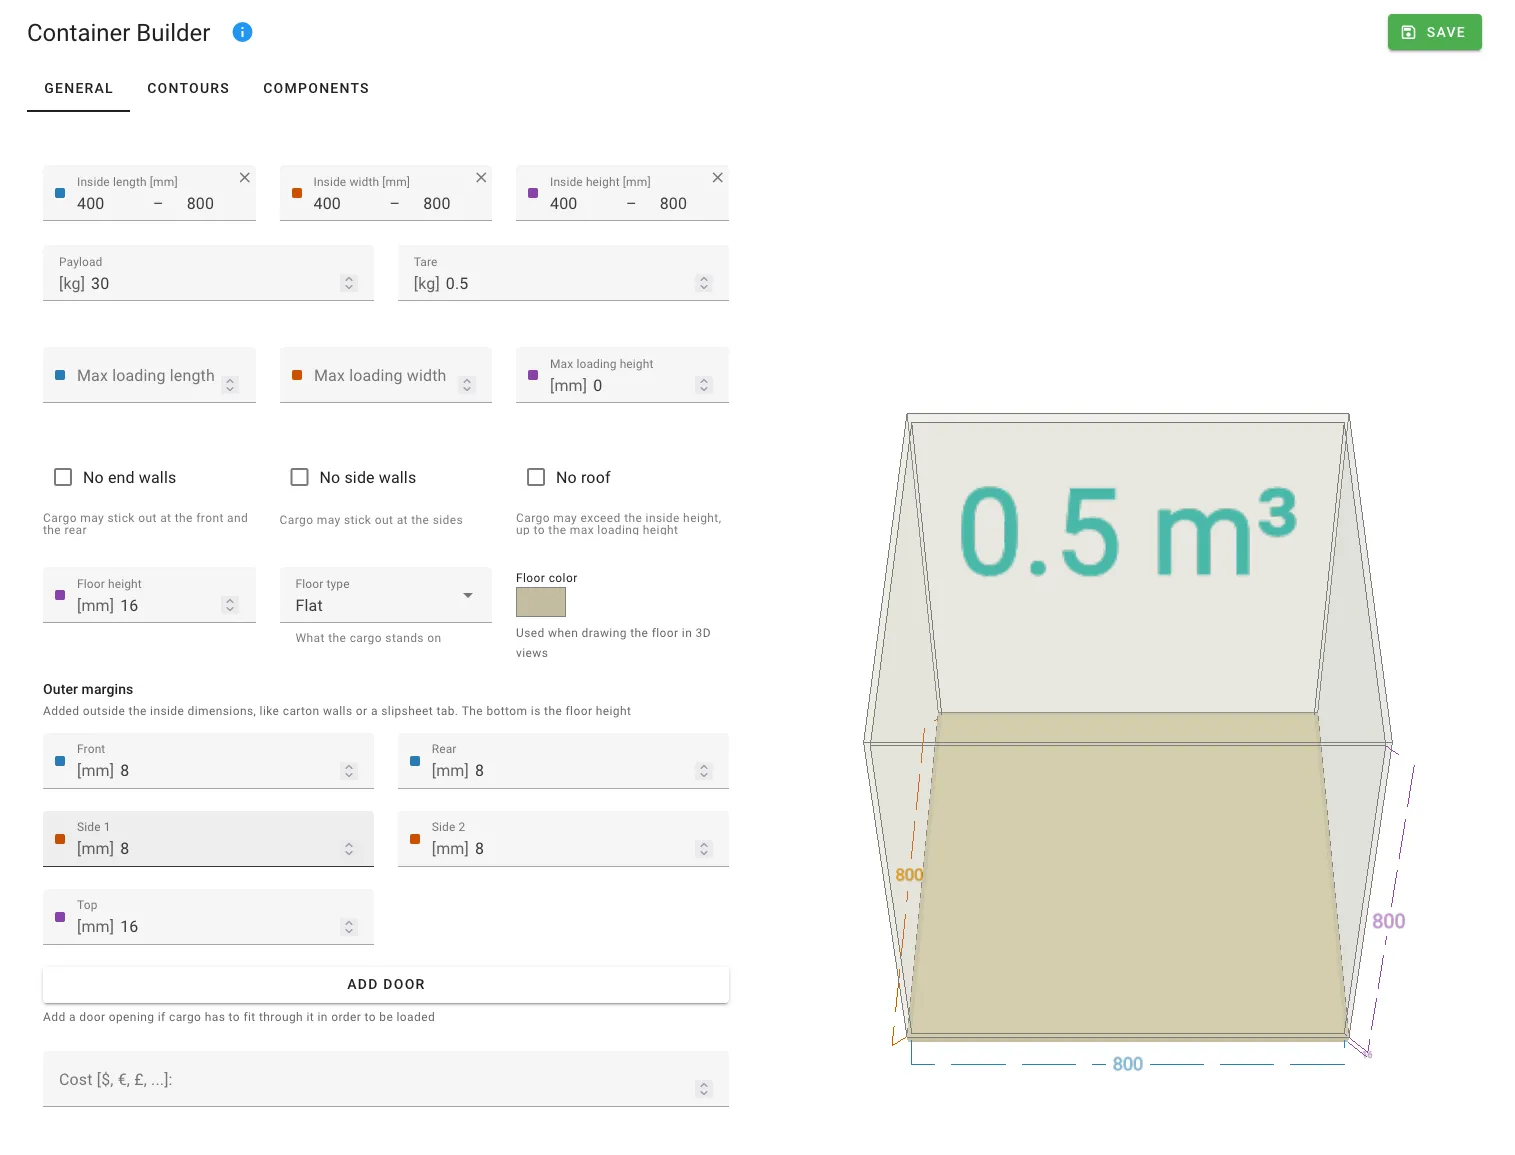
Length, width and height are inside dimensions. Outer margins add size outside them, per face: Front, Rear, Side 1, Side 2 and Top. The bottom is the existing Floor height.
When the equipment is loaded into a container, the calculation uses the outside size — inside dimensions plus margins plus floor. A carton with 0 mm walls would otherwise be planned too small, and over a full container the difference adds up.
| Equipment | Outer margins | Walls |
|---|---|---|
| Carton | Board thickness on every side, about double on top, where the flaps overlap | Walls and roof |
| Slipsheet with a tab | Tab length on the side with the tab, 0 elsewhere | No walls, no roof |
| Crate | Plank thickness on every side and on top | Walls and roof |
Margins on a side with walls are drawn as see-through walls outside the inside walls, with the side nearest the camera hidden, so you can still see the contents. Margins on a side without walls extend the floor instead — that is how a slipsheet tab is drawn.
Floor type
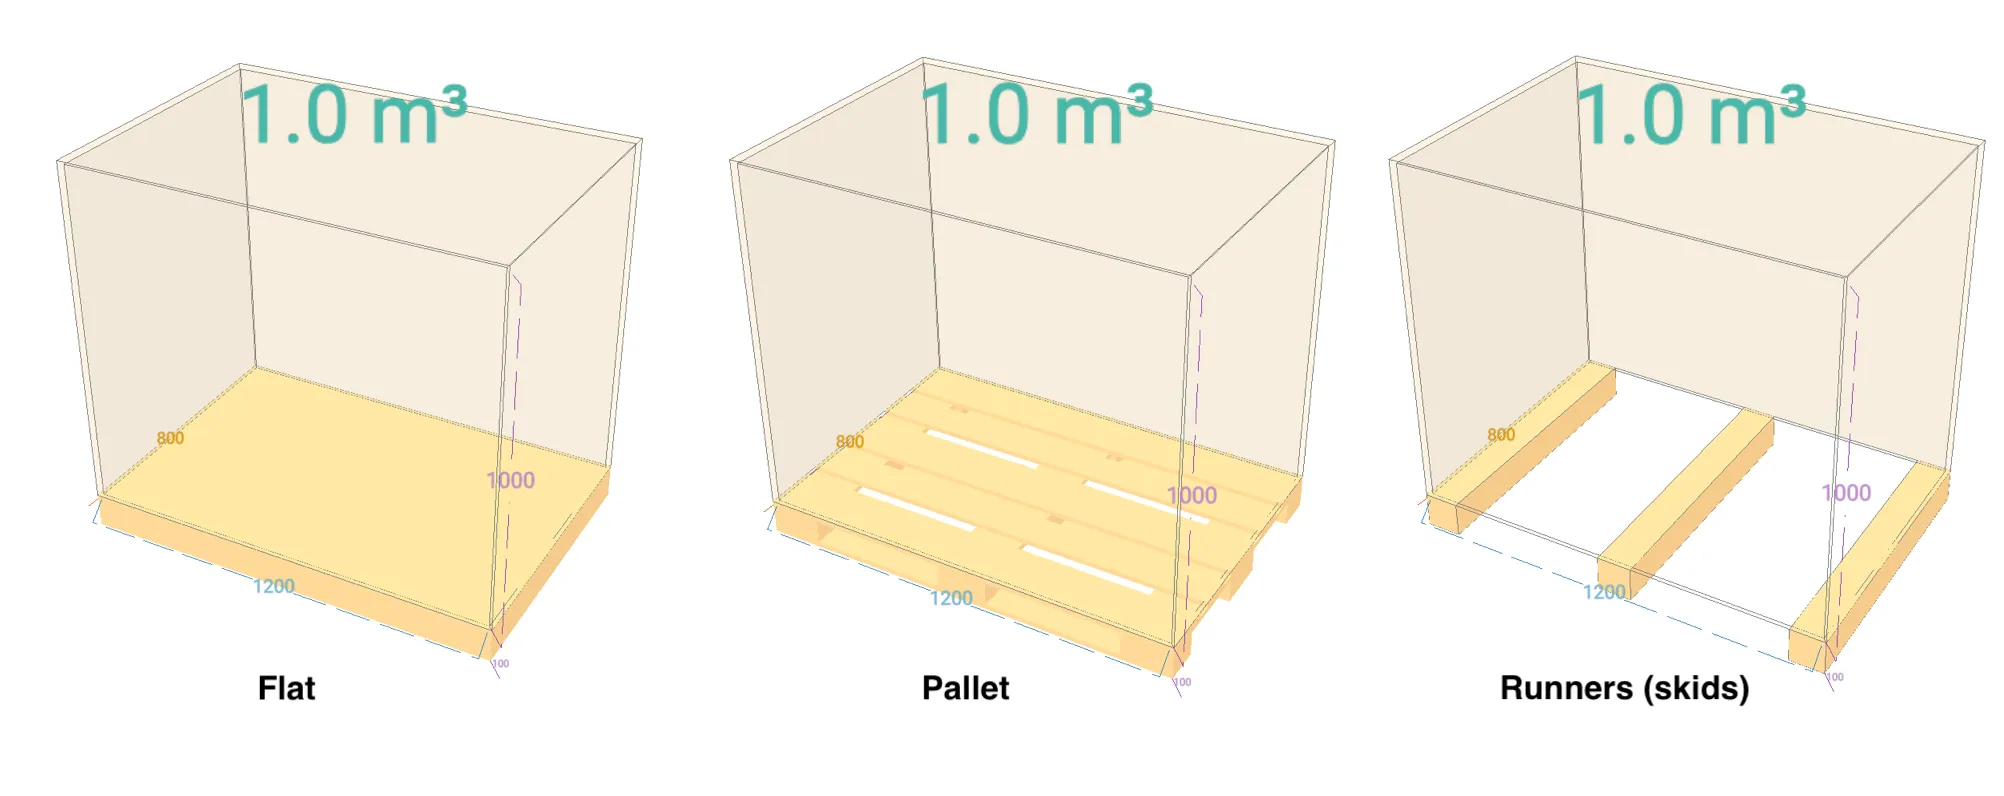
Next to Floor height, Floor type sets what the cargo stands on. It is available when the floor height is above 0. Besides how the floor is drawn, it decides which size the calculation picks — runners are sized to the first cargo loaded on them.
| Floor type | Drawn as |
|---|---|
| Pallet | A pallet (the default) |
| Runners (skids) | Beams across the width, at most 1 m apart, open at the front and rear |
| Flat | A flat base, like the bottom of a carton or a slipsheet |
The floor covers the full outside footprint, including the outer margins, and walls stand on top of it.
Outside size in the results
The calculated equipment shows up in two ways:
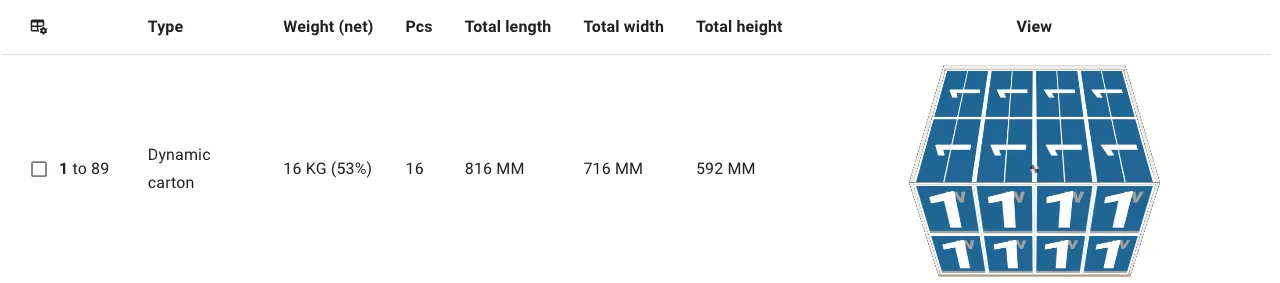
- As cargo — in the item table of the load plan, a loaded carton is a row with its outside size.
- As a container — the workspace columns Total length, Total width and Total height show the outside size, including outer margins, floor and any cargo sticking out. The Total block in the load plan shows the same values. The plain Length, Width and Height columns stay inside dimensions.
Examples
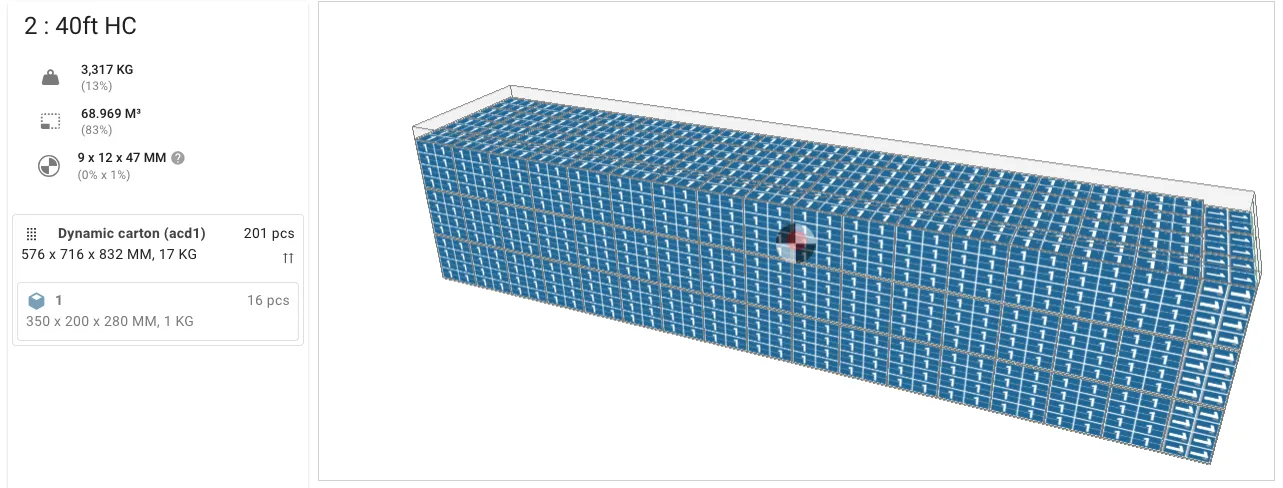
Carton design for a 40ft HC
To find the carton size that fits the most goods in a 40ft HC, create a closed carton in the Packages and pallets library:
- Set length, width and height as ranges that your supplier can produce.
- Set Outer margins to the board thickness, with about double on Top, and Floor height to the board thickness.
- Set Floor type to Flat.
Preload the goods into the carton and load it into a 40ft HC. The calculation picks a carton size that fits all goods inside the walls, and plans the container with the outside size.
Slipsheets
A slipsheet has no walls. Once all cargo is loaded on it, it is resized to the whole load, within its range:
- Turn on No end walls, No side walls and No roof.
- Set length and width as ranges, and Floor height to the sheet thickness.
- Add the pull tab as an outer margin, for example Rear, and set Floor type to Flat.
Runners cut to the cargo
When runners are cut on the warehouse floor to fit the cargo they carry, the base follows the cargo:
- Turn on No end walls and No side walls.
- Set length and width as ranges within the lengths you can cut.
- Set Floor height to the runner height and Floor type to Runners (skids), so the runners are sized to the first cargo loaded on them.
Related
- Working with pallets — preloading cargo on secondary equipment.
- Custom containers — the equipment editor end to end.
- Open containers — the No roof, No side walls and No end walls toggles.